Hey there, fellow shredders! Ever had a day on the slopes cut short by aching feet, or felt like your board just wasn’t responding quite how you wanted?
Trust me, I’ve been there, thinking any old boot would do, only to discover that the perfect fit can absolutely transform your riding. It’s not just about comfort; it’s about control, performance, and ultimately, having way more fun.
With all the incredible advancements in boot tech, from sophisticated lacing systems like BOA to cutting-edge heat-moldable liners and custom insoles, it can feel like a maze trying to figure out what’s truly right for *your* unique feet and riding style.
You see, those flimsy stock insoles that come with most boots? They’re often “garbage” and upgrading them is one of the best investments you can make for your riding.
I’ve spent countless hours researching, testing, and even getting custom-fitted to separate the hype from what actually makes a difference out on the snow.
My aim is to help you avoid common pitfalls like heel lift and pressure points, so you can ride longer, harder, and with more confidence. I’m excited to share all my hard-won knowledge and insider tips so you can find that dream combo that elevates your game, making every run feel incredible.
Let’s dive in and unlock the secrets to finding your ultimate snowboard boot and insole setup!
Decoding Your Foot’s Blueprint: Understanding Fit and Feel
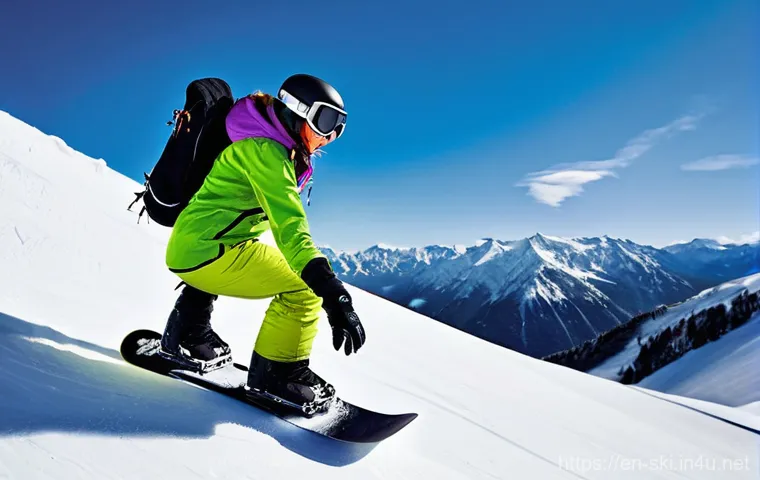
It’s easy to get caught up in the flashy graphics or the latest tech, but when it comes to snowboard boots, the absolute number one factor is how they feel on *your* feet.
We’re talking about the foundation of your entire riding experience here. I once bought a pair of boots because they were on a killer sale and looked super cool, only to spend the entire season battling painful pressure points and numb toes.
It was miserable, and it totally tanked my confidence. That’s when I realized that saving a few bucks upfront just isn’t worth sacrificing comfort and performance on the mountain.
A truly great fit means your foot is securely held without any movement, but also without any crushing pain or circulation cut-off. It’s a delicate balance, and it varies wildly from person to person.
Don’t let anyone tell you there’s a “perfect” boot for everyone; it’s all about what feels right for *you*. Always remember, your feet are unique, and a boot that fits your friend like a glove might be your personal torture device.
Take the time, try on various brands and models, and listen to what your feet are telling you.
The Snug Truth: Why Initial Comfort Isn’t Everything
Okay, so you slip into a boot, and it feels pretty good. Instant comfort, right? Not so fast, my friend.
This is where a lot of riders, myself included in my early days, make a crucial mistake. Snowboard boots, especially their liners, are designed to pack out and mold to your foot over time.
That initial “comfortable” feeling might actually be too loose once the liner compresses after a few days on the snow. What you’re looking for is a snug, almost uncomfortably tight fit when you first put them on, especially around your ankle and heel.
Your toes should lightly brush the end of the boot, but not be jammed or curled. I learned this the hard way: a boot that felt amazing in the store ended up giving me wicked heel lift by the end of the first week, leading to blisters and a complete loss of control.
The golden rule? If it feels “perfectly comfortable” straight out of the box, it’s probably too big. Give it a few minutes in the store, walk around, flex your knees – simulate riding as much as possible.
You should feel a firm embrace around your entire foot, from your arches to your shins, but no specific hot spots that scream “blister factory.”
Pinpointing Your Pressure Points: Customizing Your Comfort
Even with a perfect initial fit, sometimes those nagging pressure points can pop up. This is where the magic of heat-moldable liners and custom insoles really shines.
Many modern snowboard boots come with liners that can be heated in a special oven (usually at a pro shop) and then molded to the exact contours of your foot.
I had this done for my current boots, and it was a revelation. It took a good boot and made it phenomenal, eliminating those tiny gaps that lead to friction and discomfort.
Beyond that, don’t underestimate the power of custom insoles. Those thin, flat inserts that come stock in most boots are often a joke. They offer zero support and are just placeholders.
Investing in an aftermarket insole designed for snowboarding can provide crucial arch support, improve foot alignment, and even enhance board feel. I’ve got a buddy who suffered from chronic arch pain until he finally swapped out his stock insoles for a pair of custom-molded ones.
He literally said it was like getting a new pair of feet, and his riding improved dramatically because he wasn’t constantly distracted by discomfort.
Lacing Up Your Game: Exploring System Types
When it comes to securing your foot in your boot, there’s no shortage of options, and each system has its devotees and detractors. I’ve tried them all over the years, from the classic lace-ups to the sleek BOA dials, and each offers a distinct experience.
Your lacing system isn’t just about how fast you can get into your boots; it significantly impacts how well your foot is held, how responsive your board feels, and even how long you can comfortably ride.
The evolution of lacing technology has been fascinating to watch, with brands constantly innovating to provide better fit, faster entry, and more customizable tension.
Choosing the right one often comes down to personal preference, but understanding the pros and cons of each can really guide your decision-making process and prevent you from ending up with a system that doesn’t gel with your riding style or patience level.
Trust me, struggling with frozen laces on a powder day is no fun, nor is constantly having to re-tighten your boots because the system isn’t holding.
BOA vs. Traditional: The Battle for Lock-Down
The debate between BOA and traditional laces is as old as, well, BOA itself. Traditional laces offer that classic, infinitely customizable feel. You can tie them as tight or as loose as you want, and you can focus the tension exactly where you need it.
I rode traditional laces for years, loving the control, but I can’t deny the hassle. Frozen knots, laces coming undone, and the time it takes to get them just right every morning could be a real drag.
Enter BOA. These dial-based systems are ridiculously fast and convenient. A simple twist and you’re locked in, another twist and you’re out.
The tension is incredibly consistent, and some advanced BOA systems even feature multiple dials, allowing you to independently adjust the upper and lower zones of your boot.
While some old-school riders argue that BOA can create pressure points if overtightened, I’ve found that with the right boot and careful adjustment, they offer superb, even pressure distribution.
For me, the speed and ease of use are huge selling points, especially on those frigid mornings when I just want to get on the lift.
Hybrid Systems: Getting the Best of Both Worlds
As if BOA and traditional laces weren’t enough, many brands have embraced hybrid lacing systems, aiming to combine the best features of both. These often involve a traditional lace lower section for maximum customizability around the forefoot, paired with a BOA dial or a quick-pull lacing system for the upper cuff.
This setup can be a real sweet spot for riders who want the fine-tuned feel of laces where it matters most for board control, but appreciate the speed and convenience for the ankle and calf area.
I recently tried a hybrid system that used laces for the lower boot and a quick-pull strap for the upper, and I was genuinely impressed. It allowed me to dial in that precise toe-side and heel-side responsiveness with the laces, while quickly securing the cuff for ankle support with the pull system.
It felt like I had the best of both worlds, and I wasn’t spending ages lacing up. If you’re on the fence, a hybrid system might be the perfect compromise, offering adaptability without sacrificing convenience.
Beyond the Boot: The Game-Changing Power of Insoles
I can’t stress this enough: your snowboard boot is only as good as the insole inside it. Seriously. This is probably the most overlooked upgrade in snowboarding, and it’s one that can make an enormous difference in your comfort, performance, and endurance.
For years, I just accepted the thin, flimsy foam inserts that came with my boots, thinking that’s just how it was. My feet would ache by lunchtime, and I’d often get arch cramps.
It wasn’t until a seasoned pro shop tech practically insisted I try aftermarket insoles that I realized what I had been missing. It was like going from driving a car with bald tires to having performance racing slicks – the connection and control were just on another level.
This isn’t just about cushioning; it’s about proper foot alignment, reducing fatigue, and enhancing the transfer of energy to your board. If you only make one upgrade this season, make it your insoles.
Your feet, and your riding, will thank you profusely.
Ditching the Stock Stuff: Why Your Feet Deserve Better
Let’s be brutally honest: most stock insoles that come with snowboard boots are, for lack of a better word, trash. They’re usually just flat pieces of foam designed to fill space, offering little to no arch support or structure.
Think about it – your feet are the primary contact point with your board, absorbing impacts and driving your movements. Relying on a flimsy piece of foam for that crucial connection is like building a skyscraper on a sand foundation.
When I finally threw out my stock insoles and replaced them with a supportive aftermarket pair, the change was instantaneous. My arches felt supported, my heel was locked in better, and those annoying pressure points I used to get on the sides of my feet simply vanished.
It meant I could ride longer, without that nagging discomfort, and focus entirely on my turns rather than my aching feet. It’s a small investment with a huge payoff, preventing common issues like foot fatigue, arch pain, and even shin bang.
Leveling Up: Types of Aftermarket Insoles and What They Do
The world of aftermarket insoles is surprisingly diverse, catering to different foot types and support needs. You’ve got options ranging from off-the-shelf performance insoles to fully custom-molded solutions.
Basic performance insoles often offer enhanced arch support and heel cushioning compared to stock options. These are a fantastic starting point for most riders and can dramatically improve comfort.
Then you move into semi-custom options, which might involve a heat-moldable element or specific arch heights. The crème de la crème are truly custom-molded insoles, where a professional creates an exact mold of your foot to build an insole specifically for you.
I went the semi-custom route myself, getting a pair that specifically targeted my high arches, and it was a revelation for reducing foot fatigue on long days.
Different materials like EVA foam, carbon fiber, and gel inserts are used to provide varying degrees of cushioning, support, and responsiveness. Do a little research, or better yet, visit a good boot fitter who can assess your foot and recommend the best type for your specific needs.
It’s an investment in your shredding longevity!
| Insole Type | Key Benefit | Ideal For | Approx. Price Range (USD) |
|---|---|---|---|
| Stock Insoles | Basic cushioning (minimal) | Beginners (but upgrade ASAP!) | Included with boots |
| Performance (Off-the-shelf) | Enhanced arch support, cushioning | Most riders seeking better comfort | $30 – $60 |
| Semi-Custom (Heat-moldable) | Improved anatomical fit, targeted support | Riders with specific arch needs or minor issues | $60 – $100 |
| Custom-Molded | Precision fit, maximum support & stability | Riders with chronic foot pain, specific alignment issues | $100 – $200+ |
My Personal Insole Journey: From Flat to Fantastic
Let me tell you, my personal journey with insoles was a complete game-changer. For years, I just accepted that my feet would ache after a few hours on the mountain.
I have relatively flat feet, and the lack of arch support from those standard boot liners meant I was constantly overpronating, which led to not just foot pain, but also knee discomfort.
I tried various boots, thinking the issue was the boot itself, but the problem persisted. Finally, after a particularly brutal day where I had to call it quits early because my feet were screaming, I decided to consult a boot fitting expert.
He immediately pointed to my insoles. He took a look at my foot shape, recommended a specific brand known for strong arch support, and even suggested a heat-molding session for the insoles themselves.
The moment I put them in, it was like my feet were finally home. The support was incredible, my heel felt more locked down than ever, and suddenly, the boot felt even better.
That season, I rode longer and harder than ever before, completely free of foot pain. It wasn’t just comfort; it was a revelation that dramatically improved my control and confidence on the board.
This experience solidified my belief that aftermarket insoles are not just an accessory, but a fundamental component of a great snowboard setup.
Flex Appeal: Matching Your Boot to Your Riding Style
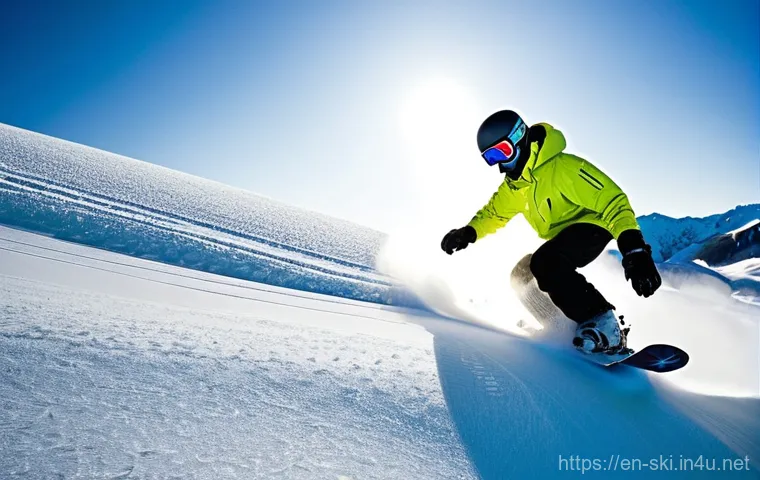
The flex rating of your snowboard boot is a crucial, yet often misunderstood, aspect of choosing the right gear. It’s essentially how stiff or soft the boot is, and it has a profound impact on how your board responds and how comfortable you’ll be throughout the day.
I’ve seen riders struggle immensely because they were in boots that were either too stiff for their beginner level or too soft for their aggressive carving style.
It’s like trying to race a Formula 1 car with minivan tires – you just won’t get the performance you expect. Understanding boot flex isn’t just about reading a number on a tag; it’s about connecting that number to your personal riding style, your skill level, and even your body weight.
A stiffer boot will offer more immediate response and support, great for high speeds and precise turns, but it can be less forgiving. A softer boot, on the other hand, provides more comfort and freedom of movement, perfect for park laps and learning new tricks, but might feel sloppy at speed.
It’s all about finding that Goldilocks zone for *you*.
The Soft vs. Stiff Debate: Finding Your Happy Medium
So, how do you decide between a soft or stiff boot? Generally speaking, softer boots (flex rating 1-4 on a 10-point scale) are fantastic for beginners, park riders, and those who prioritize comfort and tweakability.
They’re more forgiving, easier to initiate turns with, and allow for a greater range of motion for grabs and presses. When I started out, a softer boot was a lifesaver; it helped me learn to link turns without feeling like I was wrestling with my board.
As I progressed and started venturing into more aggressive riding, I quickly found that soft boots just weren’t cutting it. My turns felt mushy, and I didn’t have the response I needed for bombing down steep runs.
That’s when I transitioned to a medium-stiff boot (flex 5-7). These offer a great balance of support and comfort, making them ideal for all-mountain riders who dabble in a bit of everything.
Stiff boots (flex 8-10) are typically reserved for advanced riders, freeriders, and racers who demand maximum precision, response, and support at high speeds or in challenging terrain.
They offer unparalleled energy transfer to the board but require more leg strength and precise movements. Don’t be afraid to experiment, but always consider your current ability and what you primarily want to do on the mountain.
Freeride, Freestyle, or All-Mountain: Boots for Every Adventure
Your riding style should be the guiding star when choosing boot flex. If you’re a freestyle fiend, spending your days in the park hitting jumps and rails, you’ll likely want a softer flexing boot.
This allows for more freedom of movement, easier tweaking, and a generally more forgiving feel when stomping landings. Brands often design freestyle boots with extra cushioning and durable outer materials to withstand the abuse of park riding.
For the freeriders out there, who crave deep powder, steep lines, and high-speed carving, a stiffer boot is almost always the answer. The increased support and responsiveness are crucial for navigating challenging terrain and maintaining control at speed.
Freeride boots often have a more aggressive forward lean and robust construction. And then there are the all-mountain riders, like me, who enjoy a bit of everything.
A medium-flex boot is typically the sweet spot here, offering versatility for groomed runs, some park laps, and even a bit of off-piste exploration. It’s about finding that versatile performer that can handle whatever the mountain throws at you.
Don’t pigeonhole yourself, but understand which category you lean towards most often.
Taking the Plunge: Smart Shopping Strategies for Snowboard Boots
Alright, you’ve done your research, you understand the importance of fit, lacing systems, insoles, and flex. Now comes the exciting part: actually buying those dream boots!
But before you hit “add to cart,” there are some crucial strategies you absolutely need to employ to ensure you make the right choice. This isn’t like buying a pair of sneakers; a snowboard boot is a high-performance piece of equipment that needs to function perfectly for hours on end in challenging conditions.
Rushing the process or relying solely on online reviews can lead to a really frustrating and expensive mistake. I’ve learned from personal experience, and from seeing countless friends struggle, that a methodical approach to boot shopping pays dividends in comfort and enjoyment on the snow.
Think of it as an investment in your shredding happiness – it’s worth taking your time and doing it right.
The In-Store Experience: Why Trying Them On is Non-Negotiable
This is probably the most important piece of advice I can give you: *you absolutely must try on snowboard boots in person.* I know the allure of online deals is strong, but boots are one item you simply cannot buy sight unseen.
Every foot is different, and every boot model fits differently. What feels good on one person might be agony for another. When you go to a shop, make sure you go later in the day when your feet are slightly swollen, just like they’ll be after a few runs on the mountain.
Wear the type of socks you’d normally ride in – thin, technical snowboard socks are key. Spend at least 20-30 minutes in each pair you’re seriously considering.
Lace them up properly, walk around, flex your knees forward into a riding stance. Pay attention to any pressure points, heel lift, or areas that feel too loose.
A good boot fitter will be invaluable here, offering expert advice and even suggesting different brands or models you might not have considered. Don’t feel rushed, and don’t settle for “good enough.” This is an investment in your comfort and performance.
When to Upgrade: Signs Your Boots Are Holding You Back
How do you know when it’s time to retire your trusty, but perhaps tired, old boots? There are several tell-tale signs that your current pair is holding you back.
The most obvious is excessive packed-out liners, leading to major heel lift, where your heel moves up and down inside the boot. This causes blisters, reduces control, and wastes energy.
Another sign is a breakdown in flex; if your formerly stiff boots now feel like soft slippers, they’re no longer providing the support and response you need.
I once rode a pair until the liners were so packed out my feet were swimming in them, and my board control was awful. The difference when I finally upgraded was night and day – it was like getting my riding ability back!
Look for signs of significant wear and tear on the outer shell, broken lacing components, or even a persistent funky smell that just won’t quit. Generally, a good pair of boots will last anywhere from 100-150 days of riding, but this varies wildly depending on their quality and how well you care for them.
Don’t wait until they’re completely falling apart to replace them; your riding experience will suffer long before that point.
글을마치며
Whew! We’ve covered a lot of ground today, from the nitty-gritty of boot fit to the hidden power of insoles, and how crucial flex is to your riding style. I genuinely hope my experiences and tips help demystify the process for you. Finding that perfect combination of boot and insole isn’t just about avoiding pain; it’s about unlocking your full potential on the mountain, letting you ride longer, harder, and with a grin plastered across your face. So, take your time, listen to your feet, and don’t be afraid to invest in your comfort – it truly makes all the difference.
알아두면 쓸모 있는 정보
1. Timing is Everything for Fittings: Always try on new snowboard boots later in the day when your feet are naturally a bit swollen. This mimics the conditions you’ll experience after a few hours of riding and helps ensure a comfortable fit that won’t become too tight later on. A fresh morning fit might feel deceptively loose when you hit the slopes in the afternoon.
2. Your Socks Matter: When heading to the shop, wear the exact type of snowboard socks you’d normally ride in. Thin, technical socks are best as they prevent bunching and offer the most accurate assessment of boot fit, whereas thick cotton socks can mislead you into buying boots that are too large.
3. Simulate Riding in the Store: Don’t just stand there! Lace up the boots tightly, walk around, and most importantly, get into a snowboarding stance. Flex your knees, lean forward, and mimic heel and toe edge pressure. This helps you identify potential pressure points or areas of heel lift before you commit.
4. Consider Heat-Molding for a Custom Feel: Many high-end boots come with heat-moldable liners. Getting them professionally molded at a pro shop can make a world of difference, customizing the liner to the exact contours of your foot for unparalleled comfort and a locked-in feel. It’s often included with the boot purchase or a small fee.
5. Don’t Forget the Aftermarket Insole Upgrade: Seriously, this is often the single most impactful upgrade you can make to your boot setup. Stock insoles are rarely adequate. A good aftermarket insole provides crucial arch support, improves foot alignment, and significantly reduces fatigue, making your riding days much more enjoyable and productive.
중요 사항 정리
At the end of the day, your snowboard boots are your direct connection to your board, and getting the fit right is absolutely non-negotiable for maximizing your enjoyment and performance. Remember that an initially snug fit is generally better than an instantly comfortable one, as liners will pack out over time. Don’t overlook the power of a quality aftermarket insole; it’s a small investment that delivers huge returns in comfort, control, and endurance. Match your boot’s flex to your primary riding style – whether you’re a park shredder, a freeride enthusiast, or an all-mountain explorer – to ensure optimal responsiveness. And please, for the love of shredding, always try boots on in person at a reputable shop. Your feet will thank you for it, and you’ll be carving with confidence and comfort for many seasons to come!
Frequently Asked Questions (FAQ) 📖
Q: Why is everyone saying stock snowboard boot insoles are “garbage,” and what makes upgrading them such a huge deal for my riding?
A: Oh man, if I could shout this from the top of the mountain, I would! You know, when I first started out, I just accepted whatever came in my boots, thinking “insoles are just insoles, right?” Boy, was I wrong!
Most stock insoles are, to put it mildly, super basic and offer almost zero arch support or cushioning. They’re basically just flat pieces of foam, like a placeholder until you realize what you’re missing.
Think about it: your feet are the primary connection point to your board, and if that connection is squishy, unstable, or just plain uncomfortable, you’re losing so much control and energy transfer.
I personally suffered through seasons of aching arches and numb toes, especially on longer days or after hitting a few jumps. When I finally decided to invest in a pair of aftermarket insoles designed specifically for snowboarding, it was like flipping a switch.
Suddenly, my feet felt locked in, stable, and surprisingly comfortable. I noticed an immediate improvement in my edge control, my turns felt more precise, and I could ride longer without that annoying foot fatigue.
It’s seriously one of the best bang-for-your-buck upgrades you can make because it directly impacts your comfort, performance, and overall enjoyment on the mountain.
Trust me, your feet will thank you!
Q: I always seem to struggle with heel lift or those annoying pressure points, no matter what boots I try on. How can I really tell if my snowboard boots genuinely fit, and how do I fix these common issues?
A: This is a classic dilemma, and honestly, it’s one I wrestled with for ages! You’re not alone in battling heel lift and pressure points; they’re two of the most common fit issues that can absolutely ruin a great day on the snow.
The trick to finding that “just right” fit is all about getting granular. First, when you try on boots, wear the socks you’d actually ride in – not your everyday cotton socks.
Lace them up tight, as if you’re about to drop in. Now, stand up and flex forward, bending your knees like you’re riding. Your heel should stay firmly planted with minimal, and I mean minimal, lift.
If your heel is lifting more than a quarter-inch, those boots are too big. For pressure points, pay close attention to the tops of your feet, your ankles, and the sides of your feet.
Are there any hot spots or areas where it feels like your foot is being crushed? Walk around the store for a good 10-15 minutes, flexing constantly. What felt okay at first might become a real pain point quickly.
A good boot fitter can work wonders, often heat-molding liners to conform perfectly to your foot’s unique shape, which is a total game-changer for eliminating those sneaky pressure points.
And remember, sometimes those “flimsy stock insoles” are the culprit for heel lift, as they don’t cup your heel properly, so a supportive aftermarket insole can dramatically improve heel hold.
I’ve personally seen riders transform their experience just by getting a proper fit check and addressing these two key areas!
Q: There are so many lacing systems now, from traditional laces to BO
A: and even hybrid options. Which one should I choose, and does it really make a difference for my riding style? A3: Oh, the lacing system debate!
This is a fantastic question because it absolutely does make a difference, and what’s “best” really boils down to your personal preferences and how you ride.
I’ve gone through phases with all of them, and each has its pros and cons. Traditional laces, for example, offer that old-school, infinitely customizable feel.
You can tie them exactly as tight as you want in different zones, which is awesome if you like a super personalized fit, but they can loosen throughout the day, and tying them with cold fingers?
Not always a blast. Then you have the BOA system, which has really taken over. I love the convenience of BOA; a simple twist and you’re snug, another twist and you’re out.
It’s super fast and great for getting a consistent, even tightness. However, some riders, myself included, have occasionally found that while BOA tightens well, it doesn’t always allow for specific zone adjustments quite like traditional laces, or it can feel a little too tight in one spot if your foot isn’t ideally shaped for it.
My personal favorite for a blend of speed and customization has become the hybrid systems – often combining a BOA dial for the lower foot with traditional laces or a strap for the cuff.
This gives you the best of both worlds: quick lower-foot tightening with the ability to fine-tune ankle and calf support. If you’re a park rider who needs a bit more flexibility, maybe a single BOA or traditional laces are great.
If you’re a hard-charging freerider who demands ultimate response, a dual BOA or a hybrid system might be your ticket. It genuinely comes down to how you like your boots to feel and how much time you want to spend adjusting them on the fly!