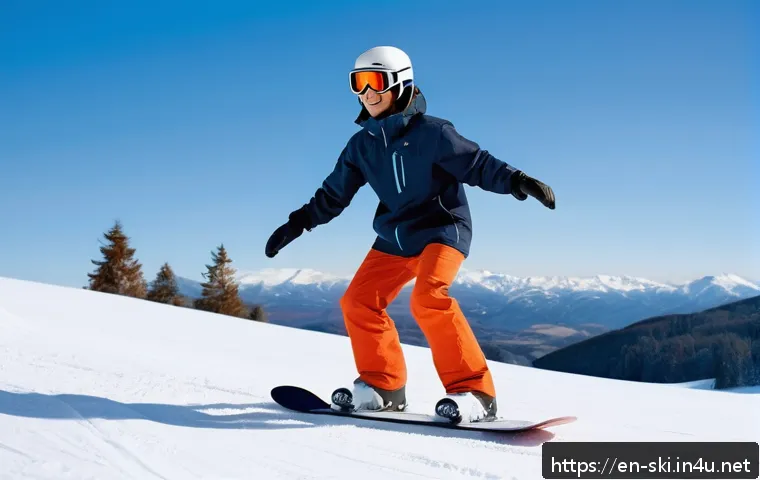
Hey everyone, it’s your favorite shredder back with some tips that I wish someone had told me when I first started eyeing those intimidating rails! I totally get it – standing at the top of a park feature, staring down that metal or plastic, can feel like staring down a monster.
You might be picturing epic slams, bruised egos, or just looking completely out of place as everyone else effortlessly glides by. Trust me, I’ve been there, thinking I’d never master anything beyond a basic jump, let alone slide a rail gracefully.
But what if I told you that with just a few simple tricks, the right mindset, and a bit of patience, those fearsome rails can actually become your favorite playground?
The feeling of finally nailing that first boardslide or 50-50 is pure exhilaration – it’s an absolute game-changer for your park riding and truly opens up a whole new world of progression and style.
Forget those shaky starts and constant doubts; we’re going to break down exactly how to approach rails safely, confidently, and turn those ‘what ifs’ into ‘I did its’.
No more watching from the sidelines wishing you could join in! Are you ready to finally level up your snowboarding game and truly conquer the park? We’ll get into the specifics right now!
Getting Your Head Right: The Mental Game of Rail Riding
Alright, let’s be real for a second. The biggest obstacle isn’t always the rail itself; it’s often the voice in your head telling you you’re going to totally eat it.
I remember standing at the top of a tiny practice box for what felt like an eternity, my heart pounding, convinced I was about to look like a complete fool.
Every trick I’d landed on the flats seemed to vanish from my memory. But here’s the kicker: once you decide to commit, truly commit, a huge chunk of the battle is already won.
It’s about shifting that internal narrative from “what if I fall?” to “what if I land this awesome?” The mental preparation is just as crucial as the physical.
Visualization is huge – close your eyes, picture yourself riding up, sliding smoothly, and riding away clean. The more vivid you make it, the more your body believes it can do it.
Trust me, I’ve seen riders with less physical skill nail tricks purely because their mental game was on point. It’s all about building that inner confidence brick by brick, celebrating every tiny victory, and forgiving yourself for the inevitable bails.
Remember, every pro started exactly where you are, filled with nerves and doubts. You’ve got this, just gotta believe it first!
Embracing the Bail: It’s Part of the Process
Nobody, and I mean nobody, lands every trick perfectly on their first try, or even their tenth. Bailing is an absolutely integral part of learning anything new in snowboarding, especially on features.
When I first started, every fall felt like a personal failure, but over time, I realized it was just feedback. It tells you what *not* to do, or what you need to adjust.
Instead of dreading a fall, learn to tuck and roll, protect your head, and get back up with a smile. The pros make bailing look almost graceful because they’ve done it countless times.
Think of each bail as a necessary step on the path to success. It’s proof that you’re pushing your limits and trying to grow, and that’s something to be proud of, not ashamed of.
Laugh it off, learn from it, and get back on that board.
Visualization is Your Secret Weapon
Before I even drop into the park, I spend a few minutes just watching other riders and then, more importantly, running through the trick in my head. I visualize myself approaching the feature, how my board will feel, the balance, the slide, and the clean exit.
This isn’t just wishful thinking; it’s actively priming your brain and muscles for the movement. I used to think it was silly, but after seeing a huge improvement in my consistency, I’m a total convert.
It helps calm the nerves, too. When you’ve mentally ‘landed’ the trick a hundred times, it feels less daunting when it’s time to do it for real. Try it next time you’re feeling a little shaky – just a minute or two of positive visualization can make a world of difference.
Your First Steps: Starting Small and Building Confidence
When you’re first dipping your toes into the world of rails, the biggest mistake you can make is trying to tackle a monster straight away. Trust me, I learned this the hard way trying to impress my friends on a legitimately huge box feature, only to slide off immediately and land flat on my back.
My ego was bruised, and my confidence took a serious hit. The real secret to success, and making quick progress, is to start small. Think tiny flat boxes, low rails, and even ground-level features that allow you to get a feel for sliding without the intimidation factor of height.
It’s all about building a solid foundation, brick by metaphorical brick. You wouldn’t try to bench press 300 pounds on your first day at the gym, right?
The same logic applies here. Get comfortable with the sensation of sliding on a small, forgiving surface, then gradually work your way up. This methodical approach might not seem as “cool” at first, but it will lead to faster, safer, and ultimately more impressive progression.
Mastering the Flat Box: Your Best Friend
If there’s one piece of advice I can give, it’s to spend ample time on the flat box. This is your absolute best friend for learning rails. These low, wide features are incredibly forgiving and allow you to really get a feel for balancing on a slippery surface.
Focus on your approach, making sure you’re riding straight and centered. Then, practice just hopping onto it and sliding. Don’t even worry about spins or fancy stuff yet.
Just get comfortable with a 50-50, feeling that even pressure on both feet, and looking ahead to where you want to go. I spent entire afternoons just sessioning a small flat box, and it made an incredible difference when I finally moved to taller, narrower features.
It builds muscle memory and confidence in a way that nothing else can.
Approach and Exit: The Unsung Heroes
You might think the sliding part is the hardest, but honestly, a clean approach and a smooth exit are just as, if not more, important. Your approach sets up your entire trick.
You want to ride in straight, with enough speed to carry you across the feature but not so much that you overshoot it. Look at the feature, then look at your landing, and commit to your line.
As for the exit, it’s all about staying balanced and riding away clean. Don’t celebrate too early! I’ve seen countless people (myself included!) perfectly land a trick only to lose their balance on the exit because they relaxed too soon.
Keep your knees bent, stay centered, and maintain that focus until you’re safely riding away. It’s the little details that truly make a trick look polished and effortless.
The Gear Lowdown: What Makes a Difference on Rails
You might think all snowboard gear is created equal when it comes to the park, but let me tell you, there are definitely some nuances that can make your rail game a whole lot easier – or harder!
When I first started, I was riding a stiff, directional freeride board because it was all I owned. Trying to slide on that thing felt like wrestling an alligator; it was clunky, catchy, and just plain difficult.
Switching to a dedicated park board was an absolute revelation. It’s not about spending a fortune, but understanding what features in your gear can genuinely help you progress.
A softer flex board, for example, is far more forgiving for landings and presses, making it easier to manipulate on features. This isn’t just about comfort; it’s about giving you the tools to succeed and minimize frustration.
Board Flex and Shape: Your Best Allies
When it comes to boards for rail riding, softer is generally better, especially as you’re learning. A softer longitudinal and torsional flex allows for easier presses, better absorption of impacts, and a more forgiving ride if you’re slightly off balance.
Think about it: a stiff board will fight against you, making it harder to lock into a press or absorb the bumps and grinds of a rail. Many park boards also feature a twin shape, meaning they’re symmetrical from nose to tail, which is perfect for riding switch and landing tricks.
I also find that a board with a slightly de-tuned edge in the contact points (or a specific rail-ready edge profile) can help prevent those nasty edge catches that send you flying.
You don’t want razor-sharp edges right where you’re trying to slide.
Bindings and Boots: Comfort Meets Control
Your bindings and boots might not seem as directly involved with the rail itself, but they’re crucial for control and comfort. For park riding, I personally prefer a medium-soft to medium-flex binding.
This gives you enough support to drive your board but also enough flexibility for tweaks and presses. As for boots, comfort is paramount. You’ll be bending, flexing, and absorbing impacts all day, so a well-fitting boot that offers a balance of support and flexibility is key.
I’ve tried too many boots that were either too stiff and restrictive or too soft and sloppy, and neither helps when you’re trying to dial in your balance on a rail.
Make sure your boots are snug but not painful, and try them on with the bindings you intend to use.
Mastering the Basics: Fundamental Techniques for Success
Alright, let’s get into the nitty-gritty of actually riding these things. It’s easy to get caught up watching advanced riders do crazy spins onto kinked rails, but every single one of those jaw-dropping tricks starts with a rock-solid foundation of basic techniques.
I remember feeling overwhelmed by the sheer variety of rail tricks out there, thinking I needed to learn them all at once. What I eventually realized was that by truly mastering a few core movements, everything else starts to fall into place much more easily.
It’s like learning to walk before you run – you wouldn’t skip straight to a marathon! Focus on getting these fundamental techniques dialed, and you’ll find your progression skyrockets, and your confidence will soar.
The 50-50: Your Gateway to Glory
If there’s one trick you absolutely *must* master on a rail, it’s the 50-50. This is the foundation for almost everything else. It simply means sliding straight down the feature with your board perpendicular to the rail, balanced evenly on both edges.
The key here is a straight approach, looking at the end of the feature, and riding onto it with a flat base. Keep your knees bent, arms relaxed, and your weight perfectly centered over your board.
Think of it like walking a tightrope – head up, eyes forward, and subtle adjustments with your body. Once you’re comfortable with the 50-50 on a flat box, try it on a low, straight rail.
It’s an incredibly satisfying feeling when you finally lock into that slide and ride it all the way out. This trick taught me so much about balance and commitment.
Boardslide Basics: Feeling the Slide
After the 50-50, the boardslide is often the next step, and it’s where you really start to feel that true “slide” sensation. A boardslide involves sliding on the base of your board, but rotated 90 degrees so your board is parallel to the rail.
For your first boardslides, start with a slight angle toward the rail (a “frontside” boardslide if the rail is behind you as you approach, or “backside” if it’s in front).
The trick here is to pop onto the rail, twisting your hips and shoulders to get your board flat on the feature. You want to maintain a slight crouch, looking over your shoulder to where you’re going.
It feels a bit weird at first, like your board wants to catch, but once you get that base locked onto the rail, it’s an incredibly smooth and satisfying slide.
Remember to de-rotate your body as you come off, just like you would coming out of a spin.
Common Pitfalls and How to Avoid Them
Learning new tricks, especially on rails, inevitably comes with its fair share of bumps and bruises. I’ve definitely had my share of epic wipeouts that could have been avoided if I’d known what to look out for.
From catching edges in the most spectacular ways to completely misjudging speed, I’ve seen (and made) pretty much every mistake in the book. But that’s okay, because learning from those errors is how we grow!
The good news is that many of the most common pitfalls are actually quite predictable, and with a little bit of awareness and a few simple adjustments, you can significantly reduce your chances of a nasty fall and accelerate your progress.
It’s all about being smart, observant, and learning to anticipate what could go wrong before it actually does.
Speed Control: Too Fast, Too Slow, Just Right
One of the most frequent issues I see, and something I struggled with myself, is getting the right speed. Too slow, and you’ll bog down halfway across the feature, often leading to an awkward dismount or a frustrating stop.
Too fast, and you risk overshooting the landing, losing control, or simply going too far to safely land your trick. The sweet spot is a Goldilocks scenario: just enough speed to comfortably clear the feature, but not so much that you feel out of control.
My advice? Start with a bit less speed than you think you need, especially on new features, and gradually increase it. Watch other riders who are successfully landing the feature and try to gauge their speed.
It takes practice, but once you find that rhythm, it makes all the difference.
Head Position and Looking Away: The Gravity Magnet
This one is a classic, and I’m guilty of it too. When you’re nervous or unsure, your natural instinct is often to look down at your board or worse, to look away from the feature entirely.
This is a recipe for disaster! Where your head goes, your body follows. If you’re looking down, your weight will shift forward, causing you to catch an edge.
If you look away, you lose sight of your landing and your body will naturally want to twist in that direction. The key is to look *through* the feature, to your landing, and beyond.
Keep your eyes fixed on where you want to go. This not only helps with balance but also tells your body where to orient itself for a clean exit. It feels unnatural at first, but force yourself to keep your head up and eyes forward, and you’ll immediately notice an improvement.
| Mistake | Description | Solution |
|---|---|---|
| Too Little Speed | Getting stuck or falling short on the feature. | Increase approach speed gradually; observe successful riders for pace. |
| Looking Down/Away | Losing balance, catching edges, or improper body rotation. | Keep head up, eyes focused on the end of the feature and your landing zone. |
| Lack of Commitment | Hesitating mid-approach or bailing out too early. | Visualize success, breathe deeply, and commit 100% to the trick. Mental game is key! |
| Stiff Body Posture | Inability to absorb impacts or make micro-adjustments. | Keep knees bent and arms relaxed; stay centered and ready to absorb. |
| Incorrect Edge Control | Catching an edge on approach or exit. | De-tune edges near contact points; approach with a flat base for 50-50s; practice proper board rotation for slides. |
Progressing Beyond the Fundamentals: Next-Level Tricks
Once you’ve got those 50-50s and boardslides feeling consistent and comfortable on various features, a whole new world of possibilities opens up. It’s an incredibly rewarding feeling when you realize you’re no longer just surviving the rails, but actually starting to *play* on them.
This is where the real fun begins, and your creativity can truly shine. I remember the thrill of finally linking a spin onto a feature or pressing the nose and tail on a box.
It wasn’t just about landing the trick; it was about the style and the feeling of complete control. Don’t rush this stage; let your comfort on the basics guide you.
When you feel ready, these next steps will add so much flair and excitement to your park riding.
Adding Spins: Getting Rotated On and Off
The natural progression from straight slides is to add spins. This means spinning onto the feature, off the feature, or even a combination of both. Start small: try a 90-degree spin onto a 50-50, or a 90-degree spin off a 50-50.
For example, a frontside 90 to 50-50 involves turning your body 90 degrees frontside as you hop onto the rail, landing in a 50-50. Similarly, a 50-50 to frontside 90 out means exiting the 50-50 with a 90-degree frontside spin.
The key is to initiate the spin with your shoulders and hips *before* you even leave the ground for the feature. Keep your eyes on the landing spot, and absorb the impact with bent knees.
Once you’re comfortable with 90s, you can start dreaming about 270s and beyond!
Presses and Butters: Style and Control
Presses and butters are what truly elevate your style on a feature. Instead of just sliding flat, you’re actively manipulating your board to put pressure on the nose or tail.
This not only looks incredibly cool but also demonstrates a high level of board control. Start with a simple nose press or tail press on a flat box. As you slide, shift your weight predominantly over your front foot for a nose press, lifting your back foot slightly.
For a tail press, shift your weight over your back foot. It requires a bit of core strength and good balance. The goal is to keep the opposite end of your board slightly off the feature, creating that distinct bent look.
Once you’ve got them down on a flat box, try incorporating them into 50-50s on rails. It adds so much flavor to your riding!
Safety First: Protecting Yourself on the Features
I know, I know, talking about safety isn’t always the most thrilling part of snowboarding, but trust me, it’s the absolute most important. There’s nothing that’ll set back your progression or kill your stoke faster than a serious injury.
I’ve seen too many friends get sidelined for weeks, or even entire seasons, because they neglected basic safety precautions. While snowboarding inherently carries some risks, especially in the park, many of those risks can be significantly mitigated with the right mindset and proper gear.
It’s not about being scared; it’s about being smart and giving yourself the best chance to ride another day, fully healthy and ready to shred. Consider it an investment in your long-term snowboarding career!
Helmet and Impact Shorts: Non-Negotiables
If you’re going to ride park, a helmet is non-negotiable. Period. Your brain is irreplaceable, and even a seemingly minor fall on a hard feature can have serious consequences.
Don’t let anyone tell you otherwise or make you feel silly for wearing one. I always wear mine, and honestly, most serious park riders do too. Beyond the helmet, I’m a huge advocate for impact shorts.
They might feel a little bulky at first, but trust me, your tailbone and hips will thank you profusely after a few awkward landings. I’ve avoided countless bruises and even potential fractures because of them.
They allow you to fall more confidently, which in turn helps you learn faster. Think of it as armor for your adventures!
Terrain Park Etiquette: Respect the Space
Beyond your personal safety gear, understanding and adhering to terrain park etiquette is crucial for everyone’s safety. This means looking before you drop, not stopping on or directly after features, and being aware of other riders around you.
A crowded park can feel chaotic, but if everyone follows these unwritten rules, it becomes a much safer and more enjoyable experience for all. I’ve seen near-misses that could have been completely avoided with a little more spatial awareness.
Give others space, wait your turn patiently, and if you see someone struggling, offer a friendly word of encouragement. We’re all out there to have fun and progress, and a respectful environment makes that much easier.
Whew, what a ride, right? Learning to conquer rails in snowboarding is truly a journey, not a destination. It’s filled with exhilarating highs when you finally stick that trick, and yes, a few humbling tumbles that remind you to stay grounded. But through it all, the sheer joy of pushing your limits and expressing yourself on the mountain is what keeps us coming back for more. Don’t ever forget that every single pro started exactly where you are, feeling those same jitters and triumphs. Keep that stoke alive, celebrate every small victory, and most importantly, have a blast out there. The mountain is waiting for your next awesome slide!
Useful Information You Should Know
1. Always check your gear before hitting the park; a loose binding or a dull edge can really throw off your game.
2. Spend a good 10-15 minutes visualizing your tricks and stretching before you even strap in.
3. Start with the smallest, easiest features and don’t rush your progression; patience is your best friend.
4. Don’t be afraid to ask experienced riders for tips; the snowboarding community is usually super supportive.
5. Remember to fuel your body and stay hydrated; a tired mind and body are more prone to mistakes.
Key Takeaways
If there’s anything I hope you take away from this, it’s that rail riding is as much a mental game as it is physical. My own experience has shown me that the commitment you bring to the feature, the unwavering belief in yourself, is often the deciding factor between a bail and a clean land. It’s truly about cultivating that inner confidence, one successful slide at a time, and not letting those inevitable falls dampen your spirit. I’ve learned firsthand that embracing every bail as a learning opportunity, rather than a failure, dramatically speeds up your progress and keeps the fun factor high. Think about it: every time you get back up, you’re building resilience and a deeper understanding of your body and board.
Moreover, getting your gear dialed in for park riding isn’t just a luxury; it’s a smart investment in your comfort and success. Riding a suitable board with the right flex and appropriate bindings can genuinely make a world of difference, turning frustration into fluidity. I can’t stress enough the importance of starting small, mastering those fundamental 50-50s and boardslides on beginner features. This methodical approach builds a robust foundation that will serve you well as you venture into more complex tricks. Don’t be tempted to skip steps; I’ve seen countless riders, myself included, try to bite off more than they can chew, only to end up with bruised egos and sore bodies. Trust the process, enjoy the journey, and always prioritize safety with the right protective gear. By combining mental fortitude, proper gear, step-by-step learning, and a dash of common sense, you’ll be sliding and grinding like a seasoned pro in no time, all while having the absolute time of your life.