Ah, the glorious feeling of clipping into your snowboard bindings, perfectly dialed in for a day on the slopes! We’ve all been there: either struggling endlessly with a screwdriver in the parking lot, or worse, hitting the first run with a wonky setup that just doesn’t feel right.
My personal journey with snowboarding has taught me that while the board and boots get all the glory, it’s really your bindings that connect you to the mountain and dictate how well you ride.
And trust me, getting those bindings installed correctly isn’t just about bolting them down; it’s about unlocking your board’s full potential and ensuring a comfortable, powerful ride every single time.
With advancements constantly happening in binding tech – from traditional two-strap refinements to exciting new fast-entry systems like those from Nidecker, Union, or the innovative Bone Bindings with their tilting mechanism – understanding your setup is more critical than ever for maximizing performance and avoiding common pitfalls that can totally throw off your day.
You might be eyeing those new responsive carbon-fiber reinforced plastics, or simply aiming to master your current gear, but the foundational principle remains: a meticulously installed binding setup makes all the difference.
I’ve seen firsthand how a few degrees of angle adjustment or a tweak to your stance width can transform a hesitant carver into a confident rider, or how an improperly centered boot can lead to frustrating toe or heel drag.
Let’s dive in and get those bindings set up perfectly for your next adventure.
Unlocking Your Ride: The Stance Width Sweet Spot
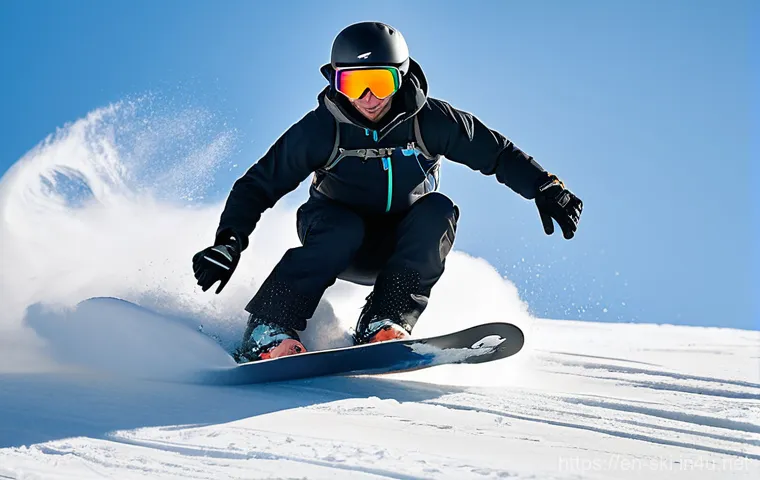
Finding your ideal stance width is like discovering the perfect handshake – it feels just right, provides stability, and sets the tone for everything that follows. I remember my early days, just blindly sticking to whatever the shop technician suggested, and sometimes that meant spending half the day feeling off-balance or struggling with edge control. It wasn’t until I started experimenting on my own, often with a mini-screwdriver set in my pocket on the mountain, that I truly understood how personal this adjustment is. Your stance width, the distance between the centers of your bindings, profoundly impacts how quickly you can initiate turns, your stability at speed, and your ability to absorb bumps. Too narrow, and you might feel tippy and unstable, especially on faster runs or choppy terrain. Too wide, and you’ll feel stretched out, compromising your ability to flex your knees and ankles effectively, which is crucial for dynamic riding and absorbing impacts. My general rule of thumb, and one I often share with friends hitting the slopes for the first time, is to start with a width roughly equivalent to your shoulder width. From there, it’s all about fine-tuning on the snow. What feels good in the living room can be completely different when you’re carving down a black diamond. Don’t be afraid to adjust it a quarter-inch at a time, testing it out for a few runs, until your body just naturally falls into a comfortable, powerful athletic stance over your board. This iterative process is key to finding that perfect balance of comfort and control, leading to less fatigue and more fun throughout your day.
The Goldilocks Principle: Not Too Wide, Not Too Narrow
Just like Goldilocks searching for the perfect porridge, you’re looking for that ‘just right’ feeling with your stance. Many riders mistakenly believe a super wide stance gives them more stability, especially for park riding, but it often leads to less effective knee bend and a reduced ability to absorb landings smoothly. Conversely, a stance that’s too narrow might make turning feel quick, but it severely limits your stability and power transmission, especially on icy patches or when trying to hold a strong edge. I’ve personally found that a good starting point is to stand naturally with your feet shoulder-width apart, then measure that distance from the center of your left foot to the center of your right. This often gives a great baseline for all-mountain riding. For powder days, some riders, myself included, like to nudge their stance back slightly (setback) and sometimes widen it just a hair for more float and stability in deep snow, but this is usually a minor adjustment from the ideal.
Why Your Body Type Matters for Stance Width
Beyond shoulder width, your individual body mechanics play a huge role. Someone with longer femurs might naturally prefer a slightly wider stance than someone with shorter femurs, even if they’re the same height. It’s about how your hips, knees, and ankles align in that athletic riding position. When you’re setting up, put your boots in the bindings and get into your riding stance. Do your knees feel comfortable bending over your toes? Can you easily shift your weight from toe to heel? If you feel any strain or unnatural stretching, chances are your stance width needs a tweak. Don’t underestimate the power of simply standing on your board in your living room and feeling it out before you even get to the mountain.
Angles of Attack: Setting Your Forward Lean and Rotation
This is where things can get a bit technical, but trust me, understanding your binding angles is transformative. For years, I just slapped my bindings on at arbitrary angles, probably 15 degrees positive on the front and 0 on the back, because that’s what a friend said was “standard.” What a mistake! My riding felt stiff, my turns were choppy, and I couldn’t understand why I was getting so fatigued. It turns out, those little adjustments to your binding angles, both forward lean on the highback and the rotational angles of the bindings on the board, are absolutely paramount to how your board responds to your every command. Positive angles on both feet (like +15°/+6°) are common for all-mountain riding, offering a balanced approach to both carving and switch riding. A “duck” stance, with a positive angle on the front foot and a negative angle on the back foot (e.g., +15°/-9°), is a favorite for park riders and those who spend a lot of time riding switch, as it offers more comfort and balance when your feet are splayed out. Your forward lean, adjusted via a lever or screw on your highback, also directly impacts your responsiveness. More forward lean means quicker edge-to-edge transitions and more power, but too much can lead to calf burn and discomfort. It’s a delicate dance of preference and performance, and it’s something I’m always subtly tweaking even now.
Understanding the Duck Stance and Beyond
The duck stance isn’t just for looking cool in the park; it’s genuinely functional for a lot of riding styles. By angling your back foot negatively, you’re opening up your body more to ride switch (with your non-dominant foot forward) comfortably. I swear by a slightly ducked stance (+18°/-6°) for my everyday riding because I love playing around on groomers and doing 180s. But it’s not for everyone. Pure carvers might prefer a more aggressive forward stance, sometimes even with both feet at positive angles, to maximize leverage and power in their turns. There’s also the often-overlooked “directional” stance, where both feet are positive but the back foot is less so (e.g., +21°/+9°), which is fantastic for freeriding and powder, really driving power through the nose of the board. The key is to think about *how* you ride most of the time and set your angles to support that. Don’t be afraid to go against the grain if it feels better for you.
The Impact of Highback Forward Lean on Performance
Your highback’s forward lean setting is often forgotten, but it’s a game-changer. It dictates how much your calves push against the highback, directly influencing how quickly your board reacts to heel-side turns. A stiffer, more aggressive forward lean gives you instant power transfer, making your heel edge feel incredibly responsive. This is excellent for high-speed carving and aggressive riding. However, too much can quickly lead to painful calf burn, especially on long days or if you’re not used to it. Less forward lean offers a more relaxed ride, often preferred by beginners or those who enjoy a more surfy, playful feel. For me, a moderate amount of forward lean strikes the perfect balance – enough responsiveness without feeling locked in or causing fatigue. Many bindings today have tool-less adjusters, which makes tweaking this on the chairlift incredibly convenient. It’s a setting you can definitely play with throughout the day.
Perfecting Your Boot Centering: Eliminating Drag
You’ve got your stance width, your angles are dialed, but there’s one more crucial piece to the puzzle: centering your boots on the board. This step is surprisingly often overlooked, even by experienced riders, and it’s a big deal. Proper boot centering ensures that you avoid toe or heel drag, which is when your boot extends too far over the edge of your board and scrapes the snow during a turn. I learned this the hard way during a particularly icy day. Every time I tried to lay out a deep carve, my toes would catch, throwing me off balance or, worse, sending me tumbling. Not fun. Centering your boots means ensuring that both your toe and heel extend an equal amount over the edges of your board. Most modern bindings allow for this adjustment, either by sliding the entire binding chassis left or right on the disc, or by adjusting the heel cup independently. This seemingly small tweak makes a monumental difference in edge hold, particularly on hardpack or when you’re really leaning into a carve. It allows you to maximize your effective edge and prevent those annoying (and dangerous) catches.
The Dreaded Toe and Heel Drag: Why It Happens
Toe and heel drag aren’t just minor inconveniences; they actively hinder your riding and can be a safety concern. Imagine trying to execute a perfect turn, only for your boot to dig into the snow halfway through, interrupting your flow and potentially sending you face-first. It happens because your boot is extending too far beyond the board’s edge, especially when the board is tilted at an angle. This is particularly problematic for riders with larger feet (size 11 US and up) or those on narrower boards. If you’ve ever felt your turns get “caught” inexplicably, or found yourself unable to hold a deep carve, poor boot centering is likely the culprit. It reduces your effective edge, making your board feel less stable and less responsive than it should. Taking the time to adjust this will significantly improve your overall control and confidence on the snow. It’s a small adjustment that yields massive performance gains, something I wholeheartedly recommend.
Adjusting for Optimal Overhang: Binding Baseplate and Heel Cup
Most quality bindings offer a way to slide your entire boot and binding assembly either closer to the toe edge or the heel edge. This is typically done by adjusting the binding plate where it attaches to the disc, or by an adjustable heel cup. To properly center, place your boot in the binding and put the binding on your board. Looking down from above, visually check the amount of overhang at your toe and heel. You want it to be as equal as possible. For very large boots, some overhang is unavoidable, but you want to minimize the *difference* between toe and heel. A common trick I use is to grab a straightedge (like a ruler or even a credit card) and lay it across the base of your boot, perpendicular to the length of the board. Measure the distance from the edge of the board to the straightedge on both the toe and heel sides. Adjust until those measurements are as close as possible. It might take a few tries, but it’s worth every minute of effort to eliminate that irritating drag.
Strap It Up: Dialing in Your Ankle and Toe Straps
Once your bindings are securely on the board, the final step in ensuring a perfect connection to your ride is adjusting your straps. This might seem like a no-brainer, but trust me, there’s an art to it. Too loose, and you’ll feel sloppy and lose power transfer. Too tight, and you’ll cut off circulation, leading to numb feet and cramping, which totally ruins a day. I’ve been there, thinking “tighter is better” only to end up with tingling toes by lunchtime. It’s all about finding that sweet spot of snugness and support without discomfort. Your ankle strap should hold your heel firmly into the heel cup of the binding, preventing any lift, which is crucial for edge control and responsiveness. The toe strap, whether it’s a traditional over-the-top strap or a cap strap that goes over the tip of your boot, should ideally pull your boot back into the heel cup, further enhancing that locked-in feeling. Each binding model can be a little different, with some offering tool-less adjustments, micro-adjustments, or even different strap materials that stretch differently. Experimentation here is key to maximizing comfort and performance. Always remember, a comfortable foot is a happy foot, and a happy foot makes for a happy rider.
The Perfect Ankle Strap Fit for Power Transfer
The ankle strap is your primary connection for transferring power to your heel edge. When adjusted correctly, it should firmly press your heel down and back into the binding’s heel cup. The key is “firmly” but not “crushingly tight.” You should be able to wiggle your toes comfortably, but your heel should have minimal to no lift when you try to stand on your toes. I often start by tightening it until it feels secure, then doing a few ankle flexes to see if there’s any play. If my heel lifts even a little, I’ll snug it up a click or two. Modern bindings often have padded, anatomical ankle straps that distribute pressure evenly, which really helps with comfort. If your binding has tool-less adjustment on the ladder straps, make sure the strap is centered over your boot – not too far forward, not too far back – for even pressure distribution.
Mastering the Toe Strap: Cap vs. Over-the-Top
The toe strap serves a slightly different but equally important purpose. Its main job is to pull your boot back into the heel cup and keep your foot securely in place. Most modern bindings feature a “cap strap” design, which wraps over the very tip of your boot. This design is superior, in my opinion, as it actively pulls the boot back, enhancing heel hold and reducing pressure points on the top of your foot. If you have an older binding with a traditional over-the-top toe strap, make sure it’s snug enough to prevent your boot from sliding forward, but not so tight that it creates a pressure point. Regardless of the style, ensure the strap is centered over your boot and adjusted so it’s applying even pressure. You shouldn’t feel any pinching or discomfort. It’s a fine balance, but one that makes a huge difference in how connected you feel to your board.
Beyond the Basics: Highbacks, Leashes, and Hardware Checks
Alright, so we’ve got the main angles and straps sorted, but there are a few other critical bits to check that often get overlooked. It’s the little things, you know? Like your highbacks – those tall pieces of plastic or carbon that support your calves. They’re not just for looks; they’re essential for heel-side control and responsiveness. Most highbacks can be rotated independently of the binding baseplate, allowing you to align them parallel with your heel edge, regardless of your binding angles. This seemingly small adjustment ensures maximum power transfer and consistent feel throughout your turn. I remember riding for years without ever touching this setting, and once I aligned them, my heel-side turns felt instantly more powerful and less fatiguing. Then there’s the humble binding leash – seriously, never forget this! I’ve seen countless boards careen down the mountain after a minor tumble because someone skipped this simple safety step. Always attach your leash to your front binding and around your ankle. Finally, and perhaps most importantly, *always* do a hardware check. Before every season, and periodically throughout, give all your screws a good once-over. Bindings vibrate loose, especially with aggressive riding, and the last thing you want is a binding falling off mid-run. A simple check with a screwdriver can save you a world of trouble and potential injury.
Highback Rotation: Aligning for Optimal Edge Control
Many riders don’t realize their highbacks can be rotated, but it’s a feature on most quality bindings that significantly improves performance. When you set your binding angles (e.g., +15°/-9°), your highbacks naturally point slightly outwards or inwards relative to the board’s edge. Rotating them so they’re parallel with the heel edge of your board ensures that the highback applies even pressure across your calf, leading to more efficient power transfer and a more natural feel during heel-side turns. If your highbacks are angled away from your calf, you’re essentially losing leverage and making your heel-side turns less powerful and more fatiguing. This adjustment is usually done by loosening a screw or lever at the base of the highback, rotating it, and then re-tightening. It’s one of those “set it and forget it” adjustments that makes a surprising difference on the snow.
The Unsung Hero: Your Binding Leash
Please, for the love of all things holy, use your binding leash! It’s such a simple, inexpensive piece of equipment, but it’s saved me (and countless others) from chasing a runaway board down a crowded slope more times than I can count. A runaway snowboard isn’t just an inconvenience; it’s a dangerous projectile that can seriously injure other riders. The leash typically attaches to a dedicated loop on your front binding and then around your boot or ankle. It’s a non-negotiable safety item, especially if you’re riding at resorts. Don’t be that person whose board is bouncing through the trees, creating a hazard for everyone. It literally takes seconds to clip on and can prevent a whole lot of heartache and potential medical bills.
The Essential Pre-Ride Checklist: Don’t Skip This!
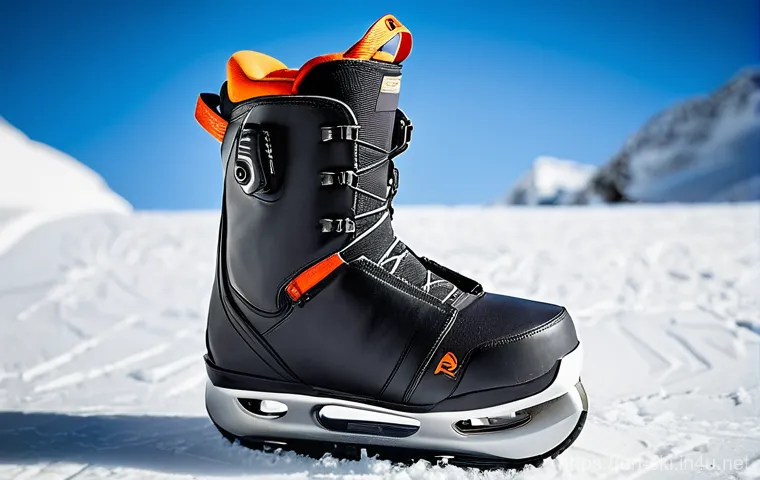
Okay, so you’ve done all the hard work: set your stance, dialed in your angles, centered your boots, and adjusted your straps. You’re practically a binding installation guru! But before you even *think* about hitting that first chairlift, there’s one absolutely non-negotiable step: the pre-ride checklist. I’ve seen days ruined, and even minor injuries occur, because someone was too eager to get on the snow and skipped this crucial double-check. It’s like a pilot’s pre-flight routine; you wouldn’t want them skipping steps, and you shouldn’t either. This quick run-through ensures that every single component of your binding setup is secure, adjusted correctly, and ready for the demands of the mountain. From loose screws to improperly buckled straps, tiny oversights can lead to big problems. Take five minutes to go through this list, either in the parking lot or right at the base of the lift. It’s an investment in your safety, comfort, and ultimately, your enjoyment of the day. A properly secured binding means you can focus on the ride, not on whether your gear is going to fail you. Trust me, a moment of vigilance now can save you a world of frustration later.
Your Quick Pre-Slope Binding Security Check
Before every single run, or at least before your very first run of the day, do a quick visual and tactile check. Wiggle your boots in your bindings. Are they firmly seated? Give each strap a good tug. Are they securely buckled and tightened? Check the screws on your binding disc – are they all snug? Sometimes, especially with new bindings or after a long break, a screw can work itself loose surprisingly quickly. I make it a habit to carry a small multi-tool in my jacket pocket specifically for these on-the-fly adjustments. It’s a simple routine, but it’s amazing how many potential issues it can catch before they become major problems. Think of it as your personal safety net for your setup. It literally takes less than a minute, but it guarantees peace of mind as you drop into your first turns of the day.
The Importance of Consistent Tool Checks
Beyond the quick pre-ride check, it’s a good practice to periodically use a screwdriver on all your binding hardware. The constant vibration from riding, especially on rougher terrain or at higher speeds, can gradually loosen screws. I usually do a comprehensive screw check every few trips to the mountain, just to be sure. This includes the screws holding the highback, the strap adjustments, and most critically, the four screws that attach your binding to the board. Finding a loose screw *before* it falls out can save you from a major headache. Some riders even apply a tiny dab of Loctite (a threadlocker) to their binding screws for extra security, though be cautious with this as it can make future adjustments harder. For most, a regular check is more than sufficient. This diligent approach to your gear isn’t just about safety; it’s about maintaining optimal performance and extending the life of your equipment.
The Science of Flex: Matching Bindings to Your Board and Style
Here’s something many folks overlook: the flex of your bindings is just as important as the flex of your board. You wouldn’t put super stiff race car tires on a plush off-road vehicle, right? The same logic applies to your snowboard setup. Bindings come in a range of flex ratings, from soft and forgiving to incredibly stiff and responsive, and matching them to your board and your preferred riding style is absolutely crucial for a cohesive and high-performing setup. A soft-flex binding on a stiff, aggressive freeride board is going to feel sloppy and diminish your control, while a super stiff binding on a soft, playful park board will make it feel less lively and harder to manipulate for tricks. My personal journey has seen me evolve from wanting the softest bindings for jibbing to appreciating a medium-to-stiff flex for all-mountain cruising and carving. It’s all about creating a harmonious system where your movements are efficiently transferred to the board, making it feel like an extension of your body. This often means doing a bit of research on your board’s flex rating and then looking for bindings that complement it. Don’t just grab the flashiest looking pair; think about how it integrates into your entire setup.
Understanding Binding Flex Ratings and Their Impact
Binding flex is usually rated on a scale, often 1-10 (1 being softest, 10 being stiffest), or described qualitatively (soft, medium, stiff). A softer binding offers more forgiveness, greater comfort, and a more “surfy” or playful feel. This is ideal for beginners, park riders focusing on presses and jibs, or those who prefer a more relaxed, cruising style. A stiffer binding, on the other hand, provides maximum power transfer, quicker edge-to-edge response, and better stability at high speeds. This is favored by advanced riders, freeriders, and carvers who demand precise control and aggressive performance. The material composition of the binding (nylon, fiberglass, carbon fiber) largely dictates its flex. Knowing your board’s flex is key; generally, you want bindings that are either the same flex or slightly softer than your board. A stiff binding on a soft board can overwhelm the board’s natural flex, making it feel less maneuverable.
Choosing the Right Flex for Your Riding Style
Your riding style is the ultimate dictator when it comes to binding flex. Are you spending all day in the park hitting rails and jumps? A softer-to-medium flex binding will give you the playfulness and forgiveness you need for tweaking grabs and landing smoothly. Do you live for charging down steep slopes, laying down deep carves, and exploring off-piste terrain? Then a medium-to-stiff binding will provide the necessary support, power, and responsiveness to handle aggressive riding. If you’re an all-mountain rider who does a bit of everything, a medium flex binding is usually a safe and versatile bet. I’ve found that my preference shifted as my riding evolved; initially, I wanted soft, but now a medium-stiff feels perfect for the variety of terrain I enjoy. Don’t be afraid to try out different flexes if you have the opportunity, as it’s a very personal preference that significantly impacts your overall riding experience and confidence.
Decoding Mounting Systems: 2×4, 4×4, EST, and The Channel
Navigating the world of snowboard mounting systems can feel a bit like learning a secret code, but once you crack it, you gain a whole new level of control over your stance customization. For years, the standard was either the 2×4 or 4×4 insert pattern – essentially rows of threaded holes in your board where your bindings attach. These systems offer solid reliability but can limit the minute adjustments of stance width and angle. Then came EST (Extra Sensory Technology) from Burton, which eliminated the traditional disc altogether, connecting the bindings directly to two slots on the board. This system, designed specifically for Burton’s boards, offers unparalleled board feel and an insane amount of stance customization. More recently, “The Channel” system, also pioneered by Burton but now adopted by many other board manufacturers, has revolutionized adjustability. It’s a continuous slot down the center of the board, allowing you to slide your bindings to literally any point along its length. This means incredibly precise stance width and angle adjustments. Understanding which system your board uses and how your bindings interact with it is fundamental to getting that perfect setup. I’ve personally experienced the freedom of The Channel system, and it’s a game-changer for micro-adjustments that make a world of difference on the snow, allowing me to fine-tune my setup for powder, park, or pure carving days with ease.
The Evolution of Snowboard Mounting: From Discs to Channels
Snowboard mounting systems have come a long way. The traditional 4×4 and 2×4 insert patterns, where the binding disc screws into a fixed set of holes, have been the backbone of the industry for decades. They’re robust and reliable, but they offer limited adjustment increments. EST bindings, exclusive to older Burton boards, removed the disc and allowed direct connection to two independent slots, enhancing board flex underfoot. However, the real game-changer has been The Channel system. This innovative design features a continuous channel down the center of the board, allowing for infinitely adjustable stance widths and angles. This means you’re not limited to pre-drilled holes; you can slide your bindings to literally any point along the channel. This precision is invaluable for finding that absolute sweet spot for your stance. While The Channel was initially a Burton exclusive, its benefits were so obvious that many other brands now offer boards with compatible channels, often requiring specific binding discs or adapters.
Compatibility Matters: Matching Bindings to Board Systems
Before you even think about installing your bindings, you absolutely need to verify compatibility between your bindings and your board’s mounting system. A 2×4 binding won’t fit on an EST board without an adapter, and not all bindings are immediately compatible with The Channel. Most binding manufacturers now produce bindings that come with discs compatible with 2×4, 4×4, and The Channel systems (often called “multi-disc” or “universal disc” bindings). However, some older bindings or specific models might only work with one type. Always check the binding’s specifications or consult with a reputable shop technician if you’re unsure. Using the wrong disc or an incompatible system can not only damage your equipment but also pose a significant safety risk. Taking a moment to ensure everything matches up perfectly saves a lot of headaches and ensures your precious gear functions as it’s designed to.
The Crucial Role of Hardware: Screws, Washers, and Anti-Vibration Pads
It’s easy to get caught up in the big-ticket items like boards and boots, but let me tell you, the small, often-overlooked pieces of hardware – the screws, washers, and sometimes anti-vibration pads – are absolutely vital to your binding’s performance and longevity. These tiny components are what literally hold your entire setup together, forming the critical link between your feet and the snow. I once had a washer disintegrate mid-season, causing a subtle wobble in my binding that I couldn’t diagnose for weeks until I finally stripped down the whole setup. Not only did it affect my riding, but it could have easily led to a major failure. High-quality screws are essential; they need to be strong enough to withstand constant stress and vibration without stripping. Washers distribute the pressure of the screw heads, preventing damage to your board and helping to keep the screws tight. And anti-vibration pads, often made of rubber or urethane, sit between your binding and the board, dampening chatter and impacts, which not only makes for a smoother ride but also reduces stress on your hardware and board. Don’t cheap out on these components or take them for granted. They are the unsung heroes of a solid, reliable snowboard setup.
Understanding Your Binding Hardware Kit
When you buy new bindings, they usually come with a hardware kit that includes specific screws and washers designed for that binding and generally compatible with common mounting systems. It’s imperative to use the hardware provided with your bindings, as different manufacturers might use slightly different screw lengths or thread patterns. Using the wrong screws can damage the inserts in your board, leading to costly repairs. Always make sure you have all four screws for each binding, along with the appropriate washers (usually a metal washer followed by a plastic washer, or a single combined washer). These washers are crucial for protecting your board’s topsheet and distributing the pressure from the screws evenly, which helps prevent them from loosening. Never mix and match hardware from different binding sets unless you’re absolutely certain they’re compatible.
The Benefit of Anti-Vibration Pads and Disc Compatibility
Many modern bindings, especially higher-end models, come with integrated anti-vibration pads or a cushioned baseplate. These pads are usually made from materials like EVA foam, urethane, or rubber and serve a fantastic dual purpose: they absorb chatter from the snow, leading to a smoother, less fatiguing ride, and they act as a buffer, reducing the stress on your binding hardware and board. If your bindings don’t come with these, you can often buy aftermarket dampening pads that sit between your binding disc and your board. They’re a relatively inexpensive upgrade that can significantly improve comfort, especially on hardpack or icy conditions. Also, always ensure the disc you’re using (the round or rectangular plate that attaches the binding to the board) is the correct one for both your binding model and your board’s mounting system. An incorrect disc can lead to an unstable connection, poor performance, and potential damage to your gear. It’s a small detail, but it speaks volumes about your attention to a perfect setup.
| Adjustment Area | What It Affects | Recommended Starting Point / Tip |
|---|---|---|
| Stance Width | Stability, Turn Initiation, Comfort | Shoulder-width apart. Adjust 1/4 inch at a time. |
| Binding Angles | Edge Control, Carving Power, Switch Riding Comfort | All-mountain: +15°/+6°. Park/Freestyle: +15°/-9° (duck stance). |
| Boot Centering | Eliminates Toe/Heel Drag, Maximizes Edge Control | Equal boot overhang on both toe and heel edges. |
| Ankle Strap Tightness | Heel Hold, Power Transfer to Heel Edge | Snug enough to prevent heel lift, but not restrictive. |
| Toe Strap Tightness | Pulls Boot into Heel Cup, Prevents Forward Slide | Snug over the boot tip (cap strap) or top (traditional) without pinching. |
| Highback Forward Lean | Responsiveness, Edge-to-Edge Speed | Moderate for all-mountain. Less for playful, more for aggressive. |
| Highback Rotation | Heel-Side Power Transfer, Calf Comfort | Align highbacks parallel to your board’s heel edge. |
Wrapping Things Up
Whew! We’ve covered a lot of ground today, haven’t we? From the foundational stance width to the subtle nuances of highback rotation and hardware checks, it’s clear that setting up your snowboard bindings is far more than just screwing them onto your board. It’s a personal journey of discovery, a conversation between you and your gear, constantly evolving as your riding style does. I truly hope that walking through these details has empowered you to approach your setup with newfound confidence and curiosity. Remember, every adjustment you make is a step closer to that seamless, “extension-of-your-body” feeling on the snow. It’s about maximizing comfort, optimizing performance, and ultimately, making every single run as exhilarating and effortless as possible. Don’t be afraid to experiment, tweak, and re-tweak – that’s where the magic truly happens!
Extra Tips for the Savvy Rider
1. Carry a Multi-Tool: Trust me on this one. A compact, purpose-built snowboard multi-tool is your best friend on the mountain. You’ll thank yourself for having it handy for quick adjustments on the chairlift or in the lodge. It’s an absolute lifesaver for fine-tuning those angles or strap tightness mid-day, letting you react to changing conditions or simply dialing in comfort.
2. Break-In Your Boots and Bindings Together: Just like a new pair of shoes, your boots and bindings need a little time to get to know each other. Spend some time wearing them around the house, flexing and moving, before hitting the slopes. This helps the foam in your boots pack out and the straps settle, preventing unexpected discomfort on your first few runs.
3. Listen to Your Body: This is perhaps the most important tip of all. If something feels off, uncomfortable, or just “not right,” don’t ignore it. Your body is giving you crucial feedback about your setup. Stop, assess, and make small adjustments. Pushing through discomfort often leads to fatigue, frustration, or even injury, ruining an otherwise perfect day.
4. Consider Different Setups for Different Boards: If you’re lucky enough to have multiple snowboards (a powder board, a park board, an all-mountain cruiser), don’t expect one binding setup to be perfect for all of them. Each board has a different flex and purpose, and your binding angles and stance width should reflect that for optimal performance across your quiver.
5. Don’t Over-Tighten Hardware: While it’s crucial for screws to be snug, over-tightening can strip threads, crack baseplates, or even damage your board’s inserts. Tighten them firmly until they’re secure, then give them a quick re-check after a few runs, but don’t crank them down with excessive force. A happy medium is always the goal here.
The Bottom Line
Ultimately, your snowboard binding setup is a deeply personal affair. There’s no single “perfect” configuration that works for everyone, and that’s the beauty of it. It’s about understanding the core principles – stance width, angles, centering, and strap tension – and then diligently applying them to find what feels right for *you*. I’ve seen countless riders transform their experience on the snow by simply paying attention to these details. Investing a little time in properly setting up your bindings isn’t just about tweaking gear; it’s about unlocking your full potential, enhancing your comfort, and elevating every single moment you spend carving, floating, or flying down the mountain. So go forth, experiment, and enjoy the ride, knowing that every adjustment brings you closer to your ultimate shredding bliss!
Frequently Asked Questions (FAQ) 📖
Q: I’m just getting started or feel like my current setup isn’t quite right. What’s the best way to figure out my stance width and binding angles for comfortable riding?
A: Oh, this is probably the most common question I get from riders, and honestly, it’s where a lot of us either get it spot on or completely miss the mark, leading to a frustrating day on the mountain.
When I first started out, I just bolted my bindings on wherever they felt “okay,” but trust me, that’s a recipe for an awkward ride and quick fatigue!
The “best” way really comes down to your personal riding style and body mechanics, but there are some fantastic starting points to help you dial it in.
For stance width, a really simple trick I’ve always used is to stand naturally on flat ground, close your eyes, and jump lightly. The width your feet land at is often a great indicator of your natural, comfortable stance.
Or, you can simply stand on your board without boots, find a comfortable, slightly wider-than-shoulder-width stance, and mark where your feet naturally land.
That’s your approximate width. From there, it’s all about experimentation. I personally love a slightly wider stance for added stability and making presses a little easier, especially when I’m hitting the park or cruising through some mellow powder.
For angles, if you’re riding all-mountain – meaning you like to hit everything from groomers to trees to a few park features – a “duck stance” is incredibly popular and my absolute go-to.
This is where both feet point slightly outwards, like +15 degrees on the front and -9 degrees on the back. It gives you incredible balance for both regular and switch riding, which is a huge plus if you’re exploring different terrains.
If you’re primarily a directional carver who loves laying down deep trenches, you might want more positive angles on both feet, like +18 degrees front and +6 degrees back, to really drive into those turns.
My advice? Start with a solid duck stance, maybe +15 degrees / -9 degrees, and a width that feels comfortable and natural for your body. Then, hit the slopes and don’t be afraid to adjust!
I always carry a multi-tool because even a tiny tweak of a degree or a half-inch of width can completely transform how connected and confident you feel on your board.
Play around until it feels just right – your comfort and performance will thank you!
Q: My boots feel centered in my bindings, but I sometimes get annoying toe or heel drag, especially on hard carves. What am I missing?
A: Ah, the dreaded toe and heel drag! I’ve been there myself, thinking my boots were perfectly centered only to catch an edge on a deep carve because my toe or heel was scraping the snow.
It’s not just annoying; it can be downright dangerous and completely throw off your rhythm. This usually boils down to something called “boot centering” and ensuring your binding is perfectly aligned with the edge of your board.
Even if your boot looks snug and centered within the binding, it might not be perfectly aligned with the actual edges of your board. Here’s my personal secret sauce for tackling this: when you place your boot into the binding, you want the toe and heel to overhang the board equally.
The absolute best way I’ve found to check this is to unstrap your board, set it on a flat surface, place your boot (strapped into the binding) onto the board, and then stand the board on its edge.
Look down both edges from the tip and tail. Are your toes and heels equally distant from the edge? If one side is sticking out more, that’s your culprit!
Most modern bindings, whether they’re traditional two-strap systems or those innovative fast-entry ones like Nidecker or Union, have adjustable heel cups or toe ramps that let you slide the entire binding forward or backward on the baseplate.
Seriously, this small adjustment makes a colossal difference in preventing drag and unlocking cleaner carves. I remember one season I was struggling with heel drag, and after carefully adjusting my heel cup just a quarter-inch back, it was like riding a whole new board – smooth, confident carves without any snagging!
It’s a total game-changer, so take the extra time to dial it in.
Q: How often should I check my binding setup, and are there any common pitfalls or quick fixes I should know about on the mountain?
A: This is such a critical question, and one I wish more people considered! We all get excited, eager to hit the slopes, but ignoring your gear is a recipe for trouble or, at best, a less-than-optimal ride.
From my own experience, I’ve learned the hard way that a loose screw can turn a perfect powder day into a total headache. So, how often should you check?
Honestly, I make it a habit to do a quick check every single time I hit the slopes. Before my first run of the day, I’ll give all the main screws on my bindings a firm twist with my screwdriver – especially the main disc screws that attach the binding to the board, and the ones holding the straps.
Temperature changes can cause metal to contract and expand, leading to things loosening up, and those vibrations from riding definitely don’t help! As for common pitfalls and quick fixes on the mountain, here are my top tips that have saved my day more times than I can count:
1.
The Elusive Loose Screw: This is the most common culprit. If your board suddenly feels “mushy” or unresponsive, or if you hear a faint rattling sound, immediately suspect a loose disc screw.
That little multi-tool in your pocket isn’t just for show – it’s your best friend! I’ve stopped mid-run countless times to tighten a screw that was threatening to bail on me completely.
2. Strap Slippage Shenanigans: Sometimes, especially with older bindings or after a big, awkward fall, your ankle or toe straps can slip out of their perfect adjustment settings.
If your strap suddenly feels too loose or too tight, it might be the ladder strap adjustment sliding. A quick readjustment back to your sweet spot can instantly save your ride and restore that locked-in feeling.
3. Highback Wobbles: If your highback feels wobbly or doesn’t lock into its upright position securely, check the hinge pins or adjustment mechanisms. Sometimes, snow and ice can get packed in there, preventing a proper lock.
A good tap or clearing out the ice can fix it instantly. 4. Boot Fit in Binding: Always ensure your boots are truly seated properly before you crank down the straps.
I’ve seen riders try to force their boots in awkwardly, which not only feels uncomfortable but can put unnecessary stress on your bindings and boots, potentially leading to premature wear or even breakage.
Remember, a little preventative maintenance and a quick check-over go a very long way. Think of your bindings as the direct link, the “steering wheel,” between you and your board – you want them solid, responsive, and trustworthy!
I promise you, taking two minutes to check your setup before heading up that first lift will save you from a lot of frustration and keep you shredding happily all day long.