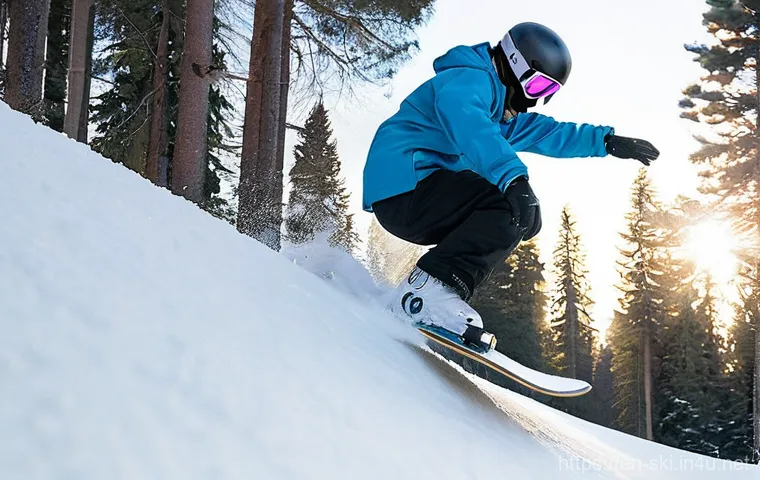
Hey there, fellow shredders and mountain enthusiasts! I remember my first time eyeing a rail in the park – it looked both terrifying and absolutely exhilarating.
You know that feeling, right? That mix of butterflies and pure stoke bubbling up, wondering if you’ll nail it or end up eating snow? Well, I’ve spent countless hours navigating those slippery metal beasts, from the intimidating flat bars to the tricky kinked rails, and let me tell you, the progression is one of the most rewarding parts of snowboarding.
It’s not just about brute force; it’s about finesse, balance, and a little bit of fearless determination. The park scene is constantly evolving too, with new features popping up every season, pushing riders to get creative and hone their skills in fresh ways.
It’s a whole subculture, a playground where every successful slide or grind feels like a massive win. If you’re looking to conquer those rails, add some serious style to your riding, or just understand what all the hype is about, you’ve come to the right place.
Let’s unpack the secrets to mastering those elusive rail techniques and elevate your park game, shall we?
Dialing in Your Approach: The Foundation of Every Rail Trick
Speed, Stance, and Spotting: The Holy Trinity
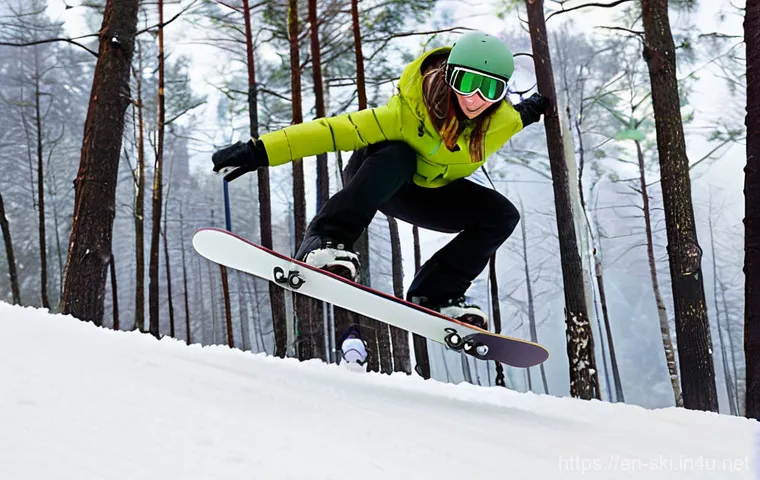
Alright, let’s get real about what truly makes or breaks a rail trick before you even touch the feature. It’s not just about throwing yourself at it; it’s about a calculated, confident approach.
I can’t tell you how many times I’ve seen riders (and honestly, myself included in my early days!) completely blow a trick because their speed was off or they weren’t looking where they were going.
Think of your approach speed like tuning a guitar – too fast, and you’re overshooting or losing control; too slow, and you’re getting stuck, leading to an awkward bail.
Finding that sweet spot comes with practice, but a good rule of thumb is enough speed to comfortably clear the feature without feeling rushed. Your stance on approach is equally critical.
You want to be balanced, knees slightly bent, and centered over your board, ready to absorb any bumps or shifts. It’s like being in an athletic ready position.
And then there’s spotting – oh, spotting! This is huge. Your head and eyes should lead the way.
You need to identify your entry point, the middle of the rail, and your exit point. My personal tip? Pick a spot slightly beyond the end of the rail that you want to aim for as you ride off.
This helps keep your body aligned and prevents you from looking down at your board, which often throws off your balance. Trust me, these three elements woven together are your secret sauce for a solid entry, every single time.
It feels a bit like a dance, actually, where every step needs to be precise for the whole routine to flow beautifully.
Commitment is Key: Overcoming the Fear Factor
Now, let’s talk about the elephant in the park – fear. We all feel it, especially when looking at a new or intimidating rail. That little voice in your head whispering, “What if you fall?
What if you look silly?” I’ve been there, staring down a particularly long flat box, my heart doing a little anxious flutter. But here’s the thing: commitment is your best friend.
Half-hearted attempts almost always lead to a bail, and often a worse one than if you had just gone for it with full conviction. When you decide to hit a rail, you have to truly commit.
It’s a mental switch. You’re not “trying” it; you’re *doing* it. This means driving into it with confidence, trusting your body, and executing the movements you’ve practiced.
Start small, with features that feel manageable, and build that confidence incrementally. A technique I found incredibly helpful is visualization. Before I drop in, I close my eyes for a second and mentally ride the rail perfectly, feeling the slide, seeing the smooth exit.
This mental rehearsal really helps calm the nerves and primes your body for success. Remember, every pro started somewhere, probably with the same jitters.
It’s about acknowledging the fear, then telling it to take a back seat while you focus on the task at hand. The feeling of overcoming that fear and landing a trick?
Absolutely euphoric, and totally worth the initial discomfort.
Conquering Your First Flat Bar: The Entry Point to Park Domination
50-50s and Boardslides: Your Go-To Starters
Alright, you’ve got your approach dialed, and you’re feeling committed. Awesome! Now, let’s talk about the bread and butter of rail riding: the 50-50 and the boardslide.
These are your foundational tricks, and mastering them on a flat bar will unlock a whole world of possibilities. The 50-50 is often the first rail trick anyone learns, and for good reason – it’s straightforward and builds incredible balance.
You’re essentially riding straight onto the rail with your board flat, centered directly over the feature, sliding along its length. It feels incredibly satisfying when you lock into that first smooth slide.
My tip for nailing the 50-50? Keep your knees bent, look straight ahead down the rail, and keep your body perfectly stacked over your board. Don’t lean back, don’t lean forward; just stay centered.
As for the boardslide, this one feels a bit more stylish and is probably my personal favorite for its simplicity and visual appeal. You approach the rail, pop onto it, and slide perpendicular to the feature, with either your front or back binding over the rail.
Regular riders would likely start with a frontside boardslide (facing uphill) or a backside boardslide (facing downhill). The key here is to spot your landing, twist your body slightly for the slide, and then untwist for a smooth exit.
These two tricks are your essential toolkit for getting comfortable on metal, and trust me, they never stop feeling good, no matter how many other tricks you learn.
Sliding with Confidence: Balance and Body Position
Confidence on rails really boils down to understanding balance and effective body positioning. It’s not just about getting onto the rail; it’s about staying on it gracefully and consistently.
When you’re sliding, your entire body needs to work together as a unit. Imagine a straight line running from the top of your head, through your shoulders, hips, and down through your feet, directly over the center of the rail.
This alignment is crucial for maintaining equilibrium. I remember early on, I used to lean too far back on rails, terrified of catching an edge. This would invariably lead to me sliding off prematurely or just feeling incredibly unstable.
The moment I started consciously keeping my shoulders aligned over my hips, directly above the rail, everything clicked. Another vital aspect is using your arms.
They’re not just there for show; they’re your primary balancing tools. Keep them slightly out, bent at the elbows, ready to make micro-adjustments to your balance.
Think of them like wings, helping you hover. Your head should always be looking in the direction you want to go, guiding your body. If you’re sliding a boardslide, for example, your head should be turned to look down the rail towards your exit.
This subtle shift in focus can make a world of difference in your stability and exit smoothness. Practice these body awareness techniques on simpler features, and you’ll find your confidence soaring, turning those wobbly slides into buttery smooth glides.
Stepping Up to Kinked and Down Rails: Upping the Ante
Navigating the Transitions: Timing is Everything
Once you’re comfortable cruising on flat bars, the natural progression is to move onto kinked and down rails. These are where things get a bit more interesting and require a touch more finesse.
Kinked rails, with their sudden changes in angle, can look intimidating at first, but they’re incredibly rewarding to master. The biggest challenge here is navigating the “kinks” or transitions smoothly.
It’s all about timing and subtly shifting your weight. As you approach the kink, you want to be slightly lighter on your board, almost floating for a split second, allowing your board to adjust to the new angle.
Don’t fight the rail; let it guide you. I’ve found that slightly bending your knees more as you hit the transition helps absorb the impact and keeps your body centered.
It’s a bit like riding over a speed bump – you don’t stiffen up; you soften to roll over it. Down rails, on the other hand, are all about commitment and controlling your speed.
The gravitational pull means you’ll accelerate, so a controlled entry and a confident exit are paramount. For these, I focus intensely on spotting my landing point and maintaining a really strong, centered body position throughout the entire slide.
The feeling of successfully gliding down a long, steep down rail is a fantastic rush – a real testament to your growing skill.
Locking In: The Secret to Sticking Those Grinds
Moving beyond simple slides, when you start thinking about grinds, especially on kinked or down rails, “locking in” becomes the mantra. Locking in means firmly engaging the edge or base of your board onto the rail in a way that feels stable and secure, allowing you to glide smoothly without slipping off.
For boardslides and lipslides, it’s about finding that sweet spot where your board is perfectly perpendicular to the rail, creating maximum surface contact.
On down rails, this means really committing your weight over the rail, letting gravity help you stick. With kinked rails, the ‘lock’ needs to adapt at each angle change.
It’s not a rigid hold; it’s a dynamic engagement. For instance, when hitting the first flat section of a kinked rail, you’ll lock in as usual. As you approach the first kink, you momentarily unweight slightly, then re-engage and ‘lock in’ to the new angled section.
This continuous adjustment, almost like a subtle re-centering, is crucial. My biggest personal breakthrough came when I stopped trying to force my board into a position and instead learned to *feel* the rail, letting my body instinctively adjust.
It takes a lot of practice, but once you start feeling that solid lock, you’ll be amazed at how much more control and confidence you gain. It’s a game-changer for pushing your rail game further.
Adding Flair: Spins, Presses, and Stylized Exits
Pre-Wind and Pop: Spinning On to Rails
Once you’ve mastered the straight slides and grinds, the next exciting frontier is adding spins into the mix. Spinning onto a rail, whether it’s a 180, 270, or even a full 360, elevates your style and makes your riding look incredibly fluid.
The key to any good spin-on is the “pre-wind and pop” technique. Before you even leave the ground, you need to load up your rotation. This means twisting your upper body in the opposite direction of your spin, then releasing that tension as you pop off your tail.
Imagine winding yourself up like a spring, then letting go. For example, if you want to do a frontside 180 onto a rail, you’ll pre-wind your shoulders and arms slightly backside (away from the rail), then as you approach the rail, pop and throw your head and shoulders frontside towards the rail, letting your board follow.
Timing is absolutely everything here. You want to pop just as your tail reaches the take-off point, giving you enough airtime to complete the spin and land cleanly on the rail.
It’s a truly exhilarating feeling when you nail that spin and smoothly lock into a slide – it feels like pure magic, honestly. Don’t be discouraged if it takes a few tries; getting the pop, spin, and landing all coordinated is a dance, and every dancer needs practice.
Pressing for Perfection: Making it Look Easy
Beyond just sliding, adding presses to your rail tricks is where you really start to express your unique style and make your riding look effortless and polished.
A press involves shifting your weight deliberately over either the nose or tail of your board while on the rail, lifting the opposite end slightly. It adds a whole lot of visual appeal and makes even a basic 50-50 look incredibly smooth.
My personal favorite is a nose press, where you lean heavily over your front foot, lifting your tail. It feels super stable and looks fantastic, especially on longer rails.
The trick to a good press is to commit your weight fully and maintain control. It’s not just a momentary lean; it’s a sustained balance act. You want to bend that lead knee deeply, almost as if you’re trying to touch your chin to your front binding, while keeping your back leg relatively straight to lift the tail.
For a tail press, it’s the opposite – dig into your back foot, lift the nose, and keep your gaze looking down the rail. The stability comes from maintaining that strong, compressed posture.
It takes some core strength and precise balance, but when you ride away from a rail with a clean press, you’ll feel like you’ve just dropped a mic. It’s a definite crowd-pleaser and a sign of true board control.
The Mental Game: Overcoming Bails and Building Resilience
Learning from the Landings: Analyzing Your Falls
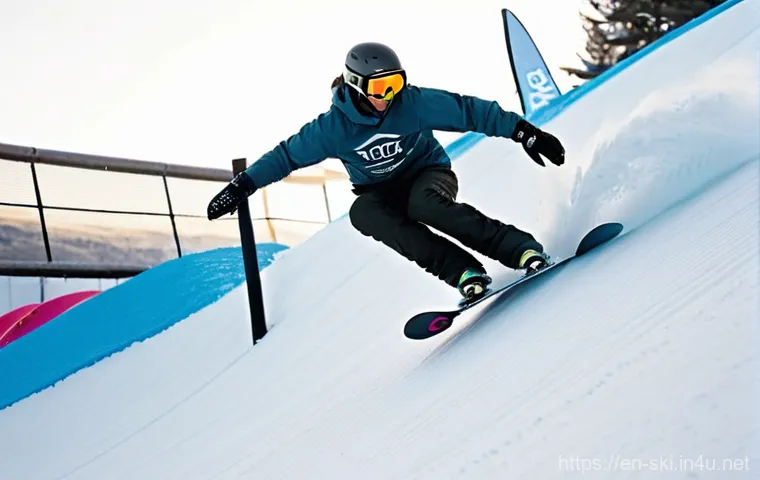
Let’s be honest, falling is an inevitable part of snowboarding, especially when you’re pushing your limits in the park. But here’s a secret: every bail is a learning opportunity.
Seriously! Instead of just shaking it off and trying again blindly, take a moment to analyze what went wrong. Did you have enough speed?
Was your body position off? Did you look away? I’ve found that my biggest breakthroughs often came after a particularly spectacular wipeout, simply because it forced me to reconsider my approach.
For example, I used to consistently fall off the end of a certain box on my heelside. After a few frustrating tumbles, I realized I was subtly looking over my shoulder too early, causing my weight to shift backward prematurely.
Once I focused on keeping my head straight and looking directly at my exit point, the problem vanished. Don’t be afraid to take a mental snapshot of your fall – how did you feel, where did you land, what was your board doing?
Use that information to adjust your next attempt. It’s about being a scientist of your own riding, making small, iterative changes based on observed outcomes.
This reflective practice not only helps you progress faster but also builds mental resilience, turning frustration into determination.
Visualizing Success: The Power of Positive Thinking
Beyond analyzing your falls, the flip side of the mental game is visualizing success. This isn’t some abstract, airy-fairy concept; it’s a powerful tool that athletes across all disciplines use.
Before I drop into a particularly challenging feature, I spend a few seconds just standing at the top, closing my eyes, and mentally riding the rail perfectly.
I imagine the exact speed I need, the pop onto the rail, the feeling of the slide, and the smooth, controlled exit. I even envision landing cleanly and riding away with a smile.
This mental rehearsal does a couple of amazing things. First, it calms those pre-trick jitters by focusing your mind on a positive outcome. Second, it primes your body.
Your muscles and nervous system get a “practice run,” making the actual execution feel more familiar and less daunting. It’s like telling your body exactly what you want it to do before you ask it to do it.
I personally found this incredibly effective for overcoming mental blocks on new tricks or features. It transforms “I hope I can do this” into “I know I can do this.” Give it a try – you might be surprised at how much it boosts your confidence and consistency on the slopes.
Essential Gear for the Park Rat: What You Need to Shred
Board, Bindings, and Boots: Finding Your Perfect Setup
You might think any old setup works for park riding, but having the right gear can genuinely make a world of difference in your progression and confidence on rails.
Trust me, I’ve tried everything from super stiff freeride boards to flimsy noodles, and there’s a sweet spot for park domination. For rails, you generally want a board that’s a bit softer in flex.
This allows for easier presses, better pop, and more forgiveness if you’re slightly off. A twin-tip shape is also highly recommended because you’ll be riding switch (backwards) a lot more, and you want your board to feel the same in either direction.
When it comes to bindings, look for something with a medium-soft flex. This gives you enough support for aggressive maneuvers but still allows for that crucial tweakability and comfort for those long park days.
And boots? Oh, boots are everything! They’re your direct connection to the board.
You want a pair that fits snugly but comfortably, without any heel lift. A medium flex is usually ideal – something that gives you response without restricting your ankle movement for presses and grabs.
Personally, I always prioritize comfortable boots; tired feet equal a shorter day in the park, and who wants that? Investing in a good park-specific setup isn’t just about looking cool; it’s about optimizing your performance and making every session more enjoyable.
Protection is Paramount: Helmets, Pads, and More
Now, let’s talk about something incredibly important that often gets overlooked by eager riders: protection. I know, I know, helmets and pads aren’t always the “coolest” look, but trust me, a good bail on a rail without the right protection can quickly turn an epic day into a trip to the emergency room.
I’ve seen it happen, and I’ve experienced a few hard knocks myself that made me truly appreciate my gear. A helmet is non-negotiable in the park. Your brain is kind of important, right?
Look for one that fits well and is certified for snow sports. Beyond that, consider wrist guards – those metal rails are unforgiving on wrists. Impact shorts with padding for your hips and tailbone are also a game-changer, especially when you’re learning new slides and falls are a regular occurrence.
My personal experience taught me that elbow and knee pads, while sometimes a little bulky, save you from those nasty scrapes and bruises that can sideline you for days.
You don’t need to look like a hockey player, but a little strategic padding goes a long way. Think of it this way: the more protected you are, the more confidently you can push your limits and try that scary new trick.
It reduces the consequences of failure, allowing you to learn faster and stay on the mountain longer. Don’t skip on safety; your future self will thank you.
Keeping the Stride Fresh: Creative Lines and Feature Combinations
Mixing it Up: Linking Tricks and Features
Once you’re feeling confident on individual rails and features, the real fun begins: mixing it up and linking tricks together. The park isn’t just a collection of obstacles; it’s a giant playground designed for creative lines.
Instead of just hitting one rail and riding off, think about how you can transition from one feature to another, or how you can combine different tricks on a single feature.
For example, can you hit a small jump, then land directly into a boardslide on a down box, and then maybe manual off the end? Or perhaps a 50-50 on a flat bar, followed by a 180 off, and then a quick transition into a press on the next feature?
This is where your individual style really starts to shine. I always try to visualize an entire “line” through a section of the park before I drop in.
It’s like choreographing a dance. The key is to maintain momentum and flow. Don’t rush; focus on smooth transitions.
Experiment with different combinations, even if they seem simple at first. The more you connect your tricks and features, the more fluid and impressive your riding will become.
It’s incredibly satisfying to pull off a seamless line, and it keeps your park sessions feeling fresh and exciting.
Observing and Innovating: Drawing Inspiration from Pros
To really push your rail game, you need to stay inspired and keep an eye on what’s happening in the wider snowboarding world. One of the best ways I’ve found to develop new ideas and refine my technique is by observing other riders.
Watch the pros in videos, but also pay attention to the really skilled riders in your local park. What are they doing that you haven’t tried? How do they approach a specific feature?
I’m not saying you should copy them exactly, but rather use their techniques as a springboard for your own innovation. Sometimes just seeing someone execute a trick flawlessly can spark an “aha!” moment in your own mind.
Beyond watching, don’t be afraid to experiment. The beauty of snowboarding is that there’s no single “right” way to do things. What if you try a different entry angle?
What if you combine a press with a spin? What if you approach a rail from the side instead of head-on? I love seeing riders come up with completely unique ways to interact with features – it’s a testament to the endless creativity possible on a snowboard.
The park scene is constantly evolving, so staying curious and always looking for new ways to express yourself on rails will keep your riding sharp and endlessly enjoyable.
| Skill Level | Key Techniques to Master | Common Features |
|---|---|---|
| Beginner | Straight rides, basic balance, ollie/nollie, 50-50, straight boardslide (frontside/backside) | Small flat boxes, wide flat rails, mellow down boxes |
| Intermediate | Boardslides (various), lipslides, simple presses (nose/tail), 180s on/off, switch riding | Medium flat rails, short down rails, mini kinked boxes, small C-boxes |
| Advanced | 270s on/off, switch 50-50/boardslide, multiple presses, creative rail combos, gap to rail | Longer down rails, multi-kinked rails, rainbow rails, street-style features |
| Expert | Full rotations on/off (360+), complex pretzel spins, technical grinds, unique feature interpretations, strong overall park flow | All park features, integrating with jumps, urban features, highly technical lines |
Wrapping Things Up
And there you have it, folks! We’ve covered a ton of ground today, from finding that perfect approach speed to conquering kinked rails and even diving into the mental game. What I truly hope you take away from all this isn’t just a list of tricks, but a sense of confidence and an understanding that every rider, no matter their skill level, is on a journey. Snowboarding is all about progression, and those small victories, like finally landing a clean 50-50 or nailing that first boardslide, are what make this sport so incredibly addictive. So, get out there, embrace the falls, celebrate the successes, and keep pushing your limits. The park is your canvas, and your board is your brush – go paint some epic lines!
Useful Tips for Your Rail Sessions
1. Always Stretch and Warm Up: Just like any sport, hitting the park puts unique stresses on your body. A quick 10-15 minute warm-up, focusing on dynamic stretches for your legs, core, and arms, can significantly reduce the risk of injury and get your muscles ready for action. Trust me, your body will thank you after a long day of sliding and bailing.
2. Start Small and Build Gradually: It’s tempting to eye that intimidating pro-line rail, but patience is key. Master the fundamentals on smaller, mellower features first. Building a solid foundation on flat boxes and small rails will give you the confidence and muscle memory needed to tackle bigger obstacles safely and successfully.
3. Ride with a Buddy or a Mentor: Learning with friends makes everything more fun, and they can offer valuable feedback on your technique. If you have an experienced rider in your crew, don’t be afraid to ask for tips or watch how they approach features. Sometimes just a different perspective is all you need to unlock a new trick.
4. Film Yourself: This is a game-changer! Watching yourself ride can highlight issues you might not even realize you have. You can analyze your approach, body position, and exit, making it much easier to identify areas for improvement. A small action cam can be your best coach on the mountain.
5. Maintain Your Gear: A well-maintained board performs better. Keep your edges sharp (especially important for rails as they can take a beating) and your base waxed. A smooth, fast base will make your slides effortless and more controlled, letting you focus on the trick itself rather than fighting your equipment.
Key Takeaways
Mastering rail tricks is a journey built on a few core pillars. Firstly, a consistent and confident approach, encompassing speed, stance, and spotting, sets the stage for every successful attempt. Secondly, unwavering commitment to the trick, despite the fear factor, is crucial for overcoming mental blocks and preventing sloppy bails. As you progress, understanding balance and body positioning becomes paramount, allowing you to lock into slides and grinds with precision. Remember, every fall is a learning opportunity, and harnessing the power of visualization can significantly boost your confidence. Finally, investing in the right park-specific gear and prioritizing protection will not only enhance your performance but also keep you safe and shredding longer. Keep it creative, keep pushing, and most importantly, have fun out there!
Frequently Asked Questions (FAQ) 📖
Q: I’m super excited to hit the park, but rails look intimidating! Where should a total beginner even start without face-planting immediately?
A: Oh, I totally get that feeling! Trust me, every single park rider you see absolutely charging started exactly where you are – with a bit of nerves and a whole lot of curiosity.
My biggest piece of advice, and something I always tell friends who are looking to dip their toes into the park, is to always start with a flat box, not a rail.
Find the lowest, widest, and shortest box you can, usually in the beginner or small park area. These are your best friends for building confidence. Don’t even think about sliding at first.
Just practice riding straight onto the box, keeping your board flat and centered. Ride off the end, then repeat. The goal here is to get comfortable with the sensation of riding onto an elevated, non-snow surface and maintaining a flat base.
Once that feels natural, then you can try a straight 50-50 slide. Approach slowly, look at the end of the box (not your board!), and commit. It’s surprising how much looking ahead guides your body.
It’s all about small, manageable steps. Remember, the fear usually comes from the unknown, and breaking it down into tiny, conquerable pieces makes it feel way less scary.
I remember my first “rail” was literally a picnic bench turned upside down – you start somewhere, right?
Q: Once I’m somewhat comfortable on a box, what’s the single most important fundamental I should focus on to truly get better and avoid sketchy wobbles on actual rails?
A: Okay, this is a fantastic question, and it gets right to the heart of successful rail riding. If I had to pick one fundamental, it would be commitment to your line and a perfectly balanced, flat base.
It sounds simple, but it’s where most people (myself included, in the early days!) go wrong. When you approach a feature, your eyes should be locked onto the exit of the rail, not your board, not the rail itself.
This helps your body naturally align and guides you through. Then, as you pop onto the rail, you need to be absolutely flat-based, centered directly over your board, and absorbing the impact with your knees.
Any edge pressure, even subtle, will cause those sketchy wobbles or a quick bail. Think of yourself as a perfectly balanced plank of wood floating across the feature.
It’s all about maintaining that equilibrium. I’ve found that consciously telling myself, “Flat base, look to the end!” before every rail attempt dramatically reduces those wobbly moments and boosts my confidence.
That unwavering focus and balance are what separate a smooth slide from a scary one.
Q: Okay, I’ve got my 50-50s down on boxes and maybe even a flat rail. What’s the next step to add some serious style and progression to my rail game? I want to move beyond just straight slides!
A: Awesome! This is where the real fun begins and your unique style starts to shine. Once those 50-50s feel locked in, you’re ready to inject some personality into your rail game.
The natural progression from a straight 50-50 is to start incorporating presses – either nose presses or tail presses. Think about it: instead of just riding flat-based, you’re now shifting your weight either predominantly over your nose or your tail, lifting the opposite end of the board.
Start on those same low, wide boxes or flat rails. Practice entering in a 50-50, then gently shift your weight forward for a nose press (lifting your back foot slightly) or backward for a tail press (lifting your front foot).
It’s a subtle but significant change in balance and body control. Once you get the feel of a pressed 50-50, you’ll feel like a whole new rider! After presses, the next big leap is into board slides.
These feel super advanced, but they’re surprisingly accessible with practice. A boardslide involves turning your board perpendicular to the rail, sliding on the base of your board between your bindings.
Start by trying a “front boardslide” – approaching the rail, turning your front shoulder towards the rail, and letting your board swing around. Again, look to the end, maintain that flat base, and commit!
The feeling of locking into your first boardslide is absolutely incredible – it’s like suddenly unlocking a secret level in your riding. Just remember to start slow, visualize the trick, and don’t be afraid to take a few tumbles.
We’ve all been there! The park is your playground, so get creative and have a blast!