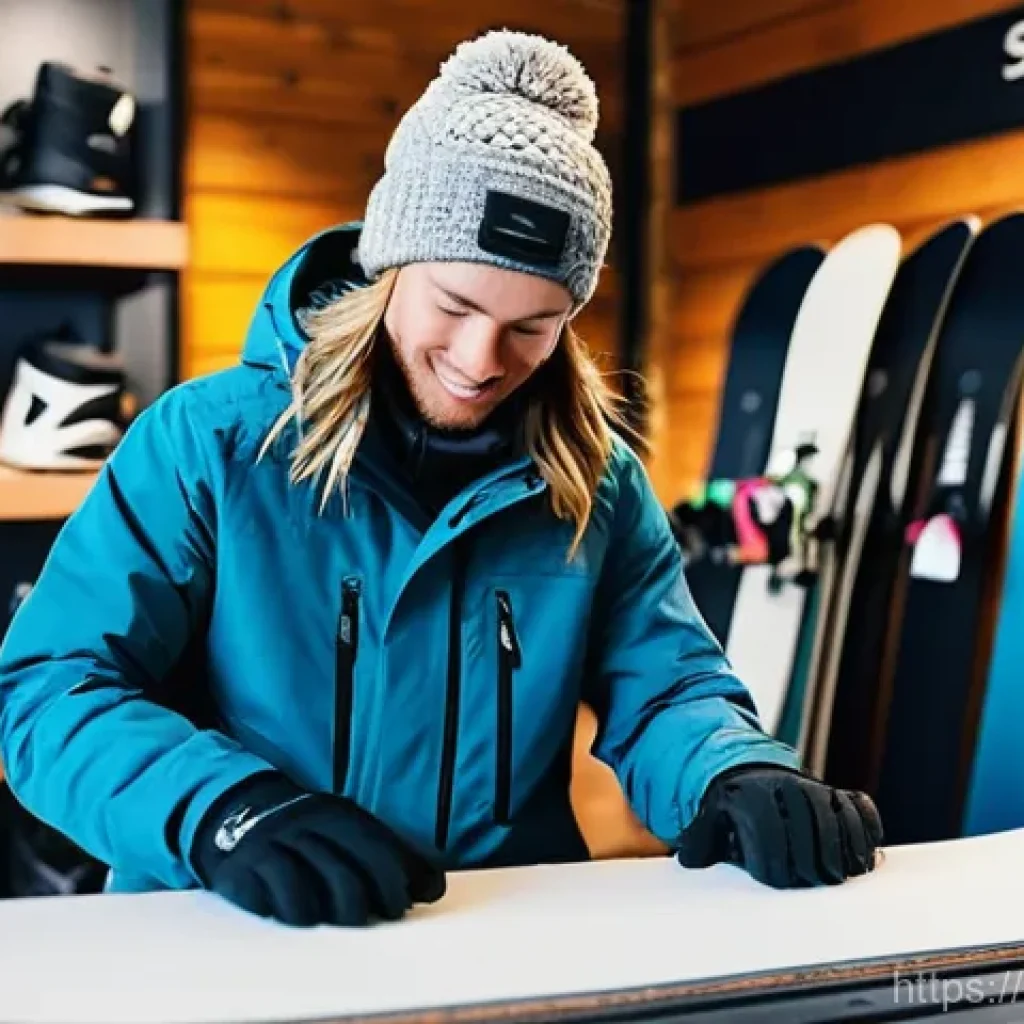
Hey there, snow enthusiasts! Are you pumped for your first time hitting the slopes on a snowboard, or maybe you’ve had a couple of tries and feel a bit stuck?
I totally get it – learning to snowboard can feel like a steep climb, literally! I’ve seen countless eager beginners, myself included back in the day, make some classic blunders that could easily be avoided.
Trust me, a few simple tweaks can make all the difference between a day of frustrating falls and an exhilarating glide. Let’s dive right in and find out exactly what those common beginner mistakes are, so you can shred with confidence and have an absolute blast on the snow!
Getting Your Gear Game On Point
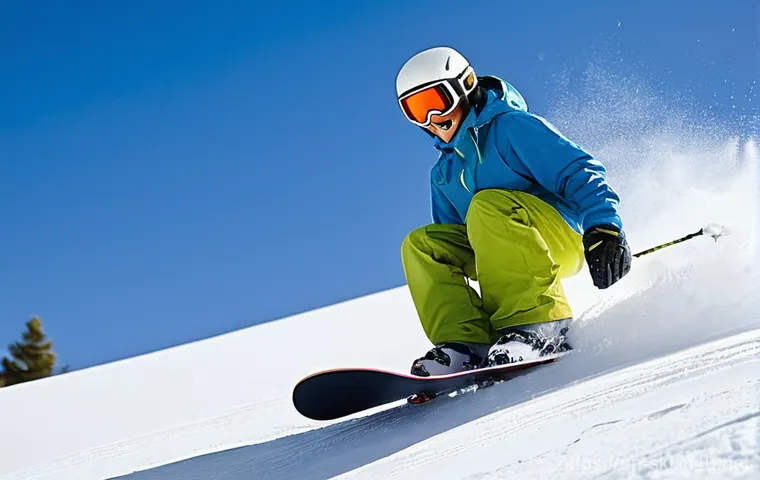
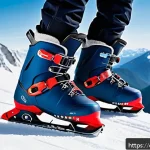
Okay, let’s get real for a second. I can’t tell you how many times I’ve seen eager first-timers show up to the mountain looking like they just raided their closet for whatever was “warm.” But trust me on this: your gear is your foundation, and a shaky foundation makes for a wobbly ride! When I first started, I borrowed boots that were a size too big, thinking “eh, close enough.” Big mistake! My feet were sliding around inside, my ankles weren’t supported, and I felt like I was trying to steer a boat with a noodle. It was absolutely miserable, and my shins paid the price by the end of the day. Proper fitting boots aren’t just about comfort; they’re crucial for control and preventing those painful shin bangs or bruised toes. You need that snug, locked-in feel without being painfully tight, allowing for precise movements that translate directly to your board. Think of your boots as your steering wheel – if it’s loose, you’re going to have a hard time navigating.
The Right Boots Make All the Difference
Seriously, this is a hill I will die on. Your boots are the most critical piece of equipment for a beginner. If they don’t fit right, you’re going to struggle with every turn, every stop, and every push off the lift. A good pair of boots should hug your foot without any pressure points, and your heel should stay firmly in place when you flex forward. Don’t be afraid to spend some time trying on different brands and styles at a reputable shop. Walk around in them, simulate a snowboard stance, and really get a feel for how they perform. My personal rule of thumb now is always to prioritize comfort and fit over brand name or color. You want to feel connected to your board, and that connection starts right at your feet.
Don’t Skimp on Board Sizing and Stance Setup
Beyond boots, your board’s length and your stance setup are equally vital. A board that’s too long will feel like trying to turn a tanker ship, while one that’s too short might feel unstable at even moderate speeds. Generally, your board should reach somewhere between your chin and your nose when standing on its tail. But it’s not just about length; the width of your board should also match your boot size to prevent toe and heel drag. Then there’s your stance – the angle and width of your bindings. This is incredibly personal, and getting it dialed in will make a huge difference in how natural and balanced you feel. A duck stance (toes pointed slightly outward) is common for beginners as it allows for comfortable riding both directions. Experiment with small adjustments at home or in the shop until it just feels right. It might take a few tweaks on the mountain too, but investing that time upfront will save you so much frustration.
Your Gaze Sets Your Path
When I was learning, I had this terrible habit of staring directly down at my snowboard, almost willing it to move correctly. My instructor, a super chill guy named Mike, kept telling me, “Look up! Look where you want to go!” But it felt so counter-intuitive because all I wanted to do was check if my feet were actually doing what I thought they were. This “foot fixation” is incredibly common among newbies, and it’s a huge obstacle to progression. Think about driving a car – you don’t stare at the dashboard or your feet on the pedals, do you? You look down the road, anticipating turns and obstacles. Snowboarding is exactly the same! Your body naturally follows your eyes. If your eyes are glued to your board, your body tenses up, your balance goes wonky, and you effectively block your ability to look ahead and plan your movements. It’s like your brain can’t compute a turn if it doesn’t even know where that turn is supposed to lead.
Look Where You Want to Go
This sounds almost too simple, right? But it’s a game-changer. When you’re making a heel-side turn, look over your front shoulder in the direction you want to go. For a toe-side turn, look over your back shoulder. Your head and shoulders are powerful steering mechanisms. As your head turns, your shoulders naturally follow, then your hips, and finally your board. It creates a fluid, connected motion that allows you to initiate and complete turns much more smoothly. I remember the first time I consciously tried this; it felt so unnatural initially, but after a few tries, it clicked! The mountain suddenly felt less overwhelming because I was looking *at* it, not *through* my feet. It’s an active process of scanning the slope ahead, planning your line, and letting your body follow that visual input.
Avoiding the “Foot Fixation” Trap
Breaking the habit of looking down takes conscious effort. One trick I found helpful was to pick out a point further down the slope, maybe a tree, another rider, or a patch of snow, and focus on heading towards it. As you get closer, pick a new point. This keeps your head up and your vision forward. Another technique is to actively try to see the path you’ve just carved behind you after a turn. This forces you to rotate your head and shoulders, which is exactly what you need for effective turning. Initially, it might feel a bit like you’re missing information about your board, but trust your edge and your body. The more you practice looking ahead, the more intuitive it becomes, and the faster you’ll feel in control. This single change can dramatically improve your balance, confidence, and overall flow on the mountain.
Mastering Both Edges: A Balancing Act
When you’re first learning to snowboard, there’s an almost universal tendency to get really comfortable on one edge – usually the heel edge. I did it, everyone I’ve taught has done it. It feels safer, right? You can lean back, see where you’re going, and it just feels more natural to stop by digging in your heels. But let me tell you, relying solely on your heel edge is like trying to drive a car with only the reverse gear. You’ll move, but you won’t get anywhere effectively or gracefully. It severely limits your ability to turn properly, control your speed, and navigate different terrains. I remember a particularly embarrassing moment where I got stuck on a traverse because I couldn’t make a proper toe-side turn to change direction. I ended up having to unstrap and walk, feeling utterly defeated. It was a clear sign that I needed to branch out and truly embrace both edges.
Breaking Free from the Heel Edge Comfort Zone
The heel edge feels safe because your weight is naturally distributed when you lean back, and you can easily look down the hill. However, to truly snowboard, you need to develop an equally strong relationship with your toe edge. This means actively pushing your shins into the front of your boots, driving your knees forward, and really leaning into the uphill side of your board. It feels awkward at first, almost like you’re going to faceplant. And guess what? You probably will! But those small tumbles are part of the learning process. Start practicing on gentle slopes, focusing on just traversing across the hill on your toe edge. Feel that pressure on the front of your boots? That’s your control. The more comfortable you get with traversing, the more confident you’ll become initiating turns from that edge.
The Art of the Toe Edge Turn
Once you’re getting the hang of traversing, it’s time to link those toe-side turns. This is where many beginners get stuck. The key is to initiate the turn by looking and pointing your lead shoulder where you want to go, then gently pressing down on your toe edge. As you come across the fall line (the steepest part of the slope), smoothly transfer your weight from your toe edge to your heel edge, allowing the board to carve through the turn. It’s a continuous, flowing motion, not a jerky shift. Think about rolling your ankles and driving your knees into the board’s edge. Practicing drills like “falling leaf” on both edges can really help build that muscle memory and confidence. The goal is to feel equally balanced and in control on both edges, allowing you to link S-turns effortlessly and truly dance down the mountain. This balance opens up a whole new world of snowboarding possibilities.
| Common Beginner Mistake | Why It Happens | Pro Tip to Overcome It |
|---|---|---|
| Staring at your board | Instinctive desire to see what your feet are doing; fear of the unknown ahead. | Look where you want to go! Your body follows your eyes. Pick a point far down the slope and aim for it. |
| Stiff legs and locked knees | Fear of falling, trying to maintain rigid balance. | Bend your knees and ankles! They are your suspension system, absorbing bumps and helping you turn. |
| Over-relying on heel edge | Feels safer, easier to see down the hill, natural braking instinct. | Actively practice toe-side traversing and turning on gentle slopes. Push shins into boots, drive knees forward. |
| Trying to go too fast too soon | Excitement, wanting to keep up with friends, underestimating the learning curve. | Master basic skills (stopping, turning, edge control) on easy green runs before attempting steeper terrain. |
Patience is Your Best Friend on the Slopes
Ah, the classic beginner’s dilemma: you see experienced riders effortlessly gliding down black diamond runs, and a little voice in your head screams, “I want to do that NOW!” Trust me, I’ve been there. My first trip to Mammoth Mountain, I was so eager to conquer every slope. I felt like I had a decent handle on green runs, so I figured a blue wouldn’t be much different. Boy, was I wrong! I ended up side-slipping down half the mountain, exhausted and frustrated. It was a harsh but necessary lesson in patience. Snowboarding isn’t a race; it’s a journey of building muscle memory, confidence, and understanding how your body interacts with the board and the snow. Skipping steps in the learning process almost always leads to more falls, more frustration, and frankly, less fun. Give yourself the grace to learn at your own pace, celebrating every small victory.
Resist the Urge to Go Full Speed Ahead
It’s tempting, I know. That rush of speed feels exhilarating, but for a beginner, it can quickly turn into pure terror. Before you can truly enjoy speed, you need to have complete control. That means being able to stop on demand, confidently link turns on both edges, and adjust your speed intuitively. Trying to go fast before you have these fundamentals down is like trying to run before you can walk – you’re just setting yourself up for a tumble. Focus on feeling the board, understanding how your weight shifts affect your direction, and maintaining a consistent, manageable speed. Green runs exist for a reason! They provide the perfect low-pressure environment to practice and build those foundational skills without the added stress of steep inclines or crowds of faster riders. You’ll build confidence much quicker if you focus on control over velocity.
Embrace the Learning Curve, Not the Race
Every single expert rider you see started exactly where you are now. They didn’t magically appear on the mountain with perfect technique. They put in the time, faced the falls, and embraced the learning curve. Instead of comparing yourself to others, focus on your own progress. Can you link two turns now where you could only do one before? Did you manage to get off the lift without falling this time? Those are huge wins! Celebrate them. Each time you step on your board, set a small, achievable goal for yourself. Maybe it’s to practice toe-side turns for thirty minutes, or to make it down a specific green run without stopping. This mindset shifts your focus from perceived failures to tangible improvements, making the entire experience far more enjoyable and sustainable. Remember, the mountain isn’t going anywhere, and neither is the joy of mastering a new skill at your own comfortable pace.
Embracing the Bend: Your Snowboard’s Best Partner
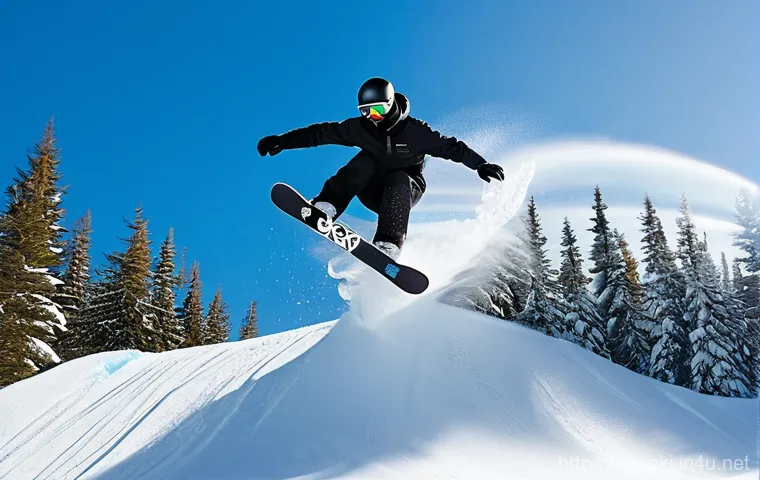
One of the biggest ‘aha!’ moments I had when learning to snowboard was realizing just how crucial my knees and ankles were. For the longest time, I rode with relatively stiff legs, trying to use my core and upper body to steer. It felt like I was fighting the board, and every little bump sent me off balance. It was exhausting, inefficient, and frankly, a bit painful after a full day. My instructor eventually pointed out, “Your knees are your shock absorbers and your steering wheel!” And boy, was he right! Once I started consciously bending my knees more, allowing them to flex and extend with the terrain, it was like a whole new world opened up. Suddenly, I could absorb bumps, initiate turns with less effort, and maintain much better balance. It’s a fundamental principle that separates the struggling beginner from someone who’s truly starting to flow with the mountain.
Unlock Your Knees for Control
Think of your knees as the suspension system for your snowboard. When they’re locked, you’re essentially riding a rigid plank, making you susceptible to every ripple and bump on the snow. But when your knees are bent, they allow your body to move independently of the board, providing crucial dampening and stability. This flexion also plays a massive role in turning. To initiate a turn, you don’t just lean; you actively drive your knees towards the direction you want to go, putting pressure on the edges. For example, to start a heel-side turn, you might push your knees slightly out and back, while for a toe-side turn, you’d drive them forward and in. This subtle but powerful movement allows for precise edge engagement and smooth transitions between turns. It might feel a bit like you’re squatting at first, but that lower, more athletic stance is key.
The Power of Ankle Flexion
While knee bend gets a lot of attention, don’t underestimate the power of your ankles. They are the direct link between your boots and your board, and subtle ankle movements are incredibly important for fine-tuning your edge control. When you’re on your toe edge, you’ll be flexing your ankles forward, driving your shins into the front of your boots. On your heel edge, you’ll be flexing your ankles back, lifting your toes. Practicing these isolated ankle movements, even off the snow, can help build the strength and awareness needed for precise control. It’s not just about big, sweeping movements; often, the most experienced riders make subtle adjustments with their ankles and feet that seem almost imperceptible. Integrating both knee and ankle flexion will give you a dynamic, responsive connection to your board, making you feel much more at one with the mountain.
Falling with Grace (and Less Pain!)
Let’s be real, you’re going to fall. Anyone who tells you they learned to snowboard without a single tumble is either lying or possesses some superhuman balance that the rest of us can only dream of. I’ve had my share of spectacular wipeouts, from sliding down half a run on my backside to a faceplant that left me with snow up my nose. But here’s the secret: falling isn’t a failure; it’s an essential part of the learning process. The trick isn’t to avoid falling entirely, but to learn *how* to fall in a way that minimizes injury and maximizes your ability to bounce back quickly. I remember one early fall where I instinctively tried to brace myself with my hands, and I nearly twisted my wrist. That’s when I realized that a little bit of knowledge about falling safely could make a world of difference between a minor inconvenience and a trip to the first aid station.
How to Tumble Smartly
When you feel yourself losing balance, don’t fight it by reaching out with your hands. Instead, try to absorb the impact by rolling with it. If you’re going to fall backward (which is very common for beginners on their heel edge), try to tuck your chin to your chest, round your back, and let your butt and upper back take the impact. Spreading the impact over a larger area reduces the force on any single point. For forward falls (often from the toe edge), try to land on your forearms and knees, again, trying to distribute the impact. It sounds counterintuitive to “let go” when you’re falling, but tensing up or trying to break your fall with an outstretched arm is a recipe for injury. Practice gentle falls on soft snow, even just sitting down intentionally, to get comfortable with the motion. The more you know how your body reacts, the better you can prepare for it.
Protecting Your Most Vulnerable Spots
Beyond technique, protective gear is your best friend when you’re learning. A helmet is non-negotiable – seriously, don’t even think about stepping on a board without one. Your brain is precious! Wrist guards are another game-changer, especially for beginners who tend to put their hands out to break falls. I’ve seen countless sprained wrists that could have been avoided with a simple pair of guards. Padded shorts or impact shorts can save your tailbone and hips from a lot of bruising, which is a lifesaver when you’re spending a lot of time on your backside. And knee pads? Well, they’re not just for skateboarding. All these pieces of gear might feel a bit bulky at first, but the confidence and protection they provide are absolutely worth it. Invest in your safety, and you’ll find yourself much more willing to push your limits and learn faster, knowing you’ve got a little extra cushion.
The Value of Professional Guidance
Look, I get it. There’s a certain allure to the idea of just “figuring it out” on your own or having a buddy teach you. I tried that route initially, convinced I could just watch some YouTube videos and mimic what I saw. While I did pick up a few things, my progress was incredibly slow and filled with inefficient habits. It wasn’t until I finally bit the bullet and invested in a proper lesson that things truly clicked. Having a certified instructor observe my movements, provide instant feedback, and break down complex actions into manageable steps was a game-changer. It saved me weeks, maybe even months, of frustrating trial and error. Think of it like learning to drive – you *could* probably teach yourself, but a driving instructor will teach you the right techniques, point out your mistakes, and get you to proficiency much faster and safer. Snowboarding is no different.
Why a Lesson is Never a Bad Idea
A lesson isn’t just for total beginners; it’s beneficial at any stage. For newcomers, it provides a structured environment to learn the absolute fundamentals: how to strap in, how to stand up, how to glide, how to stop, and how to make those first crucial turns. An instructor will also teach you mountain etiquette and safety, which is incredibly important for everyone on the slopes. They have a trained eye to spot those subtle body movements that are holding you back, things your well-meaning friend might completely miss. Plus, they can guide you to the appropriate terrain, ensuring you’re not overwhelmed by slopes that are too advanced for your current skill level. It takes the guesswork out of learning and allows you to focus purely on the sensation of riding, knowing you’re in capable hands.
Learning from Certified Instructors
There’s a reason why snowboard instructors go through rigorous training and certification processes. They don’t just know *how* to snowboard; they know *how to teach* snowboarding. They understand different learning styles, can adapt their methods to your needs, and are experts at building skills progressively. When I took my lesson, my instructor showed me specific drills for edge control that I’d never even considered, and explained the physics behind certain movements in a way that made perfect sense. The personalized attention and immediate feedback are invaluable. Instead of getting stuck in a rut, you get real-time corrections and encouragement. It’s an investment, absolutely, but one that pays dividends in accelerated learning, increased confidence, and ultimately, a much more enjoyable and safer experience on the snow. Don’t underestimate the power of professional guidance – it’s often the fastest track to truly loving your time on a snowboard.
Wrapping Things Up
Whew! We’ve covered a lot of ground today, haven’t we? From getting your gear dialed in to mastering those crucial first turns and learning to fall gracefully, it’s a journey that’s incredibly rewarding. I truly hope that sharing some of my own struggles and breakthroughs will help you sidestep some of the frustrations I faced early on. Remember, snowboarding is meant to be fun, a chance to connect with the mountain and challenge yourself in the most exhilarating way. Don’t let a few tumbles or a slow start dampen your spirit. Every single turn, every successful stop, every time you get up after a fall, you’re making progress. So go out there, embrace the learning curve, and most importantly, enjoy the ride!
Handy Tips to Keep in Mind
1. Layer Up Smart: The weather on the mountain can change in an instant, so dressing in layers is crucial. Start with a moisture-wicking base, add an insulating mid-layer, and finish with a waterproof and windproof outer shell. This way, you can easily adjust to stay comfortable, whether it’s a bluebird day or a sudden blizzard. Trust me, I once underdressed on a surprisingly cold day, and shivering through the entire afternoon really zapped my energy and my enjoyment. Always check the forecast, but prepare for the unexpected!
2. Stay Hydrated and Fueled: Snowboarding is a full-body workout, and it’s easy to get dehydrated in the cold, dry mountain air. Always carry a water bottle or hydration pack and take regular sips, even if you don’t feel thirsty. Pack some high-energy snacks like granola bars, nuts, or fruit. A quick energy boost can make a huge difference in your focus and stamina, especially when you’re pushing through those final runs of the day. Don’t let a “bonk” ruin your fun!
3. Warm-Up Before You Ride: Just like any other sport, warming up your muscles before hitting the slopes can prevent injuries and improve your performance. Do some light stretches, particularly for your legs, core, and arms. A few lunges, squats, and arm circles can get the blood flowing and prepare your body for the dynamic movements of snowboarding. I used to jump straight onto the lift, but after pulling a hamstring once, I learned my lesson – a little warm-up goes a long way!
4. Know Your Limits, and Respect Them: It’s easy to get carried away when you’re having fun or trying to keep up with friends. However, knowing when to call it a day or when to stick to easier runs is a mark of a smart rider. Pushing yourself too hard when you’re tired or trying to tackle terrain beyond your skill level significantly increases the risk of injury. There’s no shame in taking a break, heading to the lodge for a hot chocolate, or simply enjoying the green runs until you feel genuinely ready for more challenging slopes.
5. Be Aware of Your Surroundings: Mountain safety isn’t just about your own actions; it’s also about being mindful of others. Always look uphill before starting a run or traversing across the slope to ensure you won’t collide with anyone. Keep a safe distance from other riders and slow down in congested areas. Understanding the “Skier’s Responsibility Code” (which applies to snowboarders too!) is essential for a safe and enjoyable experience for everyone on the mountain. Good vibes only, right?
Key Takeaways for Your Ride
Alright, if you take nothing else away from today, let it be these core principles. First and foremost, your gear is paramount; well-fitting boots are your connection to the board, so never compromise there. Secondly, your gaze dictates your path – keep your head up and look where you want to go, letting your body naturally follow. Don’t get stuck on one edge; mastering both heel and toe-side turns will unlock the true flow of snowboarding. Remember to embrace the bend in your knees and ankles; they are your dynamic suspension and steering system. And speaking of falling, it’s inevitable, so learn to tumble safely and invest in protective gear to minimize the sting. Finally, patience truly is a virtue on the slopes; respect the learning curve, celebrate small victories, and consider professional guidance to accelerate your progress and build solid foundations. The mountain awaits, and with these tips, you’re well on your way to shredding with confidence!
Frequently Asked Questions (FAQ) 📖
Q: How can I overcome the fear of falling and actually learn to fall safely?
A: Oh, the dreaded fall! Trust me, every single snowboarder, from the absolute newbie to the seasoned pro, has kissed the snow more times than they can count.
I remember my first few days; it felt like I was spending more time on my backside than on my board! The fear of falling is totally real, and it’s one of the biggest mental hurdles.
But here’s the secret: once you learn how to fall, that fear starts to melt away. First off, accept that falls are part of the learning curve – embrace them!
Think of each fall as a lesson, not a failure. When you feel yourself going down, resist the natural urge to stick your arms straight out to catch yourself.
That’s a surefire way to injure your wrists or shoulders, and I’ve seen it happen too many times. Instead, try to tuck your limbs in, almost like you’re curling into a ball.
If you’re falling backward, try to land on your butt or the side of your hip, and then let your body roll with the momentum. Protect your head by tucking your chin to your chest.
For forward falls, aim to land on your forearms or knees – keep those elbows bent and close to your body, like a boxer protecting their midsection. You want to spread the impact over a larger, more padded area of your body.
Remember, your gear – especially a good helmet and maybe some impact shorts or wrist guards (seriously, they’re a lifesaver for beginners!) – is there to protect you.
Once you get the hang of falling, you’ll be amazed at how much more confident you feel to push your limits. It really shifts your mindset from “Oh no, I’m falling!” to “Okay, here we go, another quick reset!”
Q: What’s the secret to maintaining balance on a snowboard, and where should I actually be looking?
A: Balance on a snowboard feels like a mystical art at first, right? It’s not just about standing still; it’s about dynamic balance, constantly adjusting.
One of the most common beginner mistakes I see, and I was guilty of this too, is staring down at your board or your feet. I get it, you want to see what your board is doing!
But here’s the kicker: your body tends to follow where your head goes. If you’re looking down, your body naturally wants to hunch over, throwing your center of gravity off, and that’s a recipe for a tumble.
The real secret is to keep your head up and look where you want to go, not where you are. Imagine you’re driving a car; you’re looking down the road, anticipating turns and obstacles, not at your dashboard the whole time.
It’s the same on a snowboard! Your eyes are your steering wheel. Beyond that, it’s all about a strong, athletic stance.
Keep your knees bent and your ankles flexed – think of them as natural shock absorbers. Your weight should feel centered over the middle of your board, not leaning too far back or too far forward.
Practice rocking gently from your toe edge to your heel edge while stationary; this helps build that muscle memory for subtle weight shifts. It might feel awkward at first, but with practice, your body will start making those tiny, intuitive adjustments that keep you upright.
Trust your board, trust your balance, and most importantly, trust where you’re looking! It really changes the whole experience from a struggle to a flow.
Q: I keep catching my edges and wiping out! How can I prevent this and make smoother turns?
A: Oh, the infamous edge catch! It’s the bane of every beginner snowboarder’s existence, and probably the quickest way to send you sprawling face-first or butt-first into the snow.
I remember days when I felt like the mountain itself was actively trying to trip me! The good news is, catching an edge is almost always due to a specific technique issue, and it’s totally fixable.
The main culprit is usually having too much of the wrong edge down at the wrong time, or letting your board go completely flat on the snow while you’re trying to move or turn.
When your board is flat, both edges are “active” and can easily dig into the snow, acting like an anchor that sends you flying. The key to smoother riding and turning is continuous edge engagement.
When you’re on your heel edge, you should feel consistent pressure on that edge, and vice versa for your toe edge. To prevent edge catches and make those buttery-smooth turns, focus on these things: First, always ride with a slight edge.
You should almost never be perfectly flat-basing unless you’re deliberately gliding across a flat section. Second, initiating your turns with your head and shoulders helps a ton.
Look where you want to go, and your body will naturally start to twist and lean, rolling the board onto the correct edge. Third, it’s about shifting your weight smoothly.
When you’re transitioning from a heel edge to a toe edge (or vice versa), aim to gently release the old edge as you simultaneously engage the new one.
Think “roll” rather than “slam.” Practice those gentle “C” turns – start on one edge, let the board come down the fall line, and then smoothly transfer to the other edge to complete the “C.” Don’t try to force sharp turns too early.
It takes patience and a gentle touch, but once you get that feeling of seamless edge-to-edge transition, it’s like magic! You’ll be linking turns like a pro in no time, and those frustrating edge catches will become a distant, snowy memory.