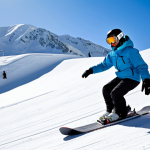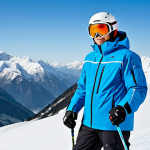
Alright, here’s the snowboarding intro you asked for:So, you’re thinking about hitting the slopes? Snowboarding is an absolute blast, a real rush of adrenaline and freedom.
I remember my first time – it was a total wipeout symphony! But trust me, the feeling of carving down the mountain after a bit of practice? Unbeatable.
With the advancements in snowboard tech and gear making it easier than ever to learn, now is the perfect time to jump in. Plus, all the cool snowboarding resorts are embracing sustainable practices, so you can enjoy the sport with a slightly lighter footprint.
Let’s delve into the details below!
Alright, let’s dive into getting you shredding that powder!
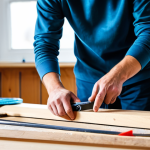
Choosing the Right Snowboard: A Deep Dive

Selecting your first snowboard is a pivotal step. It’s not just about grabbing the flashiest board off the rack; it’s about finding a board that matches your skill level, riding style, and the type of terrain you plan to conquer.
When I first started, I made the mistake of picking a board that was way too stiff for my beginner skills. I spent more time on my face than actually riding!
Don’t make the same mistake. Consider these factors:
1. Board Length: Finding Your Sweet Spot
The general rule of thumb is that the board should reach somewhere between your chin and nose when stood on its end. However, this is just a starting point.
Shorter boards are easier to turn and maneuver, making them ideal for beginners and park riders. Longer boards offer more stability at higher speeds and are better suited for freeriding and powder.
Your weight also plays a crucial role. If you’re heavier than average for your height, you might need a slightly longer board, and vice versa. I once helped a friend who was struggling to control his board realize he needed a shorter one – instantly improved his riding!
2. Board Flex: Soft, Medium, or Stiff?
Flex refers to how easily a board bends. Softer boards are more forgiving and easier to control, perfect for beginners who are still learning the basics.
They’re also great for freestyle riding, as they allow for easier presses and butters. Stiffer boards provide more stability and edge hold at higher speeds, making them ideal for experienced riders who like to carve aggressively or ride in challenging terrain.
A medium flex board offers a good balance between forgiveness and performance, suitable for intermediate riders who want to explore different types of riding.
When I upgraded to a stiffer board, the difference in responsiveness was incredible, especially on icy runs.
3. Board Shape: Camber, Rocker, or Hybrid?
* Camber: Traditional camber boards have a slight arch in the middle, providing excellent edge hold and pop. They’re great for carving and aggressive riding but can be less forgiving for beginners.
* Rocker: Rocker boards have a reverse camber, with the middle of the board raised off the ground. They’re more forgiving, easier to turn, and excel in powder.
* Hybrid: Hybrid boards combine elements of both camber and rocker, offering a versatile ride that’s suitable for a variety of conditions and riding styles.
These are the most popular snowboards on the market. I personally prefer a hybrid camber board because it gives me the best of both worlds – good edge hold for carving and enough rocker to float in powder.
I think that the rocker camber profile snowboards are the best type of snowboards for beginners because they are very forgiving.
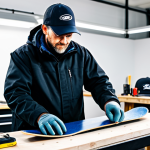
Gear Up: Essential Snowboarding Equipment
Beyond the board, the right gear can make or break your experience. Being cold and uncomfortable is a surefire way to ruin a day on the slopes. When I first started, I wore regular ski gloves and ended up with frozen fingers by lunchtime.
Learn from my mistakes!
1. Boots and Bindings: The Perfect Match
Boots are the most critical piece of equipment, as they directly impact your comfort and control. Ensure a snug but comfortable fit, allowing enough room to wiggle your toes.
Don’t be afraid to spend extra time trying on different models to find the perfect fit. Bindings connect your boots to the board, so choosing the right ones is essential for optimal performance.
Make sure they’re compatible with your boots and match your riding style. A good rule of thumb is to have the shop fit your boots and bindings simultaneously.
2. Outerwear: Staying Warm and Dry
Invest in waterproof and breathable outerwear to stay comfortable in all weather conditions. A good snowboarding jacket and pants will protect you from the elements, allowing you to focus on your riding.
Layering is key! Start with a moisture-wicking base layer, add an insulating mid-layer, and finish with a waterproof outer layer. Don’t forget a good pair of waterproof gloves or mittens!
I swear by my merino wool base layers – they keep me warm and dry all day long.
3. Helmet and Goggles: Safety First
Never ride without a helmet! Head injuries are common in snowboarding, and a helmet can significantly reduce the risk of serious injury. Choose a helmet that fits snugly and meets safety standards.
Goggles protect your eyes from the sun, wind, and snow, ensuring clear vision. Look for goggles with anti-fog coating and good ventilation to prevent fogging.
Trust me, wiping out because you couldn’t see is not fun. Always use a helmet!
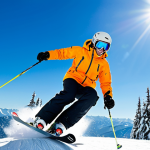
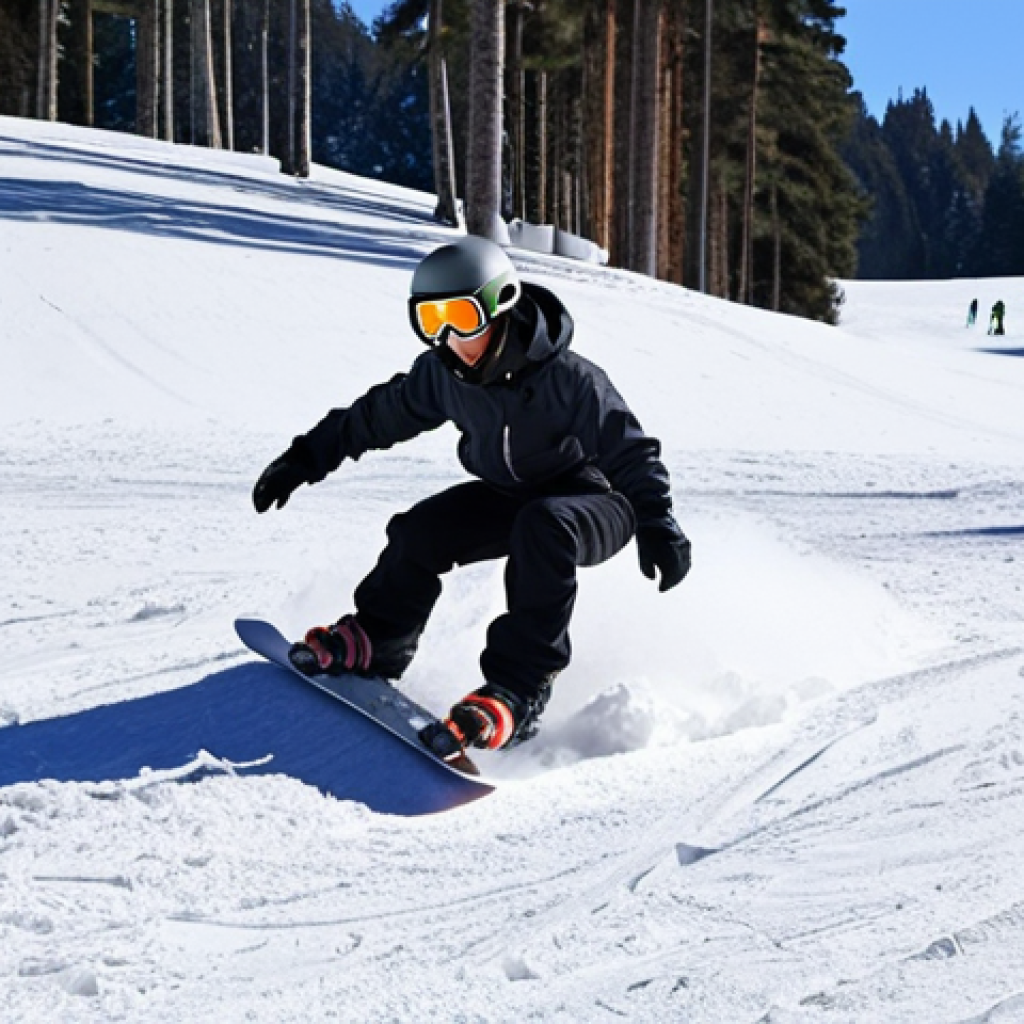
Mastering the Basics: From Falling Leaf to Carving Turns
Snowboarding has a steep learning curve at the start. But stick with it! After the first few hours, you’ll be able to handle yourself.
1. Getting Comfortable: The Falling Leaf
Start by learning the falling leaf, a technique where you slide down the hill on your heel edge, alternating between left and right. This helps you get a feel for the board and learn how to control your speed and direction.
Practice on a gentle slope until you feel comfortable and confident. I remember spending what felt like hours doing the falling leaf, but it’s the foundation for everything else.
The best strategy is to keep your head up and look to where you want to go.
2. Linking Turns: Putting It All Together
Once you’ve mastered the falling leaf, you can start linking turns. This involves transitioning smoothly from one edge to the other, creating a continuous, flowing motion.
Start by practicing on a gentle slope, gradually increasing the steepness as you become more comfortable. Focus on keeping your weight balanced and using your body to initiate the turns.
I always tell beginners to imagine they’re steering with their hips.
3. Advanced Techniques: Carving and Beyond
* Carving: Once you can link turns, carving is the next step. Carving involves using the edges of your board to make clean, precise turns, leaving a clean line in the snow.
* Freestyle: If you’re interested in more airtime, Freestyle is the natural choice. Freestyle is a more exciting style of snowboarding that involves riding terrain parks, performing jumps, and doing tricks.
* Powder Riding: The last type of snowboarding that you can try out is Powder riding. Powder riding is often seen as the holy grail of snowboarding, It is an adventure that requires specialized boards and skills but it can be rewarding.
Snowboard Gear Table
Here is a table highlighting the different snowboard gears you’ll need.
| Gear Type | Description | Recommendation |
|---|---|---|
| Snowboard | The board you ride on; choose based on skill level and riding style. | Beginners: All-mountain, soft flex; Experts: Stiff, directional boards |
| Boots | Footwear to attach to the snowboard. | Choose boots with a snug, comfortable fit. |
| Bindings | Connect boots to the board. | Match with boots; consider responsiveness and adjustability. |
| Outerwear | Jackets and pants for warmth and protection. | Waterproof, breathable, and layered for versatility. |
| Helmet | Protects your head in case of falls. | Snug fit, certified safety standards. |
| Goggles | Protects eyes from sun, wind, and snow. | Anti-fog, good ventilation, UV protection. |
| Gloves | Keeps hand warm and dry. | Waterproof, insulated, appropriate for conditions. |
Choosing the Right Resort: Setting the Stage for Success
The resort you choose can significantly impact your learning experience. A beginner-friendly resort with gentle slopes, good snow conditions, and helpful instructors can make all the difference.
1. Beginner-Friendly Terrain: Look for the Green Circles
Look for resorts with plenty of green circle runs, which are designated as beginner-friendly slopes. These runs are typically wide, gentle, and well-groomed, providing a safe and comfortable environment for learning.
Avoid resorts with mostly steep, challenging terrain, as they can be intimidating and frustrating for beginners. When I was learning, I spent most of my time on the bunny hill, and I’m not ashamed to admit it!
2. Snow Conditions: Soft Snow is Your Friend
Soft, forgiving snow is much easier to learn on than hard, icy conditions. Look for resorts that receive consistent snowfall and have good grooming practices.
Check the resort’s snow report before you go to get an idea of the conditions. Fresh powder is ideal, but even a few inches of soft snow can make a big difference.
3. Lessons and Instructors: Getting Expert Guidance
Consider taking a lesson from a certified snowboard instructor. A good instructor can provide personalized guidance and help you develop proper technique, accelerating your learning process and preventing bad habits.
Group lessons are a great option for beginners, as they’re more affordable and offer a chance to learn alongside other beginners. Even just a one-hour lesson can do wonders for your confidence!
Staying Safe on the Slopes: Prioritizing Your Well-being
Snowboarding can be a dangerous sport if you’re not careful. Always prioritize safety and take precautions to protect yourself and others.
1. Know Your Limits: Don’t Push Yourself Too Hard
Start slowly and gradually increase the difficulty of your runs as you become more comfortable. Don’t try to ride terrain that’s beyond your skill level, as this can lead to accidents.
It’s better to be conservative and stay within your comfort zone, especially when you’re just starting out. Pride doesn’t matter; safety does.
2. Be Aware of Your Surroundings: Watch Out for Others
Pay attention to what’s happening around you and be aware of other skiers and snowboarders on the slopes. Look uphill before starting down a run and give way to those ahead of you.
Avoid stopping in blind spots or in the middle of the trail.
3. Follow the Skier’s Responsibility Code: A Universal Guide
Familiarize yourself with the Skier’s Responsibility Code, a set of guidelines that promotes safe and responsible behavior on the slopes. This code includes principles such as staying in control, knowing how to stop and avoid objects, and yielding to people downhill.
I always review the code at the beginning of each season to refresh my memory.
The Snowboarding Community: Join the Tribe
One of the best things about snowboarding is the sense of community. Connecting with other riders can enhance your experience and provide support and encouragement as you progress.
1. Local Shops and Groups: Making Connections
Visit local snowboard shops and get to know the staff. They can provide valuable advice, recommend gear, and connect you with other riders in the area.
Many shops also organize group rides and events, providing a fun and social way to meet new people. My local shop has been a great resource for finding new riding buddies.
2. Online Forums and Social Media: Staying Connected
Join online snowboarding forums and social media groups to connect with riders from all over the world. These platforms provide a space to share tips, ask questions, and get inspired by others’ experiences.
I’ve learned so much from online communities and have even met some awesome people in real life.
3. Resort Events and Competitions: Getting Involved
Attend resort events and competitions to experience the excitement and camaraderie of the snowboarding community. These events offer a chance to watch talented riders, participate in fun activities, and connect with fellow enthusiasts.
I always make it a point to attend at least one event each season – the energy is contagious! Alright, let’s dive into getting you shredding that powder!
Choosing the Right Snowboard: A Deep Dive
Selecting your first snowboard is a pivotal step. It’s not just about grabbing the flashiest board off the rack; it’s about finding a board that matches your skill level, riding style, and the type of terrain you plan to conquer. When I first started, I made the mistake of picking a board that was way too stiff for my beginner skills. I spent more time on my face than actually riding! Don’t make the same mistake. Consider these factors:
1. Board Length: Finding Your Sweet Spot
The general rule of thumb is that the board should reach somewhere between your chin and nose when stood on its end. However, this is just a starting point. Shorter boards are easier to turn and maneuver, making them ideal for beginners and park riders. Longer boards offer more stability at higher speeds and are better suited for freeriding and powder. Your weight also plays a crucial role. If you’re heavier than average for your height, you might need a slightly longer board, and vice versa. I once helped a friend who was struggling to control his board realize he needed a shorter one – instantly improved his riding!
2. Board Flex: Soft, Medium, or Stiff?
Flex refers to how easily a board bends. Softer boards are more forgiving and easier to control, perfect for beginners who are still learning the basics. They’re also great for freestyle riding, as they allow for easier presses and butters. Stiffer boards provide more stability and edge hold at higher speeds, making them ideal for experienced riders who like to carve aggressively or ride in challenging terrain. A medium flex board offers a good balance between forgiveness and performance, suitable for intermediate riders who want to explore different types of riding. When I upgraded to a stiffer board, the difference in responsiveness was incredible, especially on icy runs.
3. Board Shape: Camber, Rocker, or Hybrid?
- Camber: Traditional camber boards have a slight arch in the middle, providing excellent edge hold and pop. They’re great for carving and aggressive riding but can be less forgiving for beginners.
- Rocker: Rocker boards have a reverse camber, with the middle of the board raised off the ground. They’re more forgiving, easier to turn, and excel in powder.
- Hybrid: Hybrid boards combine elements of both camber and rocker, offering a versatile ride that’s suitable for a variety of conditions and riding styles. These are the most popular snowboards on the market.
I personally prefer a hybrid camber board because it gives me the best of both worlds – good edge hold for carving and enough rocker to float in powder. I think that the rocker camber profile snowboards are the best type of snowboards for beginners because they are very forgiving.
Gear Up: Essential Snowboarding Equipment
Beyond the board, the right gear can make or break your experience. Being cold and uncomfortable is a surefire way to ruin a day on the slopes. When I first started, I wore regular ski gloves and ended up with frozen fingers by lunchtime. Learn from my mistakes!
1. Boots and Bindings: The Perfect Match
Boots are the most critical piece of equipment, as they directly impact your comfort and control. Ensure a snug but comfortable fit, allowing enough room to wiggle your toes. Don’t be afraid to spend extra time trying on different models to find the perfect fit. Bindings connect your boots to the board, so choosing the right ones is essential for optimal performance. Make sure they’re compatible with your boots and match your riding style. A good rule of thumb is to have the shop fit your boots and bindings simultaneously.
2. Outerwear: Staying Warm and Dry
Invest in waterproof and breathable outerwear to stay comfortable in all weather conditions. A good snowboarding jacket and pants will protect you from the elements, allowing you to focus on your riding. Layering is key! Start with a moisture-wicking base layer, add an insulating mid-layer, and finish with a waterproof outer layer. Don’t forget a good pair of waterproof gloves or mittens! I swear by my merino wool base layers – they keep me warm and dry all day long.
3. Helmet and Goggles: Safety First
Never ride without a helmet! Head injuries are common in snowboarding, and a helmet can significantly reduce the risk of serious injury. Choose a helmet that fits snugly and meets safety standards. Goggles protect your eyes from the sun, wind, and snow, ensuring clear vision. Look for goggles with anti-fog coating and good ventilation to prevent fogging. Trust me, wiping out because you couldn’t see is not fun. Always use a helmet!
Mastering the Basics: From Falling Leaf to Carving Turns
Snowboarding has a steep learning curve at the start. But stick with it! After the first few hours, you’ll be able to handle yourself.
1. Getting Comfortable: The Falling Leaf
Start by learning the falling leaf, a technique where you slide down the hill on your heel edge, alternating between left and right. This helps you get a feel for the board and learn how to control your speed and direction. Practice on a gentle slope until you feel comfortable and confident. I remember spending what felt like hours doing the falling leaf, but it’s the foundation for everything else. The best strategy is to keep your head up and look to where you want to go.
2. Linking Turns: Putting It All Together
Once you’ve mastered the falling leaf, you can start linking turns. This involves transitioning smoothly from one edge to the other, creating a continuous, flowing motion. Start by practicing on a gentle slope, gradually increasing the steepness as you become more comfortable. Focus on keeping your weight balanced and using your body to initiate the turns. I always tell beginners to imagine they’re steering with their hips.
3. Advanced Techniques: Carving and Beyond
- Carving: Once you can link turns, carving is the next step. Carving involves using the edges of your board to make clean, precise turns, leaving a clean line in the snow.
- Freestyle: If you’re interested in more airtime, Freestyle is the natural choice. Freestyle is a more exciting style of snowboarding that involves riding terrain parks, performing jumps, and doing tricks.
- Powder Riding: The last type of snowboarding that you can try out is Powder riding. Powder riding is often seen as the holy grail of snowboarding, It is an adventure that requires specialized boards and skills but it can be rewarding.
Snowboard Gear Table
Here is a table highlighting the different snowboard gears you’ll need.
| Gear Type | Description | Recommendation |
|---|---|---|
| Snowboard | The board you ride on; choose based on skill level and riding style. | Beginners: All-mountain, soft flex; Experts: Stiff, directional boards |
| Boots | Footwear to attach to the snowboard. | Choose boots with a snug, comfortable fit. |
| Bindings | Connect boots to the board. | Match with boots; consider responsiveness and adjustability. |
| Outerwear | Jackets and pants for warmth and protection. | Waterproof, breathable, and layered for versatility. |
| Helmet | Protects your head in case of falls. | Snug fit, certified safety standards. |
| Goggles | Protects eyes from sun, wind, and snow. | Anti-fog, good ventilation, UV protection. |
| Gloves | Keeps hand warm and dry. | Waterproof, insulated, appropriate for conditions. |
Choosing the Right Resort: Setting the Stage for Success
The resort you choose can significantly impact your learning experience. A beginner-friendly resort with gentle slopes, good snow conditions, and helpful instructors can make all the difference.
1. Beginner-Friendly Terrain: Look for the Green Circles
Look for resorts with plenty of green circle runs, which are designated as beginner-friendly slopes. These runs are typically wide, gentle, and well-groomed, providing a safe and comfortable environment for learning. Avoid resorts with mostly steep, challenging terrain, as they can be intimidating and frustrating for beginners. When I was learning, I spent most of my time on the bunny hill, and I’m not ashamed to admit it!
2. Snow Conditions: Soft Snow is Your Friend
Soft, forgiving snow is much easier to learn on than hard, icy conditions. Look for resorts that receive consistent snowfall and have good grooming practices. Check the resort’s snow report before you go to get an idea of the conditions. Fresh powder is ideal, but even a few inches of soft snow can make a big difference.
3. Lessons and Instructors: Getting Expert Guidance
Consider taking a lesson from a certified snowboard instructor. A good instructor can provide personalized guidance and help you develop proper technique, accelerating your learning process and preventing bad habits. Group lessons are a great option for beginners, as they’re more affordable and offer a chance to learn alongside other beginners. Even just a one-hour lesson can do wonders for your confidence!
Staying Safe on the Slopes: Prioritizing Your Well-being
Snowboarding can be a dangerous sport if you’re not careful. Always prioritize safety and take precautions to protect yourself and others.
1. Know Your Limits: Don’t Push Yourself Too Hard
Start slowly and gradually increase the difficulty of your runs as you become more comfortable. Don’t try to ride terrain that’s beyond your skill level, as this can lead to accidents. It’s better to be conservative and stay within your comfort zone, especially when you’re just starting out. Pride doesn’t matter; safety does.
2. Be Aware of Your Surroundings: Watch Out for Others
Pay attention to what’s happening around you and be aware of other skiers and snowboarders on the slopes. Look uphill before starting down a run and give way to those ahead of you. Avoid stopping in blind spots or in the middle of the trail.
3. Follow the Skier’s Responsibility Code: A Universal Guide
Familiarize yourself with the Skier’s Responsibility Code, a set of guidelines that promotes safe and responsible behavior on the slopes. This code includes principles such as staying in control, knowing how to stop and avoid objects, and yielding to people downhill. I always review the code at the beginning of each season to refresh my memory.
The Snowboarding Community: Join the Tribe
One of the best things about snowboarding is the sense of community. Connecting with other riders can enhance your experience and provide support and encouragement as you progress.
1. Local Shops and Groups: Making Connections
Visit local snowboard shops and get to know the staff. They can provide valuable advice, recommend gear, and connect you with other riders in the area. Many shops also organize group rides and events, providing a fun and social way to meet new people. My local shop has been a great resource for finding new riding buddies.
2. Online Forums and Social Media: Staying Connected
Join online snowboarding forums and social media groups to connect with riders from all over the world. These platforms provide a space to share tips, ask questions, and get inspired by others’ experiences. I’ve learned so much from online communities and have even met some awesome people in real life.
3. Resort Events and Competitions: Getting Involved
Attend resort events and competitions to experience the excitement and camaraderie of the snowboarding community. These events offer a chance to watch talented riders, participate in fun activities, and connect with fellow enthusiasts. I always make it a point to attend at least one event each season – the energy is contagious!
Wrapping Up
So, there you have it! Snowboarding is an incredible journey filled with thrills, challenges, and a fantastic community. Remember to gear up properly, respect the slopes, and always prioritize safety. With a little practice and the right mindset, you’ll be shredding like a pro in no time. Now get out there and enjoy the ride!
Useful Tips
1. Always warm up before hitting the slopes to prevent injuries.
2. Check the weather forecast and snow conditions before heading out.
3. Stay hydrated and bring snacks to keep your energy levels up.
4. Consider purchasing travel insurance that covers snowboarding activities.
5. Take breaks when you’re feeling tired to avoid overexertion.
Key Takeaways
– Choosing the right snowboard and gear is crucial for a safe and enjoyable experience.
– Mastering the basics, like the falling leaf and linking turns, is essential for progression.
– Staying safe on the slopes and being aware of your surroundings should always be a priority.
– Joining the snowboarding community can enhance your experience and provide support.
– Practice makes perfect – keep at it, and you’ll be shredding in no time!
Frequently Asked Questions (FAQ) 📖
Q: I’m a complete beginner. Is snowboarding really that hard to learn?
A: Honestly, the first couple of days can be humbling! You’ll probably spend a fair bit of time on your backside. But here’s the thing – the learning curve is steep initially, and then it plateaus.
What I mean is, getting the basics down – balancing, stopping, linking turns – can take a weekend or two. After that, it’s all about refining your technique and exploring different terrain.
It’s like learning to ride a bike; once you get it, you get it! Taking a lesson or two is highly recommended, though. It’ll save you a lot of frustration (and maybe a few bruises!).
Q: What kind of gear do I need to get started, and how much is it going to cost me?
A: Okay, gear can seem daunting, but it’s manageable. You’ll need a snowboard, boots, bindings, a helmet (absolutely essential!), warm waterproof outerwear (jacket and pants), gloves or mittens, and goggles.
For a beginner, I’d recommend renting your board, boots, and bindings at first. That way, you can figure out what feels comfortable before investing. You can usually rent all of that for around $40-$75 a day, depending on the resort and the quality of the equipment.
A good helmet will set you back around $75-$150, outerwear can range from $100-$400 per piece depending on the brand and features, and gloves/mittens are usually $30-$80.
Goggles are crucial for visibility and eye protection, and a decent pair will cost you $50-$150. Don’t skimp on the helmet or goggles! Safety and clear vision are paramount.
Q: Where are some good places to go snowboarding for beginners in the US?
A: That depends on what part of the country you’re in! Out West, Breckenridge in Colorado is a classic choice with plenty of beginner-friendly slopes and excellent ski school programs.
In Utah, Park City has a great mix of terrain and a charming town to explore. If you’re on the East Coast, Okemo Mountain in Vermont is known for its well-groomed trails and a relaxed atmosphere, perfect for learning.
And for those in the Midwest, Granite Peak in Wisconsin offers a surprisingly good snowboarding experience with dedicated beginner areas. Remember to check the snow conditions and trail maps before you go, and book lessons in advance, especially during peak season.
Most importantly, have fun and enjoy the ride!
📚 References
Wikipedia Encyclopedia
구글 검색 결과
구글 검색 결과
구글 검색 결과
구글 검색 결과