Remember that heart-stopping moment when your snowboard unexpectedly washed out on a hard-packed slope, or when you just couldn’t hold an edge through a turn you knew you should nail?
I certainly do. My early seasons were a frustrating dance of losing control and blaming everything but the one thing that truly mattered: my edges. It wasn’t until I invested in my first professional tune-up and the technician walked me through the basics of edge care that I had my “aha!” moment.
It literally transformed my riding overnight. Suddenly, my board felt like an extension of my body, gripping confidently on ice, carving precisely, and giving me a newfound sense of power and stability.
In an era where snowboarding continues to push boundaries, from the challenging terrain parks to increasingly diverse backcountry conditions, having sharp, well-maintained edges isn’t just for pros—it’s absolutely critical for every rider.
Modern board designs and the sheer variety of snow conditions demand precision, and your edges are your primary connection to the mountain. Neglecting them not only compromises your performance and makes learning new tricks harder, but it also directly impacts your safety.
It’s a simple truth: a dull edge is a dangerous edge.
Let’s delve into the specifics of perfect snowboard edge maintenance. The moment you truly understand and take control of your edges is when your riding elevates from simply surviving the mountain to truly dancing with it.
It’s a game-changer, not just for performance but for that deep, intuitive confidence you feel when you drop into a steep pitch or a challenging run. I remember the frustration of sliding out on what should have been a perfect carve, or the terrifying feeling of losing an edge on an icy patch.
It took me years to truly appreciate that the problem wasn’t my technique, but often, the very tools under my feet.
The Unsung Heroes: Why Your Edges Are Your Lifeline on Snow

When we talk about snowboarding, we often focus on the board itself, the bindings, or the boots. But the unsung heroes of your entire setup are those razor-thin strips of metal running along the base of your board: your edges.
These are the sole points of contact that connect you, your board, and the mountain. They are what allow you to grip, carve, stop, and control your speed.
Without properly maintained edges, your board essentially becomes a slippery plank, unpredictable and unresponsive. It’s like trying to drive a car with bald tires on a wet road – you’re just asking for trouble, and frankly, you’re missing out on the exhilarating precision that good edges provide.
I learned this the hard way, thinking I could just power through until a seasoned rider pointed out my dull edges. The difference after a proper tune was night and day; it felt like I’d upgraded my board without spending a dime on a new one.
1. Beyond Grip: Understanding the Physics of Edge Control
It might sound a bit like a physics lesson, but understanding the simple principles behind how your edges work can fundamentally change your approach to maintenance and even your riding.
When you lean into a turn, your edges bite into the snow, creating friction and resistance. This friction allows you to steer and hold a line. The sharper the edge, the more effectively it can penetrate and grip even the hardest, iciest surfaces.
The angles of your base and side edges are crucial here. They dictate how easily your board rolls onto its edge and how aggressively that edge bites. A well-tuned edge offers a clean, consistent grip that translates directly into smoother, more powerful carves and more stable straight-line glides.
It’s not just about raw sharpness; it’s about the precise geometry that allows your board to seamlessly transition from flat to edge, engaging exactly when and how you need it to.
Think of it as the difference between a dull knife sawing through something and a perfectly honed blade slicing clean.
2. The Dangers of Neglect: What Happens When Edges Go Dull
Ignoring your edges is akin to ignoring the oil changes in your car – eventually, something is going to go wrong, and it won’t be pretty. Dull edges manifest in a terrifying loss of control, especially on hard-packed snow or ice.
You’ll find yourself washing out of turns, struggling to hold a line, and feeling a constant sense of instability. Beyond the frustration, there’s a significant safety concern.
A board that doesn’t grip properly is a dangerous board, increasing your risk of falls and injuries. Moreover, dull edges require more physical effort to initiate and maintain turns, leading to quicker fatigue.
I’ve seen countless riders struggle, blaming their technique or their equipment, when the real culprit was simply a neglected edge. It’s a simple, avoidable problem with profound consequences for your performance and safety.
Rust, burrs, and dings also contribute to this degradation, creating uneven surfaces that catch unexpectedly or refuse to engage.
Diagnosing Your Edges: Knowing When It’s Time for a Tune-Up
Before you even think about pulling out a file, you need to know what you’re working with. Assessing the condition of your edges is the first, crucial step in proper maintenance.
It’s like a doctor performing a diagnosis before prescribing treatment; you need to understand the symptoms to apply the right fix. Over time, edges naturally wear down from contact with snow, ice, and even rocks (ouch!).
They can also develop burrs, small curled bits of metal that stick out and can cause your board to feel “catchy.” Rust is another common issue, especially if you store your board wet.
Developing an eye (and a touch) for these indicators will save you a lot of guesswork and ensure you’re always riding on optimal edges. I always do a quick check after every day on the mountain, and a more thorough one before any significant trip.
1. The Visual Check: What to Look For
Give your edges a good look-over in decent light. Are there any visible dings, nicks, or flat spots? Run your fingers gently along the edge (carefully, they might be sharp!).
Do you feel any burrs, especially along the side edge? These are tiny, often microscopic, pieces of metal that have been pushed out from the main edge.
They’re usually created when the edge hits something hard. You might also see rust, which appears as reddish-brown spots, particularly near the tips and tails or in areas where the edge has been scraped.
Pay close attention to the base edge too; sometimes, subtle indentations or rounding can occur, which will require attention. The goal is a smooth, continuous line of metal from tip to tail.
2. The Fingernail Test: A Simple Indicator
This is one of the oldest tricks in the book and surprisingly effective. Lightly draw your fingernail perpendicular to the side edge, starting from the base.
If your nail shaves off a tiny sliver of material, your edge is still reasonably sharp. If your nail slides cleanly over the edge without any resistance, it’s a clear sign your edges are dull and need sharpening.
This simple tactile test gives you an immediate, tangible sense of your edge’s bite. I taught this to my friends, and they were amazed at how quickly they could assess their own boards on the fly, saving them from frustrating days on the slopes.
It’s a quick, dirty, but reliable indicator of sharpness.
3. Listen to Your Board: Sounds and Sensations
Sometimes, your board will tell you what’s wrong before you even look. A dull edge can feel “slippery” or “washy” on hard snow, making it difficult to hold a straight line or complete a carve.
You might hear a scraping sound instead of a smooth, slicing sound as you turn. If your board feels unpredictable, constantly slipping out from under you, or if it feels like you have to muscle it much more than usual to initiate a turn, dull edges are very likely the culprit.
Conversely, edges that are too sharp or have burrs can feel “grabby” or “catchy,” especially at the tips and tails, leading to unexpected stops or falls.
Trust your instincts and the feedback your board gives you while riding.
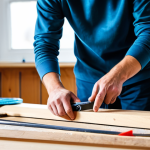
Essential Tools for the Home Tuner: Equipping Your Workbench
So, you’ve diagnosed the issue, and now it’s time to become your own snowboard technician. Don’t be intimidated; the basic tools for edge maintenance are relatively affordable and easy to use once you get the hang of them.
Investing in a good quality set of tuning tools is one of the best things you can do for your riding and your wallet in the long run. Professional tunes add up quickly, and while they’re definitely worth it for major overhauls, routine maintenance can be done effectively at home.
I started with a very basic kit, and over the years, I’ve gradually upgraded, but the core tools remain the same. Having the right equipment makes the job infinitely easier and more precise.
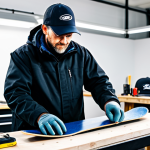
1. Files and Guides: Precision in Every Stroke
Your primary weapon against dull edges is a good quality file and, crucially, a file guide. The file guide ensures you maintain a consistent angle along the entire length of your edge, which is paramount for predictable performance.
You’ll typically want a metal file for initial sharpening and a diamond file for polishing and fine-tuning. Files come in different grades (coarseness); a coarser file will remove more material, while a finer one will leave a smoother finish.
A basic setup should include a good general-purpose file, a fine diamond stone, and an adjustable edge tuning tool that allows you to set precise side and base edge angles.
2. Gummy Stones and Diamond Files: Polishing Perfection
These are your secret weapons for that buttery-smooth edge feel. A “gummy stone” is a soft abrasive stone used for removing burrs, polishing the edge, and detuning the very tips and tails of your board (more on detuning later).
It’s gentle enough not to remove much material but effective at smoothing out irregularities. Diamond files, on the other hand, are harder and come in various grits (e.g., 200 grit for sharpening, 600 or 1000 grit for polishing).
They are essential for putting that final, mirror-like finish on your edges, ensuring maximum glide and bite. I always carry a small diamond file in my pack for quick touch-ups on the mountain.
3. The Basics Beyond Edges: Scrapers and Wax Irons
While we’re focusing on edges, it’s worth mentioning that comprehensive board maintenance also involves waxing. A sharp metal or plastic scraper is essential for removing old wax and leveling new wax.
A dedicated wax iron, with precise temperature control, is crucial for proper wax application. While not directly for edges, these tools are part of the larger picture of board care, and often, if you’re tuning your edges, you’ll be waxing your board too.
Keeping your base glide-ready complements your sharp edges perfectly, creating a holistic performance package.
Mastering the Angles: Base and Side Edge Bevels Explained
This is where edge maintenance gets a little more technical, but also where the biggest gains in performance are made. Understanding and setting your base and side edge bevels correctly is the difference between a board that feels great and one that fights you every step of the way.
It’s not just about making the edge sharp; it’s about making it sharp *at the right angle* relative to the base of your board. This geometry determines how easily your board rolls onto its edge, how much grip it has, and how forgiving it feels.
Getting this right is a huge confidence booster, as your board will respond predictably and consistently.
1. Understanding the “Why” Behind Bevels
Think of the base edge bevel as the slight lift of the edge away from the snow when the board is flat. A small base bevel (e.g., 1 degree) allows your board to transition smoothly from flat to edge without “catching” unexpectedly.
Without any base bevel, the edge is more likely to catch, especially if it’s very sharp. The side edge bevel, on the other hand, determines the ultimate sharpness of the edge and how aggressively it bites into the snow.
A common side edge angle is 90 degrees, but many riders, especially those seeking more aggressive grip, opt for steeper angles like 89 or even 88 degrees.
The combination of these two angles creates the precise cutting edge that defines your board’s performance characteristics.
2. Finding Your Sweet Spot: Common Angle Recommendations
For most recreational riders, a base bevel of 1 degree and a side edge bevel of 89 or 90 degrees is a great starting point. This combination offers a good balance of easy turn initiation and reliable grip.
Freeride and all-mountain riders might prefer a 1-degree base and an 89-degree side edge for more aggressive carving. Park riders, conversely, might opt for a slightly larger base bevel (e.g., 2 degrees) and a 90-degree side edge, or even detune a bit more, to make the board more forgiving for rail slides and jumps, reducing the chance of catching an edge.
Experimentation, within reason, is key to finding what feels best for your style and the conditions you typically ride.
3. The Art of Filing: Technique and Consistency
Using your file guide, you’ll make consistent, smooth strokes along the entire length of the edge. Always file in one direction, from tip to tail, applying even pressure.
The goal is to remove minimal material while creating a consistently sharp edge. For the base edge, the file guide will lift the file just enough to create that slight bevel.
For the side edge, the guide ensures your file meets the edge at the precise angle. After filing, use a diamond stone to polish the edge and remove any burrs that might have formed.
Consistency is key here; a few gentle passes are better than aggressive, uneven filing. This table gives a quick overview of common edge angles and their typical use:
| Base Bevel (Degrees) | Side Bevel (Degrees) | Typical Use Case | Characteristics |
|---|---|---|---|
| 1° | 90° | All-Mountain, Beginner-Intermediate | Forgiving, good glide, easy turn initiation. |
| 1° | 89° | All-Mountain, Freeride, Advanced Carving | More aggressive grip, precise carving, less forgiving. |
| 2° | 90° | Park, Jibbing, Rails | Very forgiving, minimal edge catch for freestyle, less grip on ice. |
Deburring and Detuning: Fine-Tuning Your Ride
Once your edges are razor-sharp, you might think you’re done. But there’s another crucial step that truly personalizes your board’s feel: deburring and detuning.
While a super sharp edge is fantastic for carving, it can also be overly aggressive and “catchy” in certain situations, especially at the very tips and tails of your board.
This is particularly true for freestyle riders who slide rails or hit jumps. These steps are about smoothing out the rough spots and strategically dulling parts of the edge to improve forgiveness and overall rideability.
It’s like putting the final polish on a masterpiece; it perfects the user experience.
1. The Purpose of Deburring: Smooth Transitions
After filing and sharpening, tiny micro-burrs can form on the very cutting edge. These are almost imperceptible but can make your board feel rough or “zippy” on the snow, not to mention they can prevent your edge from being truly smooth and efficient.
Deburring involves using a fine diamond stone or a gummy stone to gently remove these burrs, leaving a clean, smooth edge. You simply run the stone along the edge with light pressure, making sure to hit both the base and side edge facets.
This step is critical for maximizing the effectiveness of your sharpening and ensuring a consistently smooth feel across the entire length of the edge.
2. When and Where to Detune: Preventing Catchy Edges
Detuning involves intentionally dulling certain sections of your edge. The most common areas to detune are the very tips and tails of your board, typically the first 5-10 centimeters (2-4 inches) from each contact point.
Why? Because these areas are prone to catching unexpectedly when you’re flat-basing, landing jumps, or sliding rails. By slightly dulling them with a gummy stone, you make the board more forgiving and less prone to “hooking up” unintentionally.
Freestylers might detune even more aggressively or along longer sections of the edge to prevent catching on features. For general riding, a light detune at the very ends is usually sufficient to prevent over-aggressiveness.
It’s a delicate balance; you want the edges sharp where you need them for carving, but forgiving where you don’t want them to engage aggressively.
Protecting Your Investment: Storage and Post-Ride Care
You’ve put in the effort to tune your edges, so don’t let that hard work go to waste by neglecting proper storage and post-ride care. This is a common oversight that can lead to rapid rust formation and degradation of your freshly sharpened edges.
Think of it as putting your tools away properly after a job; it keeps them in top condition for next time. A little bit of consistent care after each session can dramatically extend the life of your edges and keep them performing optimally, saving you time and effort in the long run.
I’ve seen perfectly good edges ruined by a single night of improper storage.
1. Wiping Down and Drying: The First Line of Defense
This is the simplest, yet most frequently ignored, step. As soon as you finish riding for the day, take a clean cloth and wipe down your entire board, paying special attention to the edges.
Snow and moisture, when left on the edges, will quickly lead to rust, especially if the metal is exposed. A thorough wipe-down removes the water and prevents oxidation.
If you have any stubborn moisture, let the board air dry in a well-ventilated area before putting it away. Never put a wet board directly into a board bag or a tight, unventilated space.
2. Edge Protectors and Storage Bags: Long-Term Preservation
Once dry, consider using edge protectors or a padded board bag. Edge protectors are simple plastic or rubber strips that slip over your edges, protecting them from dings and preventing them from damaging other gear during transport.
A good quality board bag not only protects your board but also keeps it clean and dust-free during storage. For longer-term storage, especially during the off-season, applying a layer of storage wax to your base and edges will provide an additional protective barrier against moisture and rust.
This sacrificial layer of wax is a small effort for a big reward.
3. The Off-Season Ritual: Preparing for the Next Winter
When the snow melts and you hang up your boots for the summer, your board needs a special kind of attention. This is the perfect time for a full service: a thorough cleaning, edge tune-up, and a thick layer of storage wax.
The storage wax protects the base from drying out and the edges from rusting. Don’t scrape off this wax until you’re ready to ride again next season. Proper off-season storage ensures that when the first flakes fall, your board is ready to hit the slopes without needing a complete overhaul, keeping those precious edges pristine and sharp.
When to Call in the Pros: Recognizing Your Limits
While much of your snowboard edge maintenance can be done at home with a bit of practice and the right tools, there are times when it’s absolutely essential to hand your board over to a professional.
Just like you might do basic car maintenance yourself but take it to a mechanic for major repairs, your snowboard occasionally needs the specialized touch of an experienced technician.
Knowing when to step back and let the experts handle it can save you a lot of grief, time, and potentially, the life of your board. There’s no shame in seeking professional help; it’s a smart move for longevity and peak performance.
1. Major Damage and Repair: Dings, Dents, and Core Shots
If your edges have suffered significant damage – deep dings, bends, or even separation from the sidewall due to hitting a rock or a rail – it’s time for a professional.
These types of repairs often require specialized tools and techniques, such as welding edges back into place or patching base material that has been ripped out.
Attempting these repairs at home without the right expertise can lead to further damage or an unsafe riding experience. A pro shop has the jigs, presses, and experience to bring your board back from the brink of catastrophe.
2. Base Grinds and Stone Grinds: Factory Fresh Feel
Over time, the base of your board can become uneven, develop small nicks, or lose its optimal structure from repeated waxing and riding. A professional base grind uses a specialized machine to flatten and restructure your board’s base, ensuring maximum glide and consistent edge engagement.
A stone grind then adds a specific pattern (structure) to the base, which helps manage water film under the board, improving glide in different snow conditions.
These processes require expensive machinery and expertise that you simply can’t replicate at home. If your board feels slow despite waxing, or if the base looks uneven, a base grind is likely needed.
3. Beyond the Basics: Advanced Tuning for Specific Conditions
While you can manage general edge sharpening, professional tuners often have access to a wider array of specialized files, diamond stones, and ceramic disks that can create an even finer finish or specific edge geometries.
They can also advise on and apply specific race tunes or specialized edge structures that are optimized for particular snow conditions or competitive riding.
If you’re looking to squeeze every last bit of performance out of your board for specific events, or if you simply want the absolute best possible tune, a professional shop is your go-to.
They live and breathe this stuff, and their accumulated knowledge can be invaluable.
Closing Thoughts
Taking the time to truly master your snowboard’s edges isn’t just about maintenance; it’s about unlocking a whole new level of confidence and joy on the mountain. From those first tentative turns to carving deep trenches, your edges are your connection to the snow, your true partners in performance. Embrace the process, get your hands dirty, and feel the tangible difference that a sharp, well-tuned edge makes. It’s a skill that pays dividends every single run, transforming frustrating slips into exhilarating control, and ultimately, making every day on the snow an absolute blast.
Useful Information to Know
1. How Often Should You Tune? The frequency of tuning largely depends on how often you ride, the snow conditions, and your riding style. For regular riders hitting the slopes a few times a month, a light touch-up every 2-3 days of riding is a good idea, with a full sharpen every 5-7 days. If you ride frequently or in icy conditions, you might need to touch up more often. Always do the fingernail test before each day out!
2. Cost-Effectiveness of DIY vs. Pro Tunes: A single professional tune in most North American ski towns can range from $40 to $70, not including waxing. Investing in a basic home tuning kit, which might cost between $80 and $150, can quickly pay for itself within just 2-3 tuning sessions, making it a wise long-term investment for any dedicated rider.
3. Weather and Edge Performance: Your edges behave differently based on snow conditions. On icy days, razor-sharp edges are your best friend, providing maximum grip. In soft, fresh powder, overly sharp edges can feel “hooky” or grabby, which is where a slight detune at the tips and tails really helps improve maneuverability and flow.
4. Protecting Your Edges on the Lift: One subtle way to damage your edges is on the chairlift. Avoid banging your board against the metal chair or other riders’ boards. Be mindful when loading and unloading to prevent accidental impacts that can ding your freshly sharpened edges.
5. The Importance of Waxing with Edge Tuning: While distinct, edge tuning and waxing go hand-in-hand. A well-waxed base reduces friction, allowing your board to glide effortlessly, which in turn lets your expertly tuned edges engage more effectively and with less effort. Think of it as a holistic approach to board performance.
Key Takeaways
Your snowboard edges are your primary connection to the snow, crucial for control, safety, and overall riding pleasure. Regularly diagnosing their condition using visual and tactile checks is the first step.
Invest in essential home tuning tools like files, guides, and diamond stones to maintain proper base and side edge bevels, which dictate performance.
Don’t overlook deburring for smooth transitions and strategically detuning tips/tails to prevent “catchy” edges, especially for freestyle riding.
Post-ride care, including wiping down and proper storage, is vital to prevent rust and preserve your hard work, extending the life of your edges.
Know your limits; for major damage or a comprehensive base grind, trust professional technicians. They have the specialized equipment and expertise for complex repairs.
Frequently Asked Questions (FAQ) 📖
Q: How often should I really be sharpening my snowboard edges, or is it just ‘when they feel dull’?
A: That’s the million-dollar question, isn’t it? And honestly, it’s less about a strict calendar date and more about a gut feeling and, yes, what the snow’s been like.
I used to think I could get away with a full season on one tune, especially when I was just cruising groomers. But then I hit an icy patch on an East Coast resort, and my board just slid out from under me like I was on buttered glass.
That unsettling slip was my wake-up call. What I’ve learned is that it truly depends on how much you ride and the conditions. If you’re hitting icy days, scraping through park features, or just generally riding hard on abrasive snow, your edges are taking a beating.
For me, after about 3-5 solid days of riding, I can usually feel my board starting to lose that crisp, responsive grip, especially on hardpack or when trying to carve a tight turn.
It’s like the board just feels… sloppier. If you’re riding powder all week, maybe you can stretch it, but if you’re seeing any rust spots, burrs, or you feel yourself slipping more than gripping, it’s time.
Don’t wait until they feel completely dull; that’s when you’ve lost performance and, more importantly, a good chunk of your control and safety. A light touch-up or a professional tune every few trips is a game-changer, I swear.
Q: I’ve seen those little edge tuning kits online. Can I actually sharpen my own edges, or am I just going to mess up my board and should always go to a pro shop?
A: Oh, the allure of the DIY kit! I totally get the appeal; saving a few bucks and feeling self-sufficient is awesome. I bought one of those entry-level kits myself back in the day, full of optimism and visions of perfectly sharp edges every single morning.
And let me tell you, my first few attempts were… humbling. What I’ve come to understand is that there’s a big difference between maintaining your edges and sharpening them from scratch.
You absolutely can do basic maintenance yourself, like removing burrs (those tiny metal hairs that pop up on your edges from hitting rocks or other boards) with a gummy stone or a fine file, and even giving them a light polish.
This is crucial for keeping them running smoothly between full tunes. But when it comes to truly setting the base and side bevels, and really getting that razor-sharp finish, a professional shop often has the specialized tools and, more importantly, the practiced hand to do it consistently and correctly.
You risk filing off too much edge, or worse, messing up your base or the crucial edge angles, which can completely alter how your board rides. My advice?
Get a cheap gummy stone and a deburring tool for quick fixes and post-ride care, absolutely. For a full, proper sharpen and tune that feels like a brand-new board under your feet, especially early in the season or after hitting something gnarly, pony up the $20-30 and let the pros do their magic.
The peace of mind alone is worth it.
Q: What’s the absolute biggest mistake you see riders make when it comes to their edges?
A: nd how can I avoid it? A3: This one’s a biggie, and it’s heartbreakingly common. The absolute biggest mistake I see riders make with their edges isn’t even about sharpening them; it’s about neglecting them after a day on the mountain.
I cringe every time I see it, because I’ve been guilty of it myself, especially after a particularly epic powder day when all you want to do is grab a beer and chill.
People just throw their wet, snowy boards straight into the car, or worse, lean them against a wall in a damp garage without wiping down the edges. What happens?
Rust. You get that sickening sight of orange speckles and streaks forming on your edges, sometimes literally overnight. Rust eats away at the metal, creates pits, and just absolutely destroys the smooth, consistent bite your edges are supposed to provide.
Once rust sets in, it’s a pain to remove and can permanently compromise your edge integrity. How to avoid it? It’s so simple it’s almost frustrating.
As soon as you’re done riding for the day, and before you even think about putting your board away, take a rag, an old towel, anything, and wipe down your edges, top to bottom.
Make sure they’re completely dry. If you’ve got a few minutes, hit any visible burrs with a gummy stone. That’s it.
That one tiny habit will extend the life and performance of your edges, and save you a world of agony down the line. Trust me, your board will thank you, and you’ll feel way more confident when you drop into that next steep run.
📚 References
Wikipedia Encyclopedia
구글 검색 결과
구글 검색 결과
구글 검색 결과
구글 검색 결과
구글 검색 결과