As the last snow melts and the resorts begin to quiet down, there’s always that familiar bittersweet feeling. You’ve had an incredible season, made unforgettable memories on the slopes, but now it’s time to face the inevitable: what do you do with all that expensive gear?
For years, I simply shoved my skis into a dusty corner of the garage or tossed my snowboard in the attic, hoping for the best. And believe me, pulling out rusty edges, warped bases, or cracked boots the following winter is a truly gut-wrenching moment, not to mention a costly mistake.
It’s not just about finding a spot; it’s about preserving your significant investment and ensuring your gear performs optimally for many seasons to come.
In an era where ski and snowboard technology evolves rapidly, incorporating lighter, more durable, and often more expensive materials, proper off-season care has become absolutely critical.
With rising costs and a growing global emphasis on sustainability, extending the life of your equipment through intelligent storage isn’t just smart—it’s essential for both your wallet and the planet.
I’ve learned this the hard way over countless seasons, and I’m here to share what really works. Let’s find out exactly how.
The Pre-Storage Ritual: A Deep Clean is Your Best Friend

When the snow melts and the skis come off for the last time, the temptation is always to just throw everything in the garage and forget about it. But believe me, after years of making that mistake and then facing rusty edges or a sticky base when winter rolled around again, I learned the hard way that a thorough clean is absolutely non-negotiable.
Think of it as putting your gear to bed properly after a long, hard season. This isn’t just about aesthetics; it’s about removing all the grime, salt, and microscopic debris that can cause irreversible damage over months of storage.
I’ve seen bindings seize up, boots develop truly unpleasant odors, and bases get pitted from neglect. Taking an extra hour or two now saves you a massive headache and potentially hundreds of dollars in repairs later.
It’s a little investment of your time that pays dividends in gear longevity and performance.
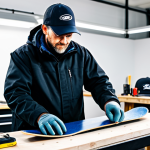
1. Giving Your Skis and Boards a Proper Wash-Down
This step is often overlooked, but it’s vital. I usually start by taking a warm, damp cloth – sometimes with a tiny bit of mild soap – and wiping down the entire surface of my skis or snowboard.
Pay close attention to the edges, the base, and especially around the bindings. You’d be amazed at the amount of grit, mud, and road salt that accumulates, especially if you’ve been traveling with your gear on a roof rack.
I vividly remember one time I skipped this step, and come next season, I found a thin layer of rust creeping up my edges, even on the top sheet, from what I can only assume was residual salt.
It was a proper pain to get off and definitely dulled the initial edge feel. Make sure to get into all the nooks and crannies. Once clean, use a dry cloth to completely dry everything.
Moisture is the enemy of metal and composite materials, leading to corrosion and delamination. Don’t let any water spots linger.
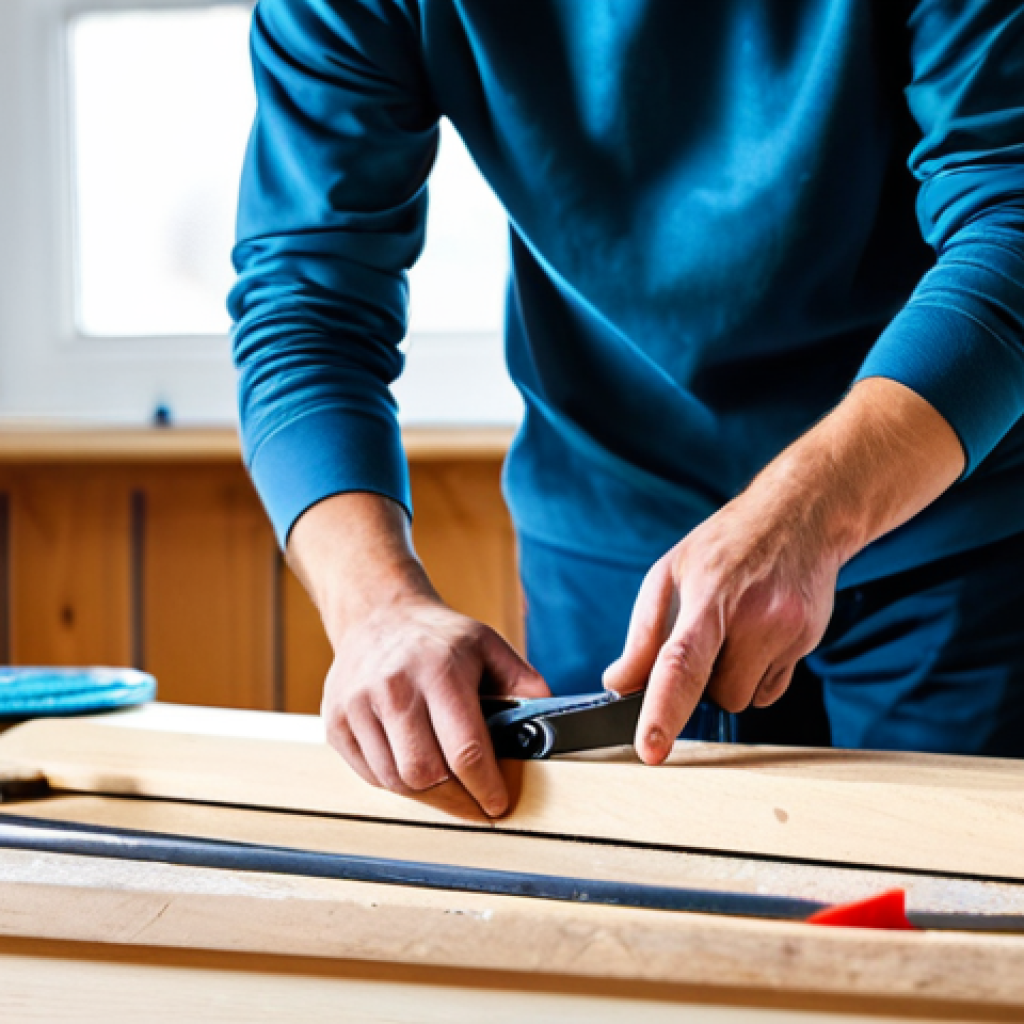
2. Binding Bliss: Cleaning and Initial Inspection
Your bindings are complex pieces of engineering that endure incredible stress. Neglecting them during off-season storage is like ignoring the engine of your car.
After cleaning the exterior of your skis or board, take a soft brush or a dry cloth and carefully clean around the binding mechanisms. Remove any visible dirt, small stones, or plant debris that might be lodged in springs or levers.
I typically use a small, soft-bristled brush, like an old toothbrush, to get into those tight spots. This is also a fantastic opportunity for a quick visual inspection.
- Check for any loose screws, especially those holding the binding to the ski or board. Don’t tighten them yet, just note them.
- Look for any cracks or signs of stress on the plastic or metal components.
- Ensure all moving parts seem to operate smoothly. If anything feels stiff, a very, very small drop of silicone-based lubricant (not oil!) can sometimes help, but be careful not to overspray onto areas that need grip.
This proactive check can flag minor issues before they become major, dangerous problems.
Wax On, Damage Off: Base Protection Secrets
If there’s one thing I’ve championed over the years, it’s the magical power of a generous storage wax. It’s truly a game-changer. For a long time, I just didn’t bother, figuring a quick tune-up at the start of the next season would sort everything out.
Boy, was I wrong. The bases of your skis and snowboards are porous and designed to absorb wax. When they’re left exposed to air and varying humidity for months, they can dry out, become brittle, and even oxidize.
This leads to that dreaded “hairy” or “chalky” look, making them slow and unresponsive on the snow. A thick layer of storage wax acts as a protective shield, sealing the base from ambient air and moisture, keeping it nourished and preventing the edges from rusting.
It’s probably the single most important step for preserving your glide and edge performance.
1. The Mighty Storage Wax Application
Applying a storage wax is slightly different from your regular performance wax. The goal here isn’t speed; it’s protection. You want a thick, even layer that completely covers the base and, crucially, extends over the metal edges.
I typically use a softer, all-temperature wax for this purpose, applying it with an iron on a low setting. The key is to drip plenty of wax onto the base and then slowly iron it in, making sure to leave a visible, thick coat.
Don’t scrape it off! This is the protective barrier that will keep your base happy and hydrated all summer long. I usually go over it twice to ensure maximum coverage, especially along the edges.
It should look almost waxy, not polished. This is the only time you actually want to *see* the wax on your base.
2. Edge of Perfection: Rust Prevention
Rust on your edges is a nightmare. It dulls them, reduces grip, and can be a monumental pain to remove, sometimes even requiring a stone grind if it’s severe.
The storage wax, as mentioned, is your first line of defense here, completely encasing the metal. However, for extra peace of mind, especially if you live in a humid environment, you can take an additional step.
I often wipe down my edges with a rust inhibitor or even a small amount of machine oil (like sewing machine oil) *before* applying the storage wax, making sure to remove any excess before waxing.
Alternatively, after waxing, you can use a fine-grit rubber abrasive stone to lightly polish any visible rust spots that might have appeared during the season, then immediately apply wax over them.
Just remember, once the storage wax is on, the edges should be completely covered. When you pull them out next season, a quick scrape and brush will reveal pristine, ready-to-be-sharpened edges.
Binding Wisdom: Release the Tension!
This is one of those subtle tips that makes a massive difference in the long-term health of your ski and snowboard bindings. Many people just leave their bindings clicked in or at their usual DIN settings, but those powerful springs inside are under constant tension.
Over months of storage, this can lead to spring fatigue, meaning they might not perform as accurately or reliably as they should when you really need them.
It’s a bit like leaving a spring-loaded trap set for an entire year; eventually, it loses some of its snap. I vividly recall a friend having issues with his old bindings releasing randomly mid-turn, and his tech pointed directly to improper off-season storage as a contributing factor.
It’s such an easy fix to prevent a potentially dangerous situation.
1. Dialing Down the DIN: Ski Binding Relief
For ski bindings, it’s crucial to release the tension on both the toe and heel pieces. Locate the DIN settings (the numbers that indicate release force).
Simply dial both the toe and heel settings down to their absolute lowest number – typically “0” or “1.” This completely relaxes the internal springs, preventing them from wearing out or losing their calibration over the off-season.
When you’re ready to hit the slopes again, you’ll simply reset them to your proper DIN settings, and they’ll be as responsive as ever. Make sure you remember your personal DIN settings, maybe snap a picture with your phone before you adjust them down, or even jot them down on a sticky note.
It’s a small but significant detail.
2. Snowboard Binding Care: Straps and Highbacks
Snowboard bindings have different mechanisms, but the principle of releasing tension still applies. For most strap bindings, the best practice is to unstrap them completely and possibly even loosen the main attachment screws slightly, though not so much that the parts separate.
The highbacks, which endure a lot of pressure during riding, should be laid flat if your binding model allows. If they have a forward lean adjustment, set it to the most relaxed, upright position.
This takes the stress off the plastic components and straps, preventing them from warping or stretching out over time.
- Unstrap all ratchets completely.
- Loosen ankle and toe straps to their fullest extent.
- Adjust highbacks to their most upright, relaxed position.
- Consider removing the bindings entirely from the board if you have space and want to inspect the mounting inserts.
This keeps everything supple and functional for next season.
Boot Camp: Protecting Your Footwear Investment
Your boots are arguably the most critical piece of equipment for control and comfort. A poorly stored boot can be a source of absolute misery when you try to put it on next season.
I’ve suffered through cracked plastic shells, shrunken liners, and the absolute horror of mildewy, foul-smelling boots far too many times. These aren’t just minor inconveniences; they can severely impact your performance and even lead to painful pressure points.
Boots are designed to conform to your feet, and improper storage can deform them or compromise their structural integrity, turning a custom fit into a painful ordeal.
Don’t let your expensive foot prisons become actual prisons of discomfort.
1. Liner Love: Dry, Clean, and Odor-Free
The first thing I do with my boots is pull out the liners. This is non-negotiable. Liners can trap an incredible amount of moisture and sweat, even if you don’t feel it immediately after a day on the slopes.
Lay them out in a well-ventilated area, away from direct sunlight or heat, to air dry completely for a day or two. If they’re particularly funky, you can spray them with a boot-specific deodorizer or even a mild disinfectant.
I sometimes put a dryer sheet or two inside each liner once they’re fully dry to keep them smelling fresh. Make sure they are bone dry before putting them back in the shell or storing them.
Moisture is a breeding ground for mold and mildew, and trust me, that’s not a smell you want to encounter next winter.
2. Shell Shock: Buckling Up for Success
Once the liners are dry and either back in the shells or stored separately, it’s time to address the boot shells themselves. The key here is to buckle them up!
But not just any buckles – you should lightly buckle all four buckles on each boot, from the top down. Don’t crank them tight; just enough to gently engage the buckle and hold the boot’s natural shape.
This prevents the plastic from warping or deforming over the long off-season, ensuring a perfect fit when you next slide your foot in. I’ve seen so many boots that have lost their shape from being stored unbuckled, making them a struggle to get on and less responsive on the slopes.
I also make sure the power strap is loosely fastened. Store the boots upright, perhaps in their original boot bag, in a temperature-consistent environment.
| Gear Item | Off-Season Storage Best Practice | Why It Matters |
|---|---|---|
| Skis/Snowboard Base | Apply thick storage wax, do not scrape. | Prevents base drying, oxidation, and preserves glide. |
| Edges | Cover with storage wax, consider rust inhibitor. | Prevents rust, maintaining sharpness and longevity. |
| Ski Bindings | Dial DIN settings to lowest possible. | Relieves spring tension, prevents fatigue, maintains accuracy. |
| Snowboard Bindings | Unstrap completely, lay highbacks flat. | Prevents strap stretching/warping, maintains binding integrity. |
| Boots (Liners) | Remove, air dry completely, deodorize. | Prevents mold/mildew, eliminates odors, maintains comfort. |
| Boots (Shells) | Lightly buckle all buckles, store upright. | Maintains shell shape, prevents warping, ensures proper fit. |
| Outerwear | Clean, reproof (DWR), hang or store loosely. | Maintains waterproofing, breathability, and prevents creasing. |
Outerwear & Accessories: Keeping Them Fresh and Functional
It’s not just your hardgoods that need love; your softgoods, especially your expensive technical outerwear, demand proper attention too. Shoving a dirty, damp jacket into a closet for months is a recipe for disaster – think mildew, degraded waterproofing, and possibly permanent stains.
I’ve personally ruined a couple of decent jackets by just tossing them in a heap. When you spend good money on breathable, waterproof gear, you want it to perform season after season.
The same goes for helmets, goggles, and gloves. These items, while often overlooked, contribute significantly to your comfort and safety on the slopes.
Taking the time to care for them ensures they are ready to protect you and keep you warm for many winters to come, saving you the cost of premature replacements.
1. The Garment Spa: Washing and Re-Waterproofing
Before storing any technical outerwear (jackets, pants), always wash them. But not just with any detergent! Regular detergents can strip away the DWR (Durable Water Repellent) finish that makes your gear waterproof.
I use a specific technical wash designed for waterproof-breathable fabrics, often available from brands like Nikwax or Grangers. Follow the instructions carefully – usually a cold wash, gentle cycle.
After washing, I often run them through a delicate dryer cycle with a few clean tennis balls to reactivate the DWR, or apply a spray-on DWR treatment if the fabric needs reproofing.
The goal is to have them perfectly clean and their waterproof capabilities restored before putting them away. Store them on wide hangers in a cool, dry closet, never crumpled in a bag, as this can create permanent creases and compromise insulation.
2. Helmets, Goggles, and Gloves: The Little Things That Matter
These accessories often get forgotten, but they deserve a bit of TLC. For helmets, remove any removable padding or liners and wash them by hand. Wipe down the shell with a damp cloth and let it air dry completely.
Store your helmet in a helmet bag or a well-ventilated area, away from extreme temperatures. Goggles are susceptible to scratches and lens delamination.
Clean the lenses carefully with a microfiber cloth and store them in their protective bag, away from direct sunlight or extreme heat, which can damage the tints and coatings.
Gloves, like liners, can get damp and smelly. Ensure they are completely dry, perhaps turning them inside out if possible. I sometimes place a small desiccant packet inside each glove for extra moisture absorption.
If they have leather components, a leather conditioner can help prevent cracking.
The Ideal Environment: Location, Location, Location
You can do all the cleaning and waxing in the world, but if your storage location is wrong, it can undo all that hard work. I’ve made the mistake of storing gear in my uninsulated garage during a particularly hot and humid summer, and the difference in the base condition, even with storage wax, was noticeable compared to gear I kept indoors.
The environment where your gear sleeps for the summer months plays a monumental role in its long-term preservation. Temperature fluctuations, excessive humidity, and direct sunlight are the silent destroyers of ski and snowboard equipment, leading to material fatigue, base degradation, and even cosmetic damage.
This isn’t just about finding *a* spot; it’s about finding the *right* spot.
1. Temperature and Humidity: The Perfect Climate
The golden rule for gear storage is a cool, dry, and consistently temperature-controlled environment. Think of it like a wine cellar for your skis and board.
Attics often experience extreme heat in summer and cold in winter, which can be brutal on plastics, epoxies, and composite materials, leading to delamination or warping.
Garages, while convenient, can suffer from humidity swings that promote rust and moisture absorption in bases. Basements can sometimes be too damp. Ideally, a closet inside your main living space, or a climate-controlled storage unit, is best.
Aim for stable temperatures, ideally between 50-70°F (10-20°C), and low to moderate humidity. If you live in a very humid area, consider using a dehumidifier in the storage space or placing silica gel packets with your gear.
2. Light and Position: Avoiding Unseen Damage
Direct sunlight is another insidious enemy. UV rays can degrade plastics, fade graphics, and even affect binding components over time. Store your gear away from windows or any direct light sources.
When it comes to position, for skis, vertical storage against a wall is fine, but if you have wall racks, ensure the bindings aren’t bearing the entire weight of the ski against the wall, which can put stress on the base.
For snowboards, lying them flat on a surface or hanging them from a wall mount designed for snowboards is best. Avoid leaning them precariously, as a fall can cause edge dings or core shots.
If stacking, always place bindings-to-bindings or base-to-base to avoid scratching surfaces. Proper positioning ensures even weight distribution and prevents accidental damage.
Regular Check-Ins: A Little Love Goes a Long Way
Even with the best initial preparation and storage environment, out of sight shouldn’t mean out of mind entirely. I’ve found that a quick, periodic check-in during the off-season can prevent small issues from becoming big headaches.
It’s like tending to a garden; you don’t just plant it and walk away for months. Your gear, a significant investment, deserves that occasional glance to ensure everything is holding up as it should.
This proactive approach saves you from that dreadful last-minute scramble of discovering an issue right before your first planned trip of the next season.
Trust me, finding a surprise crack in your boot shell a week before your flight to Aspen is a special kind of agony.
1. The Mid-Summer Sneak Peek
Around mid-summer, when the thought of snow is still a distant dream, I usually make it a point to pop into my storage area and give my gear a quick once-over.
It takes literally five minutes. I’m looking for any unexpected signs of rust on edges, particularly if I live in a humid area and didn’t apply enough storage wax.
I check for any moisture that might have somehow seeped in or condensation if the temperature fluctuated wildly. I also give the boots a sniff test to ensure no mold or mildew has decided to make a home in the liners despite proper drying.
If I spot any issues, I address them immediately – maybe a quick re-wax on a dry spot or airing out a boot liner again. This small effort can prevent a minor inconvenience from escalating into a major problem that requires professional intervention.
2. The Pre-Season Wake-Up Call
About a month or two before the first snow is expected, or whenever I start planning my initial trips, I bring my gear out for its official “wake-up call.” This is when I thoroughly inspect everything.
I check binding functionality, test buckles on boots, look for any signs of material fatigue on straps or plastic, and inspect the bases for any drying or cracks that might have formed.
This is also the time I start thinking about tuning: deciding if my edges need a professional sharpen, or if the base needs a fresh performance wax applied.
By doing this well in advance, I avoid the pre-season rush at the local ski shop and have ample time to address any issues, ensuring my gear is in peak condition and absolutely ready to carve up the first fresh powder of the season.
It adds a wonderful sense of calm anticipation to the start of winter.
Wrapping Up Your Season: A Pro’s Final Words
As the last remnants of snow melt away and the resorts close, it’s easy to just shove your gear into the darkest corner of your garage and forget about it until next winter.
But as someone who’s spent countless hours on the slopes and even more maintaining my own equipment, I can’t stress enough how much a little effort now pays off tenfold later.
This isn’t just about preserving your investment; it’s about ensuring your gear performs flawlessly, keeps you safe, and brings you pure joy season after season.
Take the time, follow these steps, and you’ll thank yourself when you hit that first fresh powder day next year with perfectly primed skis, a smooth-gliding board, and comfortable, functional boots.
Useful Insights to Keep in Mind
1. Professional Touch-Up: While DIY storage is great, consider having a professional shop do a full base grind and edge tune at the very start of the next season. Even with storage wax, a fresh base structure can make a world of difference in performance and glide.
2. Invest in Storage Bags: For skis, a padded ski bag offers protection from dust and accidental dings. For boots, a good boot bag with ventilation will keep them aired out and protected from external elements.
3. Keep Your Tools Handy: Even if you don’t do full tunes, having a basic kit (scraper, brush, p-tex candle, edge file) can help with minor touch-ups or repairs throughout the season, and certainly during storage prep.
4. Don’t Forget About Repair Kits: A small kit with binding screws, a multi-tool, and some tenacious tape can save a day on the mountain. Check and restock it before storing for the summer.
5. The Value of DWR Reapplication: For outerwear, the Durable Water Repellent (DWR) finish is crucial. If water isn’t beading off your jacket or pants anymore, it’s time to re-treat them. This is best done *before* long-term storage.
Key Takeaways
The essence of off-season gear care boils down to a few critical actions: thoroughly clean all equipment to remove corrosive elements; apply a generous layer of storage wax to bases and edges for protection; release tension on all bindings to prevent spring fatigue and maintain calibration; properly dry and store boots to preserve fit and prevent odor/mildew; and clean/reproof outerwear to maintain its protective qualities.
Store everything in a cool, dry, dark, and consistent environment. A little maintenance now ensures optimal performance and extends the life of your gear, guaranteeing you’re always ready for the next adventure on the snow.
Frequently Asked Questions (FAQ) 📖
Q: After a long season, I’m exhausted. What’s the absolute bare minimum I need to do to properly store my skis or snowboard and avoid that “gut-wrenching moment” next winter?
A: Oh, I totally get that feeling – dragging yourself off the slopes for the last time, just wanting to collapse. But trust me, giving your gear even a little love now saves a world of pain and dollars later.
The absolute non-negotiable? First, give everything a good, thorough cleaning. I’m talking about wiping down your skis or board with a damp cloth to get rid of all that gunk – dirt, salt, whatever crud has accumulated.
Then, and this is huge, dry it completely. Every single nook and cranny. I once thought “mostly dry” was good enough, and I pulled out a snowboard with a surprise patch of fuzzy mold near the bindings.
Gross. And finally, for skis and snowboards, get a storage wax on the base. You don’t need a fancy tune-up, just a thick layer of wax that covers the entire base and even wraps over the edges a bit.
It’s like a protective shield, keeping the base hydrated and preventing those awful rust spots on your edges. It costs maybe five bucks for a block of wax and ten minutes of your time, but it saves you from a hundred-dollar shop visit for base repair or a new edge grind next season.
Seriously, do these three things, and you’re miles ahead.
Q: I’ve heard horror stories about warped bases and rusty edges. What’s the real secret to preventing that kind of damage during the off-season?
A: Ah, the dreaded rust and warp – these are the silent killers of ski and snowboard gear, and I’ve had my share of battles with them. The secret isn’t really a secret; it’s consistency and knowing why you’re doing what you’re doing.
For rust, it always, always comes back to moisture. After cleaning and drying (which we talked about), that storage wax I mentioned for your bases is your best friend.
Make sure it’s applied generously, especially over the edges, because that wax acts as a barrier, sealing out humidity. I actually use a slightly softer, all-temp wax for storage because it spreads easily and really coats everything.
For the edges specifically, some folks go a step further and rub a light coat of oil – like WD-40 or even bike chain lubricant – on them before applying the storage wax, just for that extra layer of protection.
I haven’t gone that far myself, but I know people swear by it. As for warping, that’s usually a temperature and pressure thing. Avoid storing your board or skis standing upright against a wall for months on end, especially if it’s leaning unevenly.
That consistent, uneven pressure can put stress on the core. Instead, lay them flat, or hang them horizontally from a wall rack if you have one. And keep them out of direct sunlight or extreme temperature swings – no attics that bake in the summer sun or garages that turn into a deep freeze.
A stable, cool, dry spot is golden.
Q: My garage is packed, and my attic gets super hot. Does it really matter where I store my gear, or can I just shove it wherever there’s space?
A: Believe me, I used to be the “shove it wherever there’s space” kind of guy, and I’ve paid the price. It absolutely, unequivocally matters where you store your gear.
Think about it: you’ve shelled out hundreds, maybe even a couple of thousand dollars on this stuff! You wouldn’t leave your expensive car out in a hurricane, right?
The two biggest culprits for long-term damage are extreme temperatures and fluctuating humidity. That super hot attic you mentioned? It’s a nightmare for boots, bindings, and even the core of your skis or board.
Heat can cause plastics to degrade, boots to crack (I’ve pulled out perfectly good-looking boots only to have them disintegrate on the first buckle-up because they baked all summer), and glues to weaken.
It can also dry out your bases like crazy, leading to more warping potential. Same goes for those icy cold garages that then warm up – the constant expansion and contraction isn’t great.
Ideally, you want a cool, dry, dark place with stable temperatures, like a climate-controlled basement, a spare closet inside your house, or even a dedicated gear storage unit if you’re really short on space and have the budget for it.
The goal is to avoid direct sunlight, which fades colors and degrades materials, and to keep consistent humidity. It’s not just about finding a spot; it’s about finding a stable environment that protects your investment, ensuring your gear is ready to rip, not to rust or crumble, when that first snowfall hits.
📚 References
Wikipedia Encyclopedia
구글 검색 결과
구글 검색 결과
구글 검색 결과
구글 검색 결과
구글 검색 결과